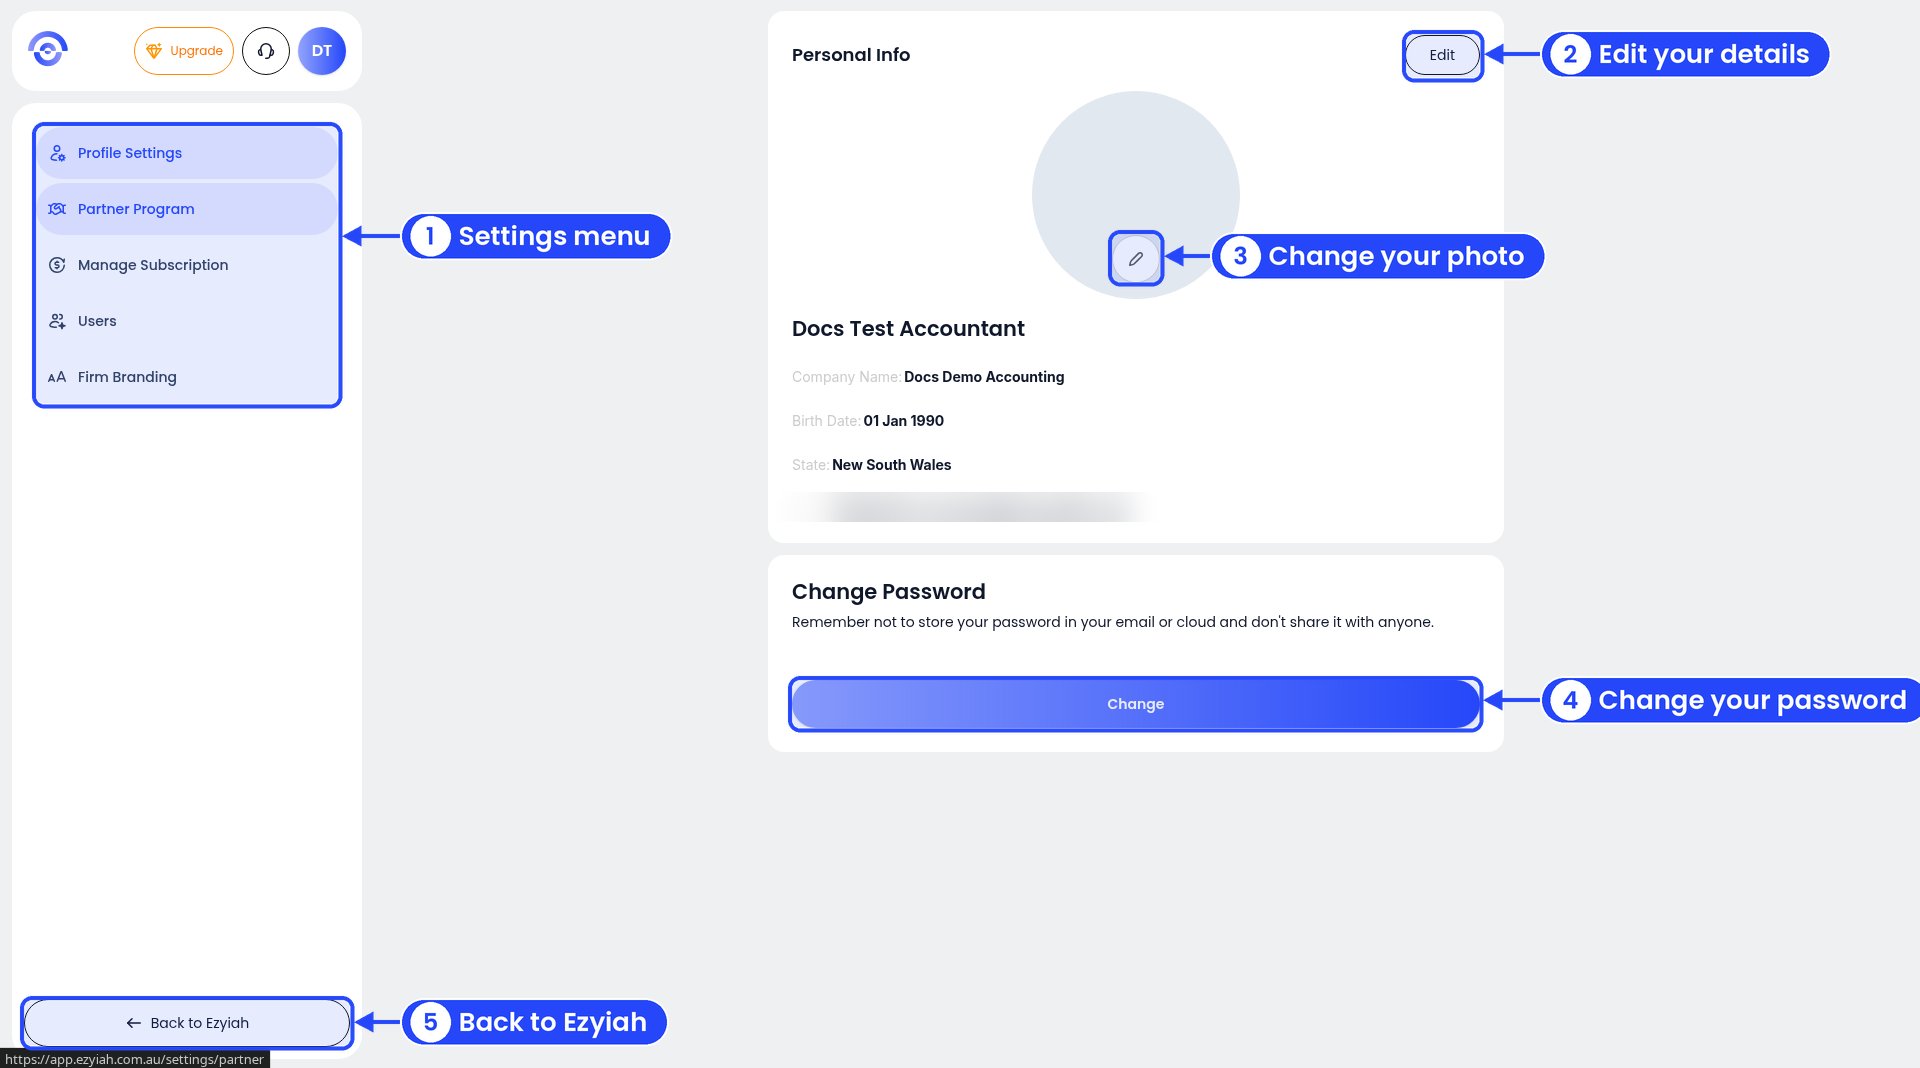
Profile Settings shows your personal details. You can change them, add a photo and change your password. To get there, click your avatar, then Settings. Profile Settings opens first.
Profile Settings with numbered callouts on the settings menu, the Edit button, the photo pencil, the Change password button and Back to Ezyiah

Profile Settings

  1. Settings menu. Move between the Settings pages.
  2. Edit. Change your personal info.
  3. Pencil. Add or change your profile photo. If you already have a photo, click the bin icon on it to remove it.
  4. Change. Change your password.
  5. Back to Ezyiah. Go back to your clients.

Your personal info
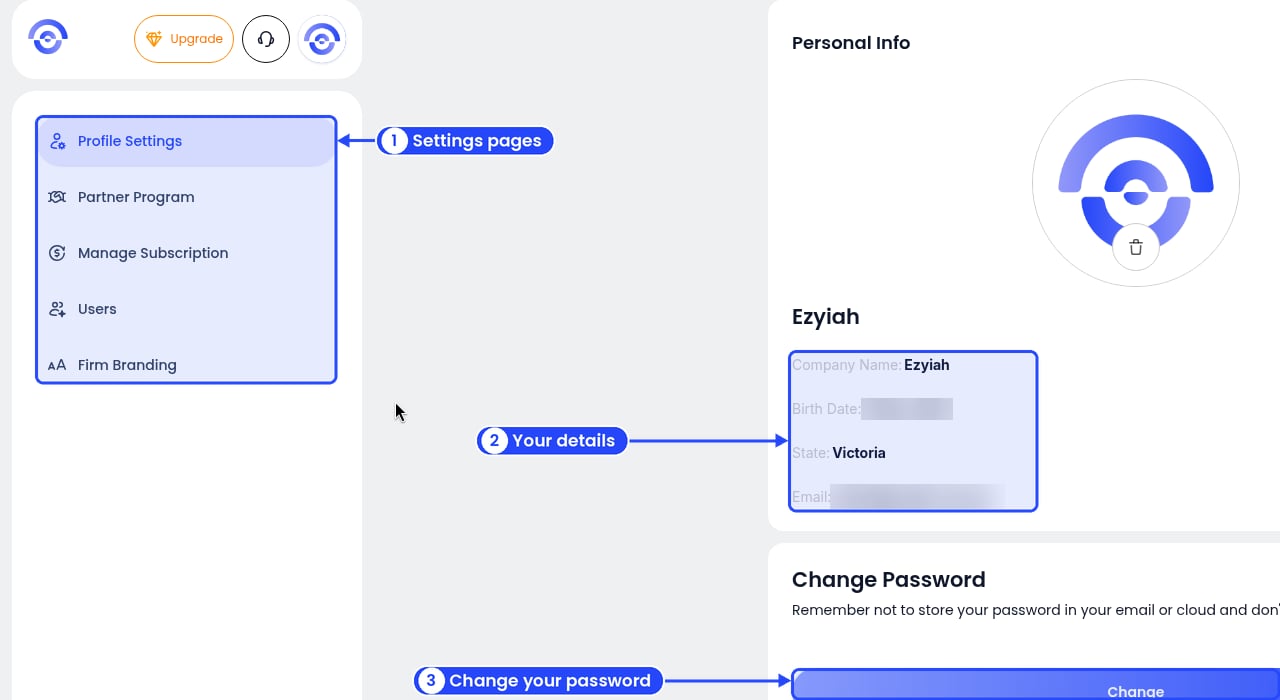
Profile Settings with callouts on the Settings menu, the Personal Info details and the Change button under Change Password. The birth date and email are blurred

1 The Settings pages, 2 your details, 3 change your password

The Personal Info card shows your photo, your name, Company Name, Birth Date, State and Email. It has an Edit button at the top right. Below it, the Change Password card has a Change button.
1

Click Edit

Click Edit at the top right of Personal Info. The Edit Profile window opens.
2

Make your changes and save
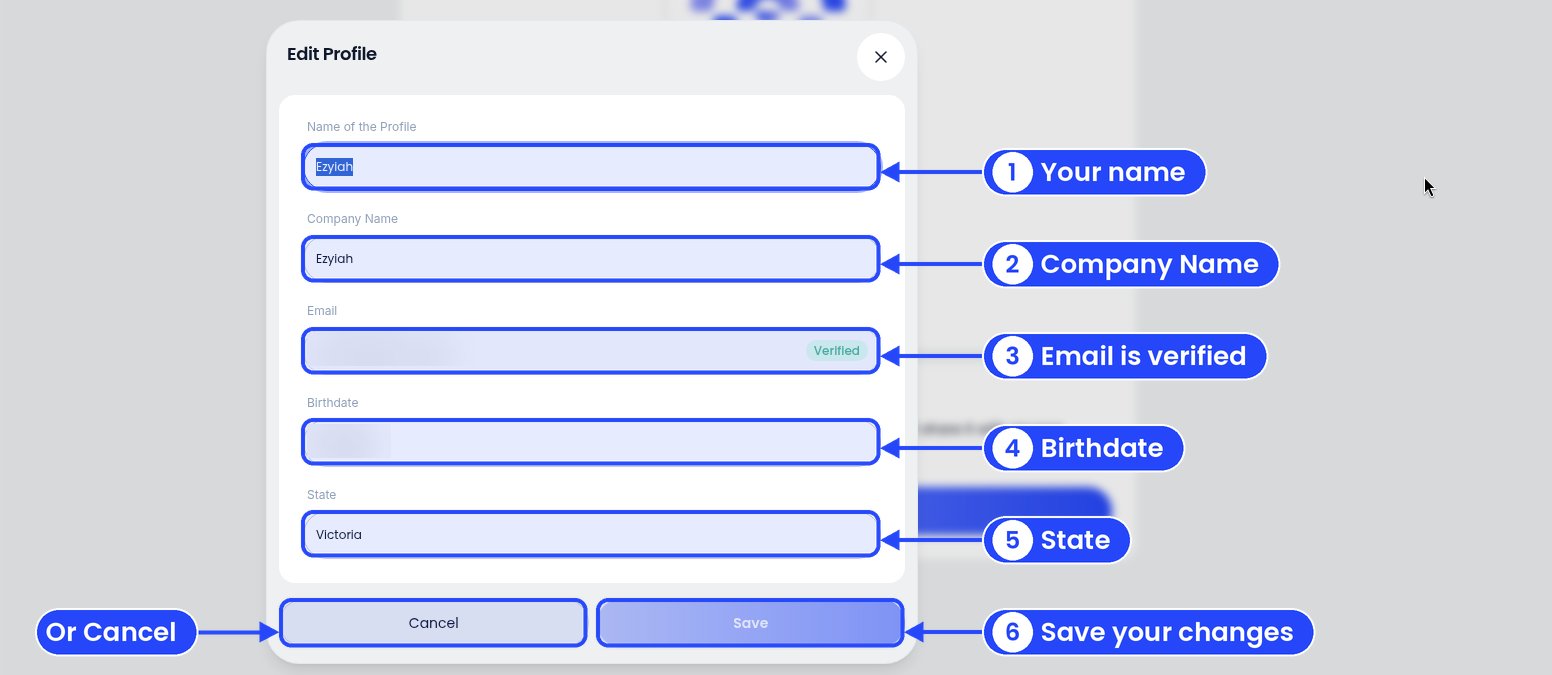
The Edit Profile window with callouts on Name of the Profile, Company Name, Email with a Verified badge, Birthdate, State and Save, and on Cancel. The email and birthdate are blurred

1 to 5 your details, 6 click Save, or Cancel to stop

The window has Name of the Profile, Company Name, Email (marked Verified), Birthdate and State. Change what you need, then click Save. To stop without changing anything, click Cancel.

Change your password

1

Click Change

Under Change Password, click Change. Ezyiah emails you a one-time code (OTP) straight away. The Change Password window says “An OTP has been sent to your email. Please enter the 6-digit code to proceed.”
2

Enter the code
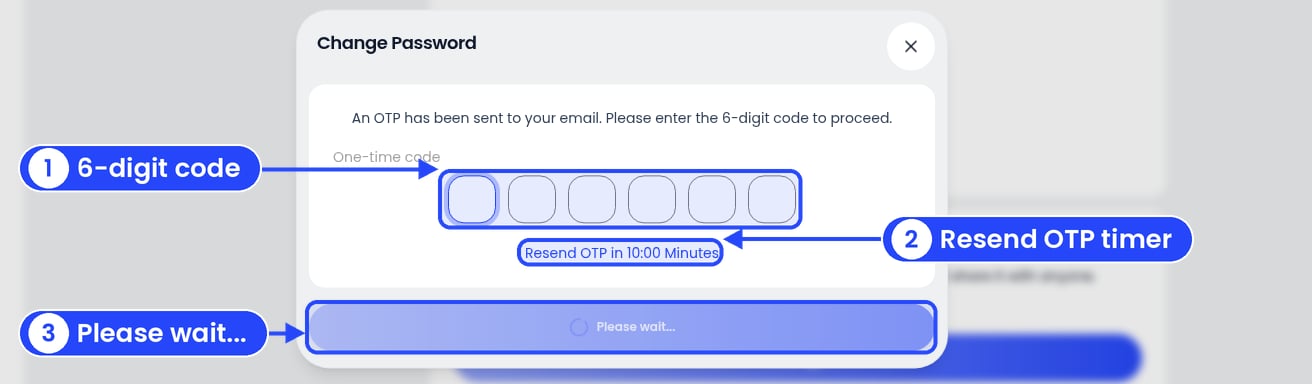
The Change Password window with callouts on the six code boxes, the Resend OTP timer and the button at the bottom

Enter the code from your email

Type the 6-digit code from the email into the six boxes, then click Verify Code. No email? The window shows Resend OTP in 10:00 Minutes. When the timer runs out, click Resend OTP.
3

Enter your new password

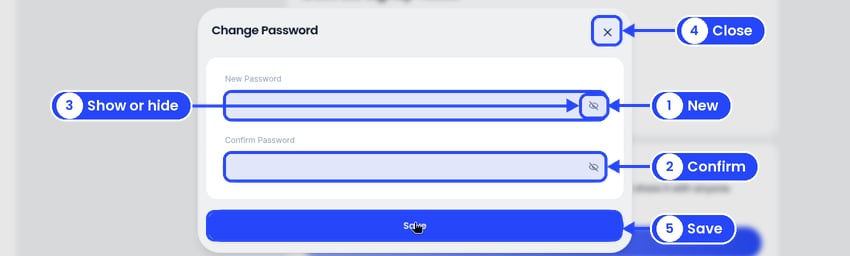
The Change Password window after Verify Code, with callouts on New Password, Confirm Password, the show or hide eye, the X and Save

After Verify Code: type your new password twice, then click Save

Type your new password under New Password and again under Confirm Password. Click the eye in a box to show or hide what you typed. Then click Save.
The email subject is “Your password OTP”, and the code works for 10 minutes. To stop without changing anything, click X at the top right of the window. There’s no Cancel button. You can’t change your email address in Settings.
Don’t keep your password in your email or in the cloud, and don’t share it with anyone. Each person in your firm should have their own login. See Users.