

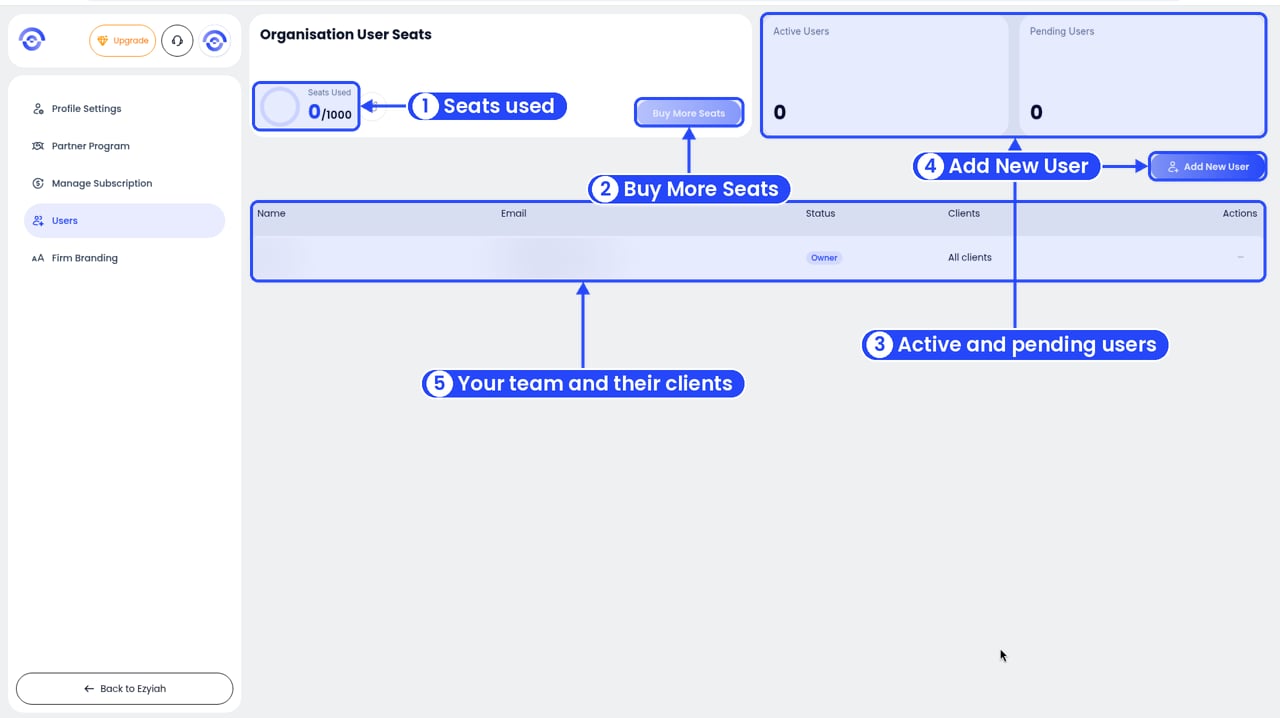
The Users page
- Seats Used. How many seats you’ve used, out of how many you have, for example 0/3.
- Buy More Seats. Add seats to your plan. It’s greyed out on a free trial.
- Active Users and Pending Users. How many people have joined, and how many haven’t accepted their invite yet.
- Add New User. Invite someone from your firm.
- Users table. Each person’s Name, Email, Status, Clients and Actions. You’re shown as Owner, with All clients.
Seats in each plan
You, the owner, don’t use a seat. Seats are for the people you invite.
Add someone from your firm
1
Click Add New User
It’s on the right, above the users table. The Add New User window opens. The bar at the top shows your Seats Remaining.
2
Enter their email
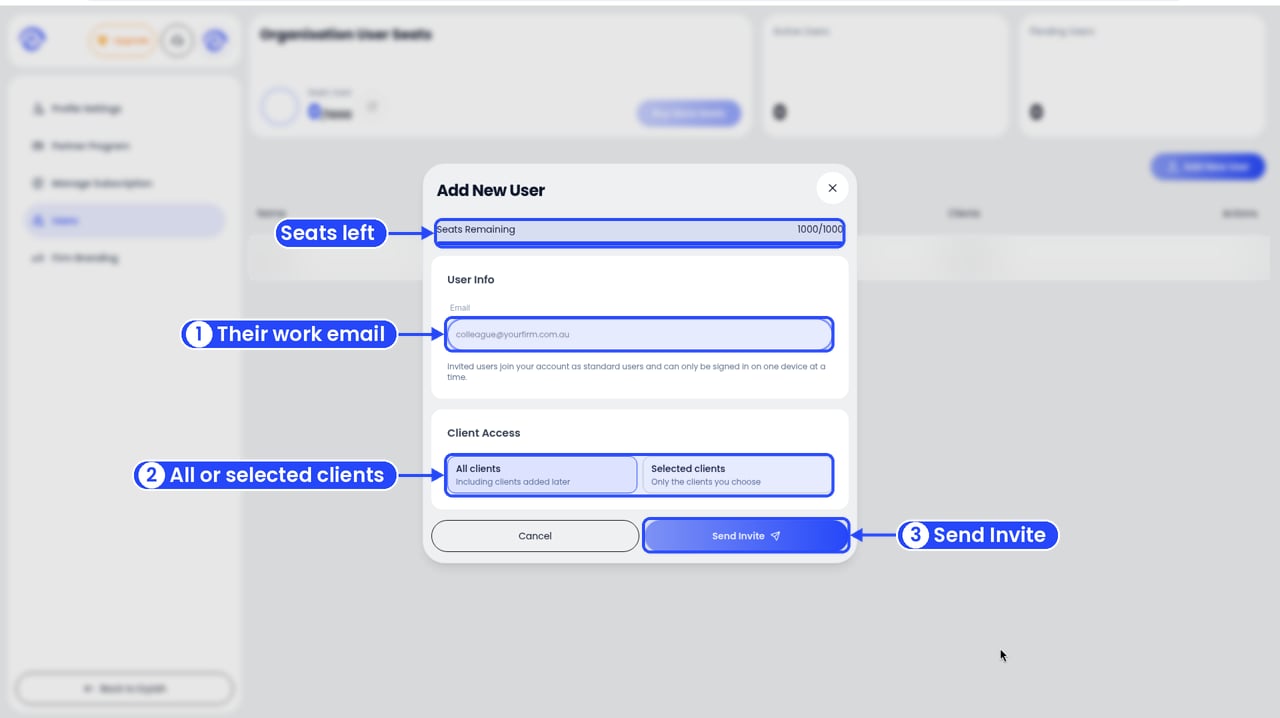
1 Enter their email, 2 choose their clients, 3 click Send Invite
3
Choose which clients they can see
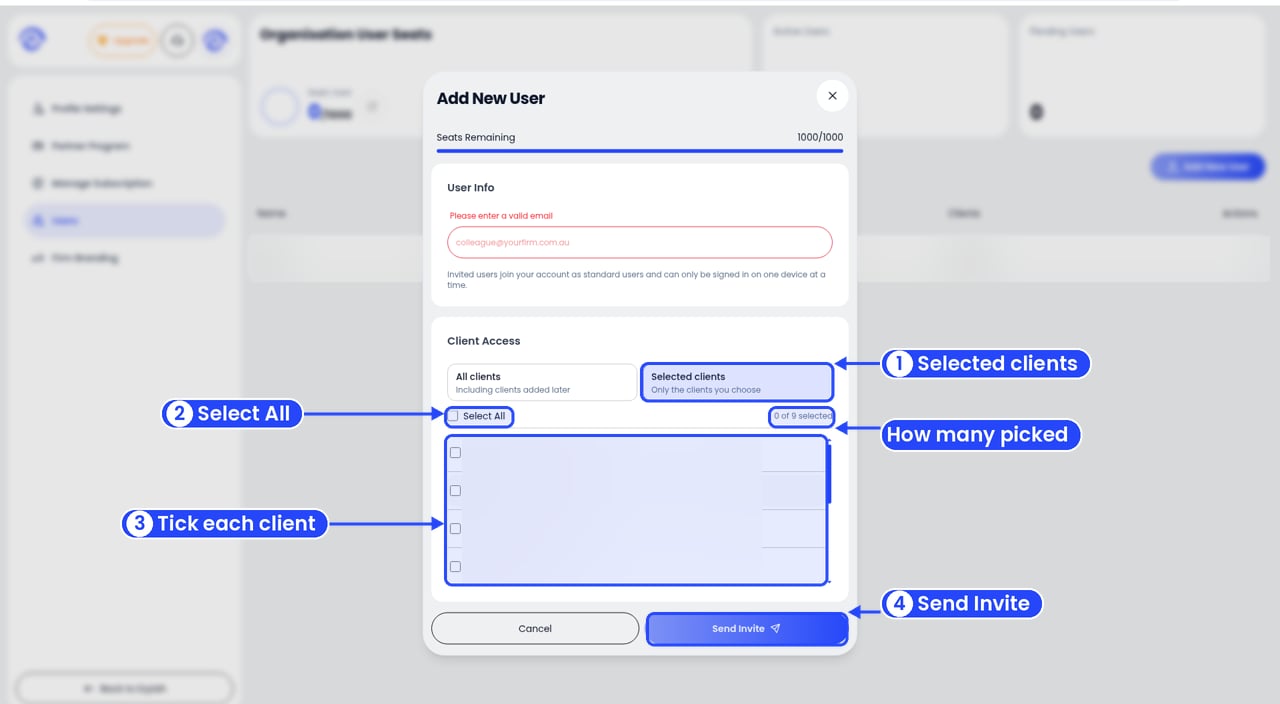
Pick the clients they can see
- All clients: every client, including clients you add later.
- Selected clients: only the clients you choose. A list of your clients opens. Tick each one they should see, or click Select All. The count shows how many you’ve picked, for example 3 of 9 selected.
4
Click Send Invite
They get an email inviting them to join your firm in Ezyiah. Until they accept, they show under Pending Users.
Invited people join as standard users. Each person can only be signed in on one device at a time.
When you need more seats
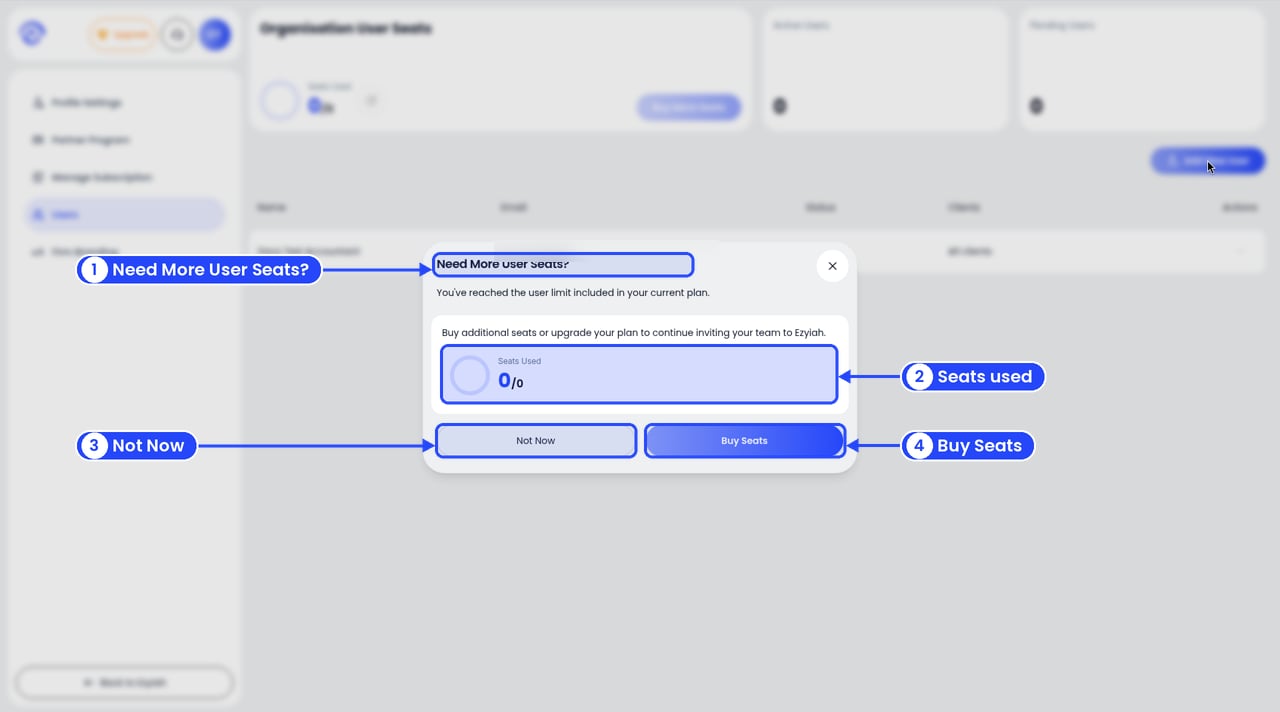
No seats left
- Click Buy Seats to open the plans page, where you can add seats or move to a bigger plan.
- Click Not Now to close it.
Moving to a smaller plan removes any extra team seats. See Cancelling your subscription.
When someone leaves
Remove their access straight away. Use the Actions column in the users table. Your own row shows a dash (–), because the owner can’t be changed or removed here.Users are people in your firm. To give a business owner their own login, see Inviting a business client.