

Add one customer
1
Open Customers
Click Sales in the sidebar, then Customers. Click + Add Customer at the top right.
2
Enter their name
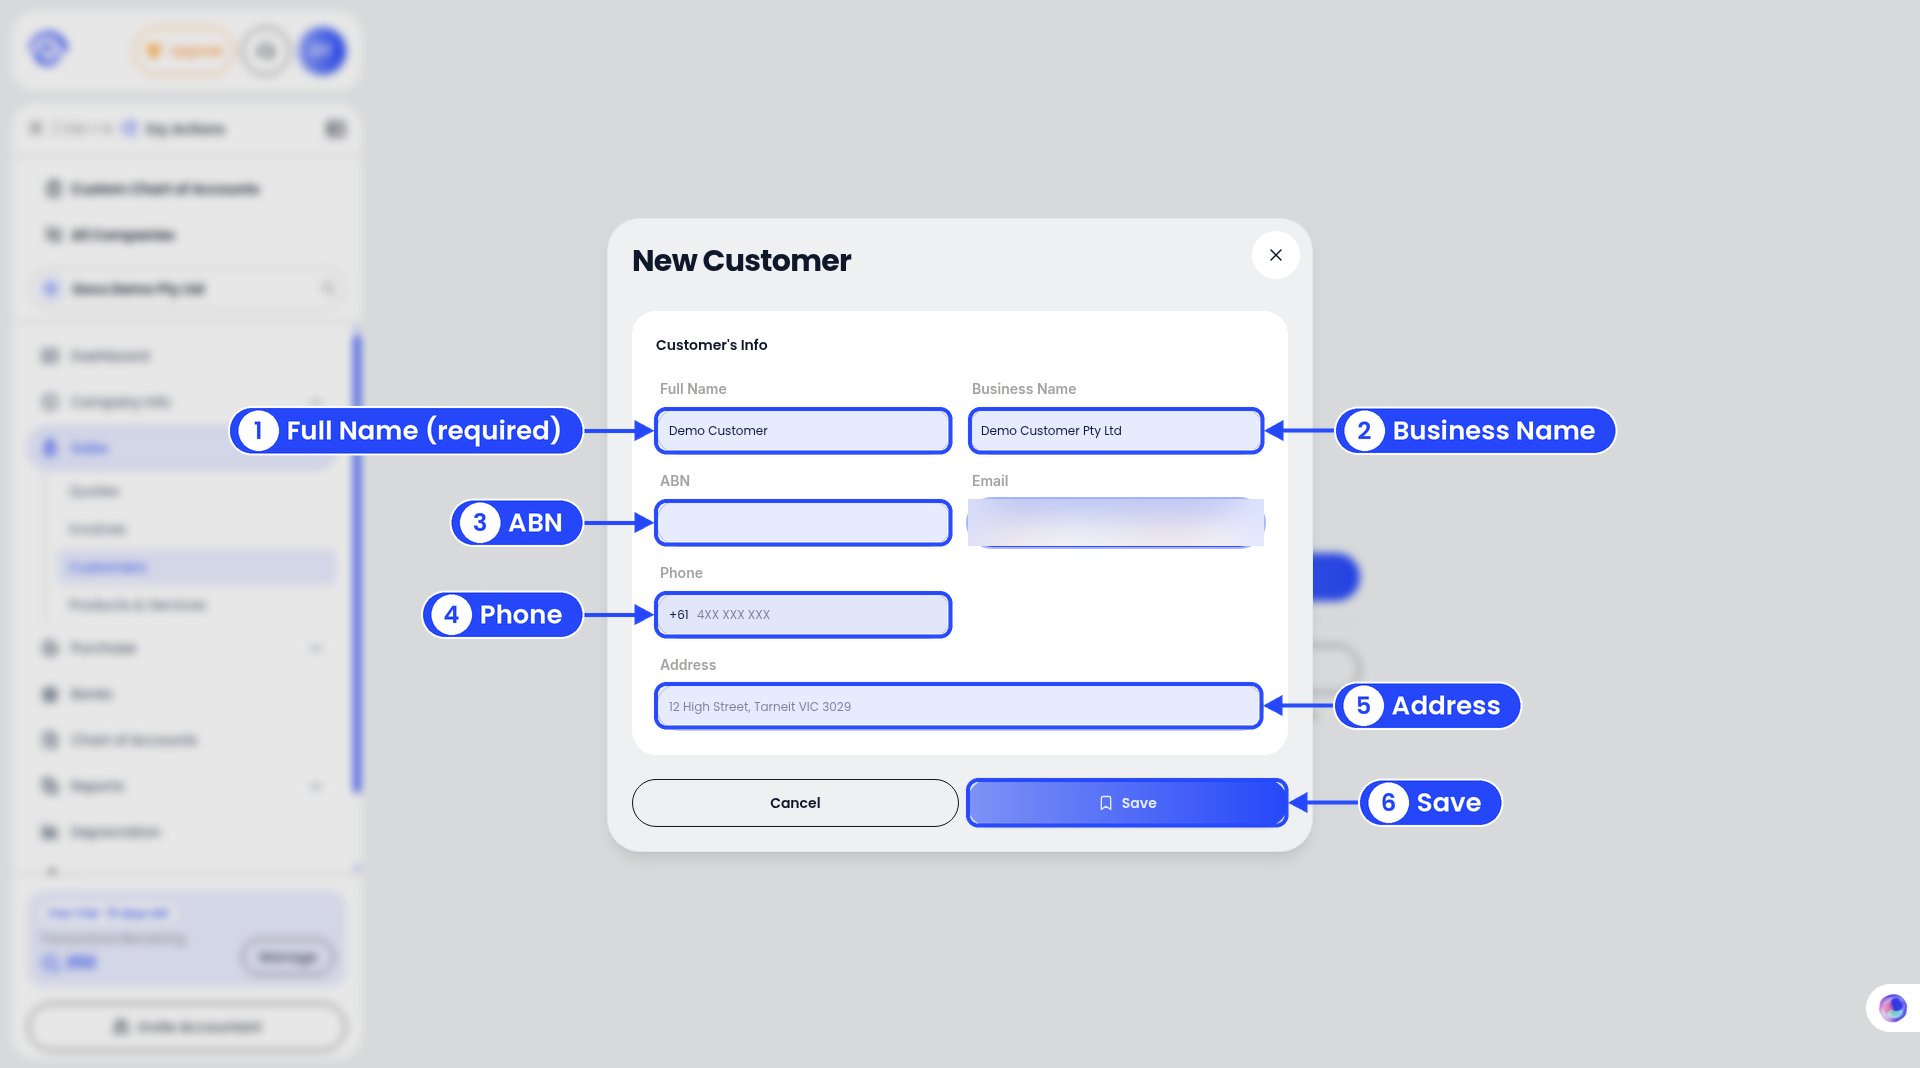
The New Customer window. The numbers follow steps 2 to 7.
3
Add the business name
If they’re a business, add the Business Name, for example Demo Customer Pty Ltd.
4
Add their ABN
Add their ABN if they have one, plus their Email.
5
Add a phone number
Phone starts with +61. Type the rest, for example 4XX XXX XXX.
6
Add an address
Type their Address, for example 12 High Street, Tarneit VIC 3029.
7
Save
Click Save. The customer shows in your list.
Your customer list
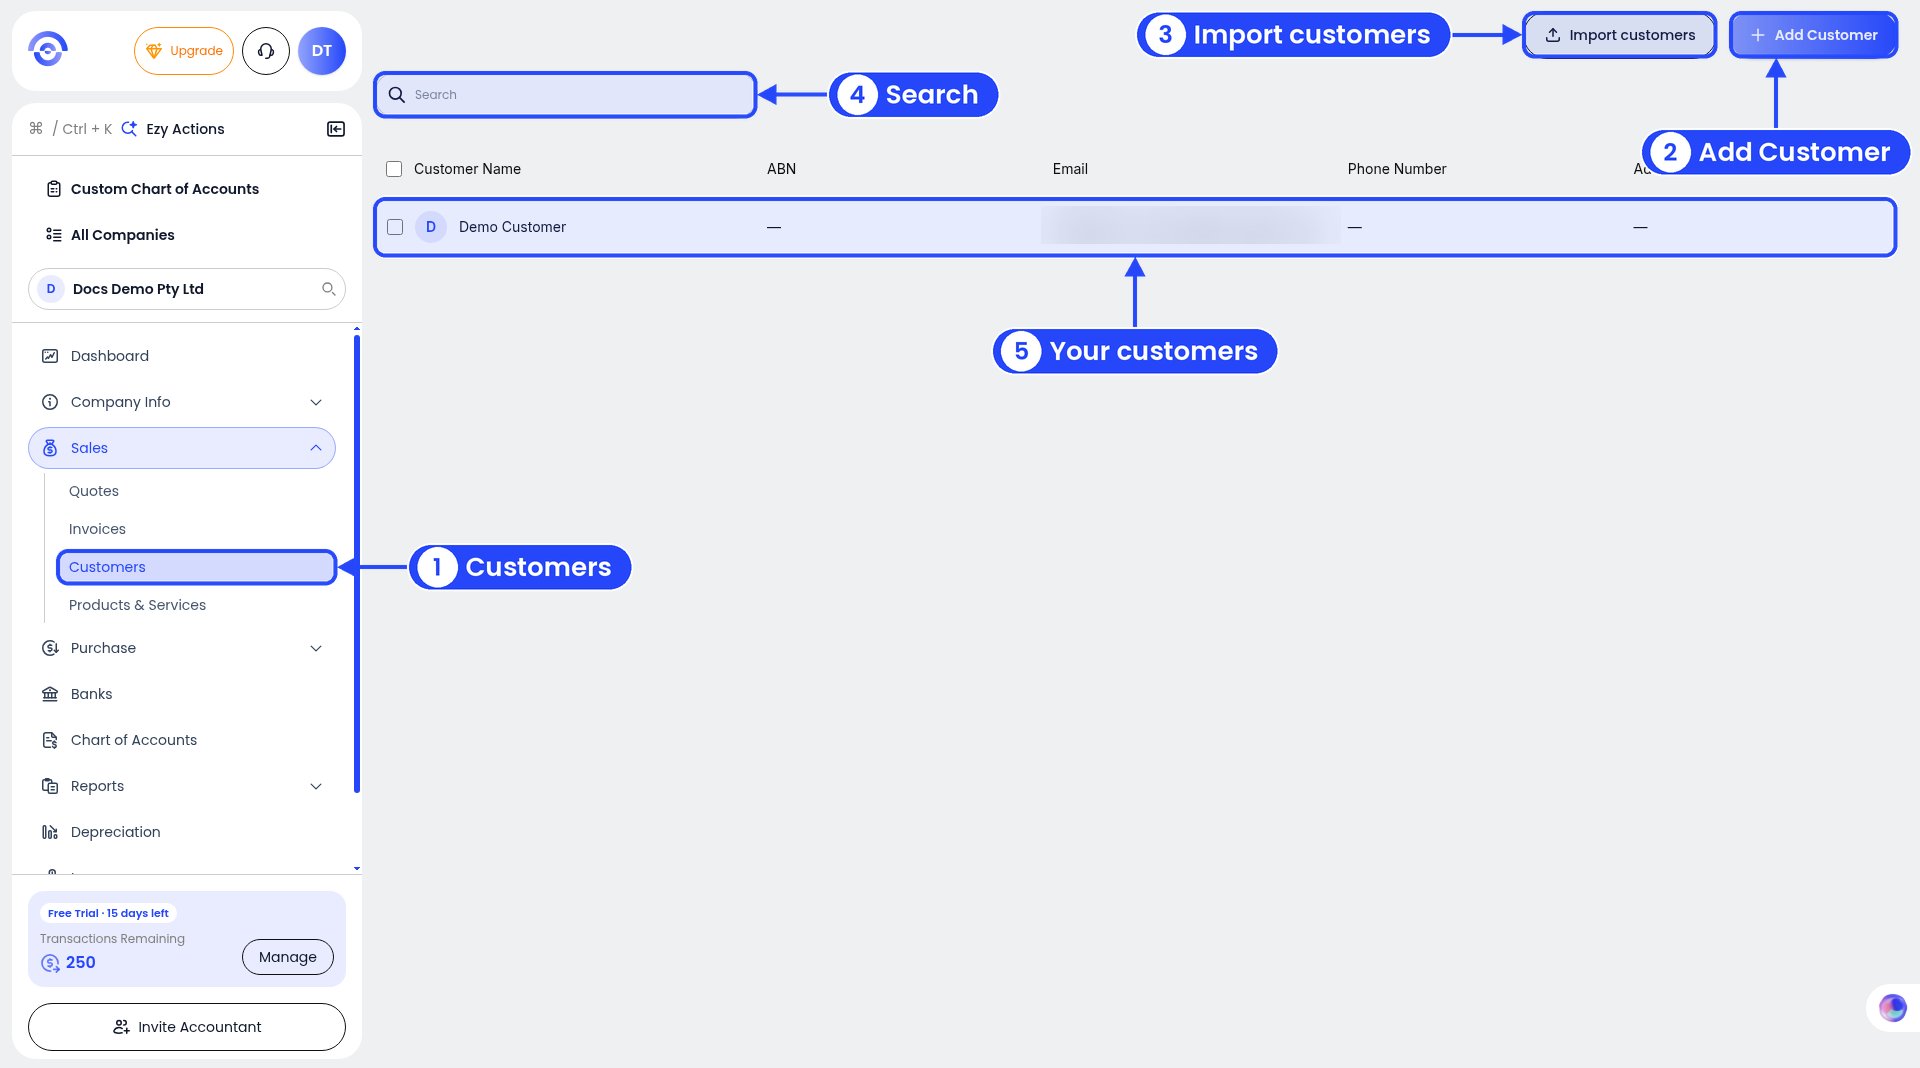
The customer list
Bring in your whole list
Moving from another system? Click Import customers at the top right of the Customers list, next to + Add Customer, to bring in everyone at once, instead of adding them one by one. Export your customers from your old system as a spreadsheet first. There’s no template to download. Import customers opens its own page. It shows three steps, Upload, Review and Done, but once you import you go straight back to your customer list.1
Upload your file
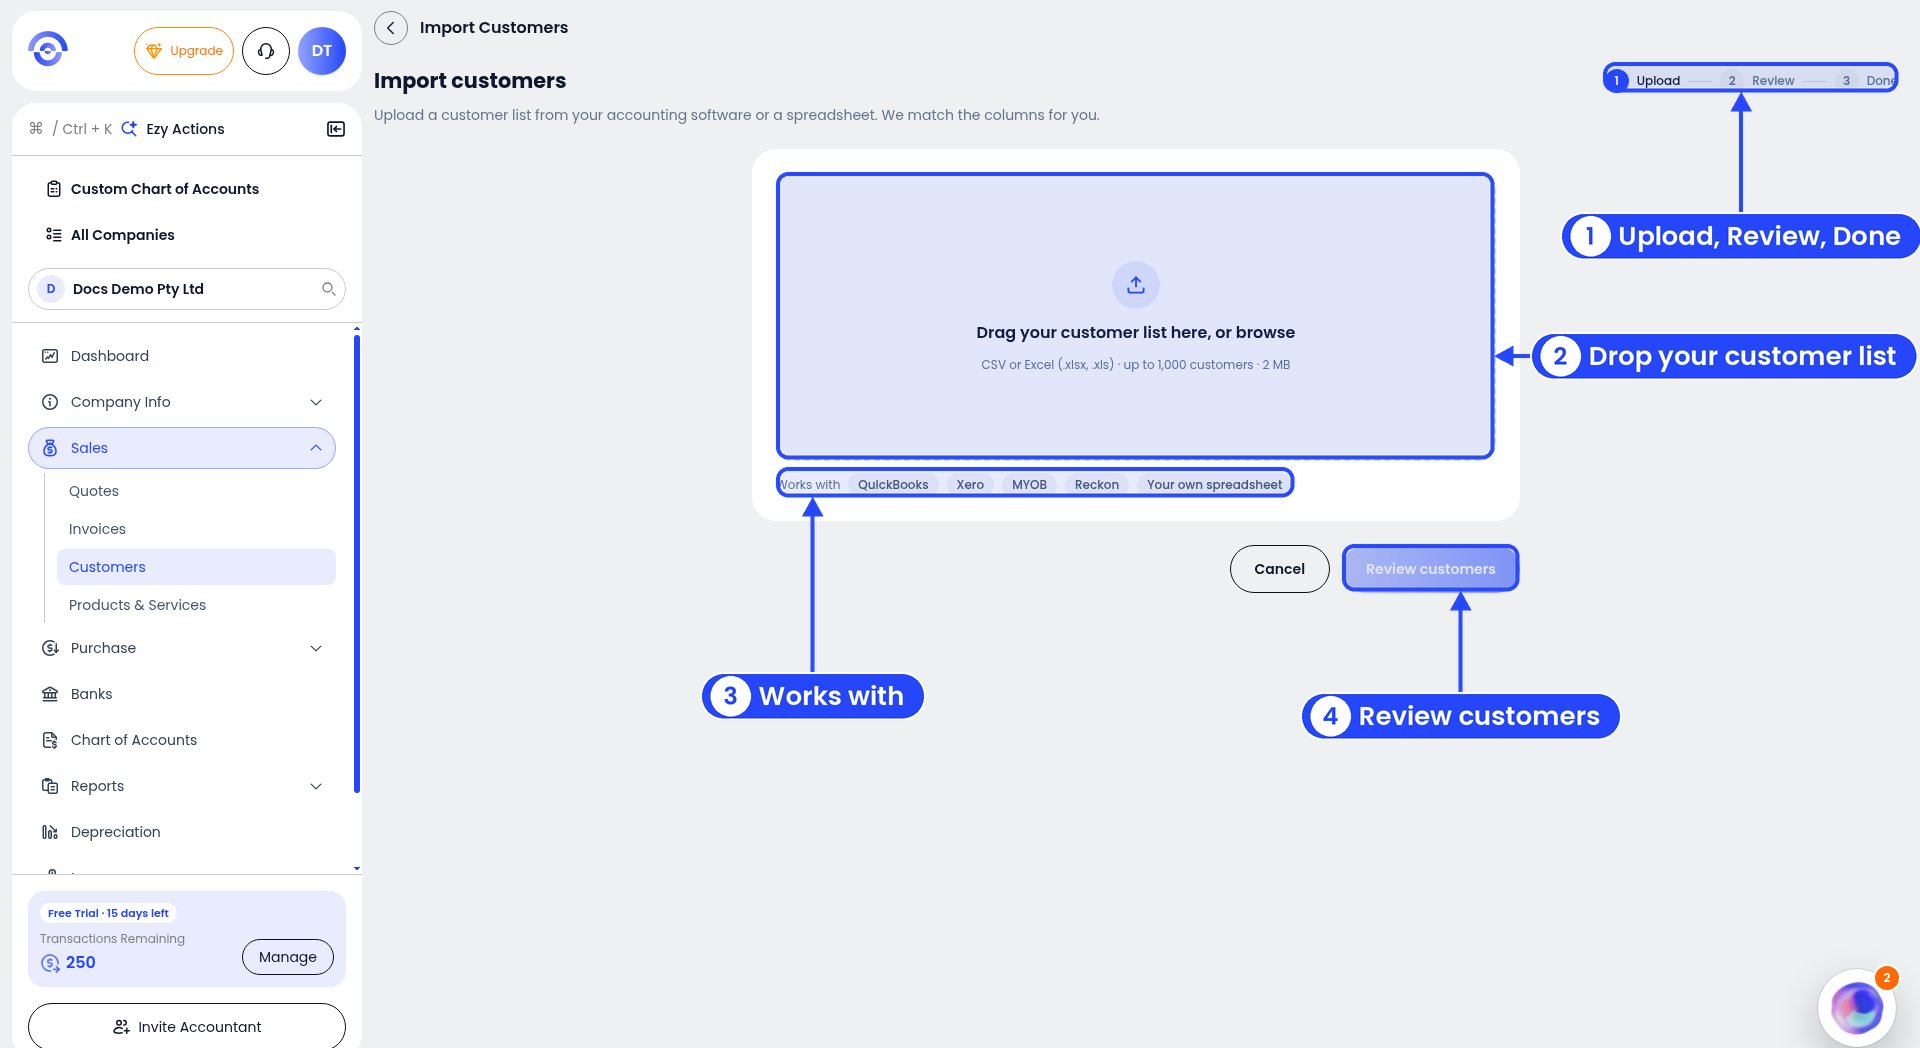
The Import customers page
2
Click Review customers
Ezyiah reads the file and matches the columns for you. You’ll see “Reading your file and matching the columns. This can take up to 30 seconds.” There’s no step to match columns yourself.
3
Check the Review step
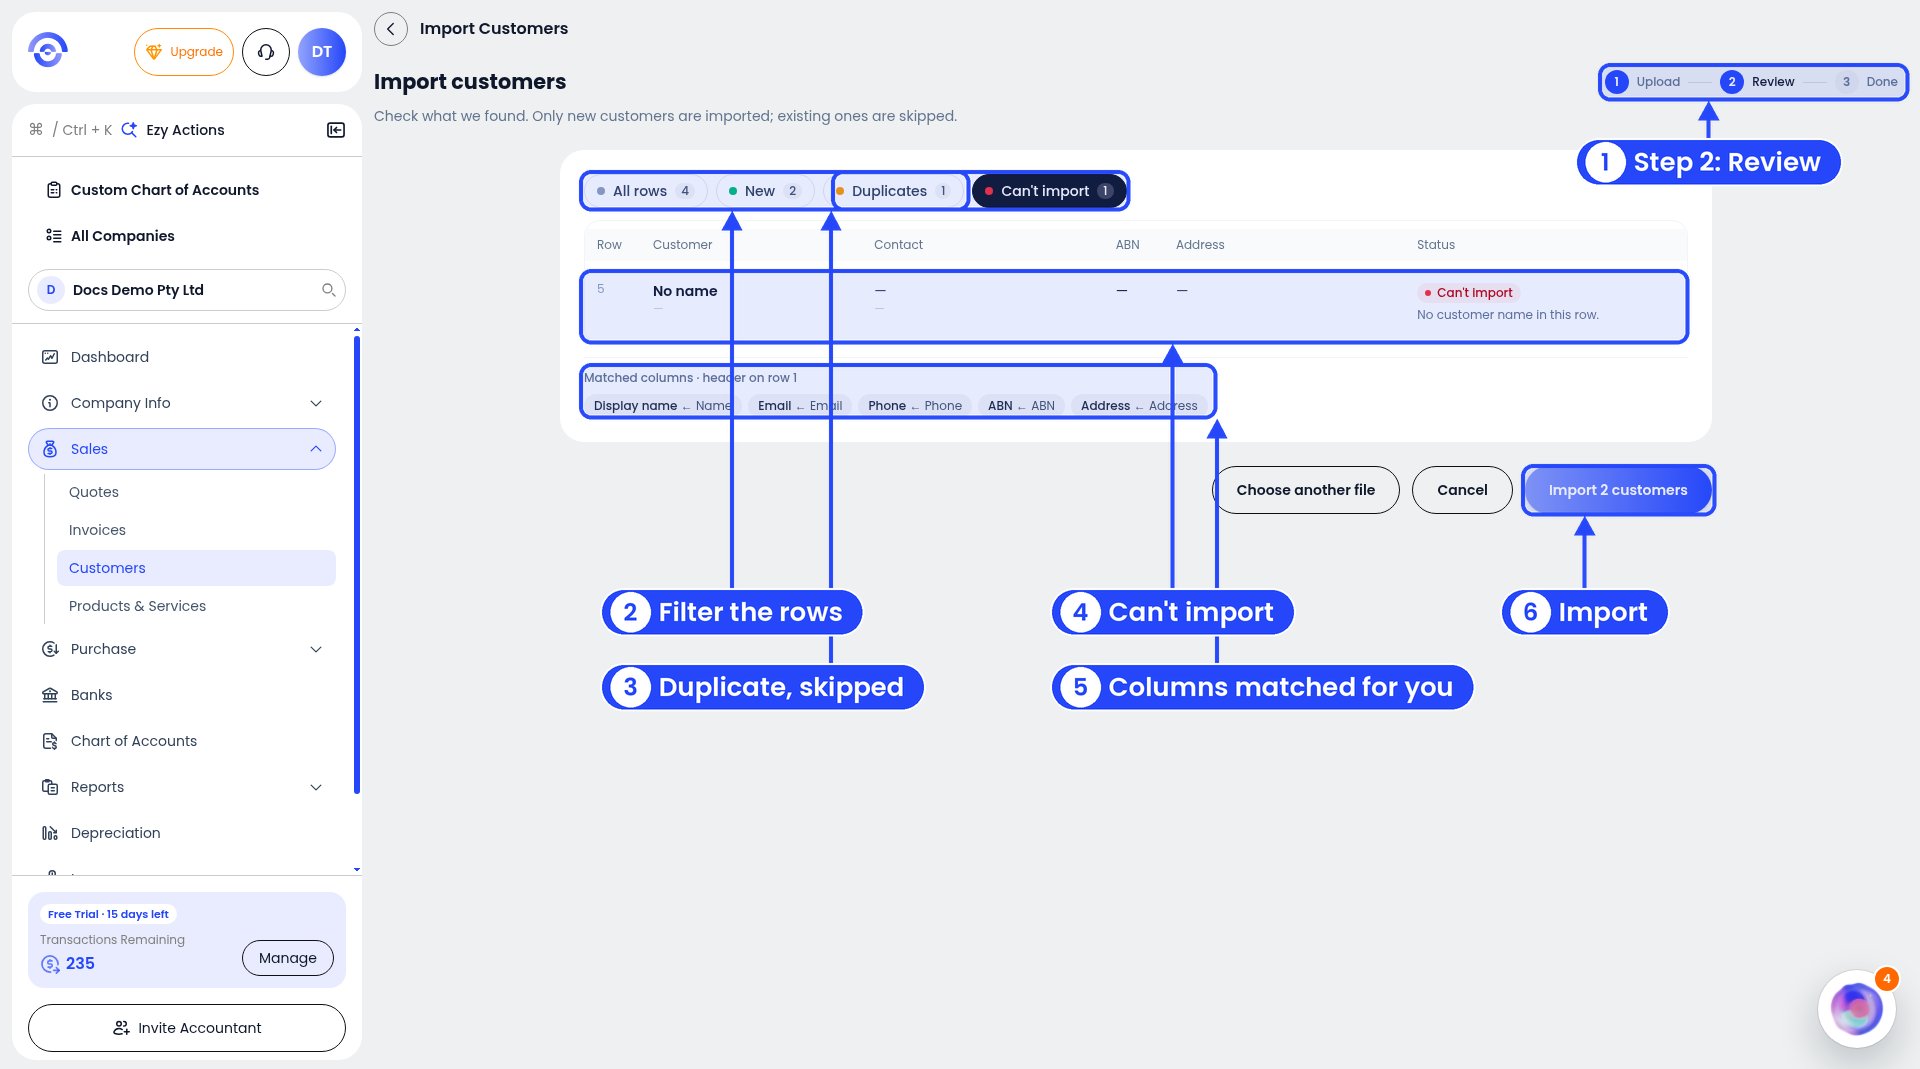
The Review step
4
Click Import
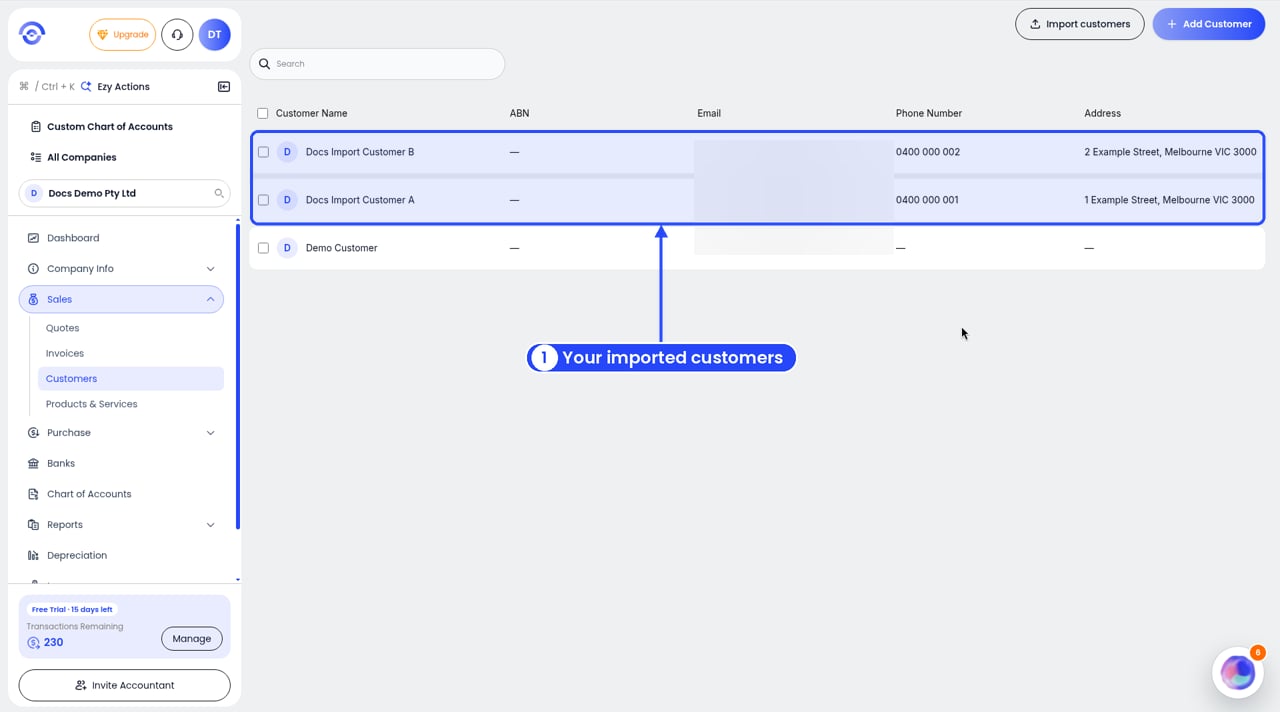
Back in your customer list
Your file
Put a header row at the top. Ezyiah looks for these columns: Name, Email, Phone, ABN and Address. Each row needs a name. The others are optional.The Review step
Use the tabs at the top to filter the rows:- All rows: everything in your file.
- New: customers that will be added.
- Duplicates: shown as Already exists. The customer is already in Ezyiah, or an earlier row in your file has the same email. These are skipped.
- Can’t import: something’s missing, for example “No customer name in this row”.