

Connect a live bank feed
1
Open Banks
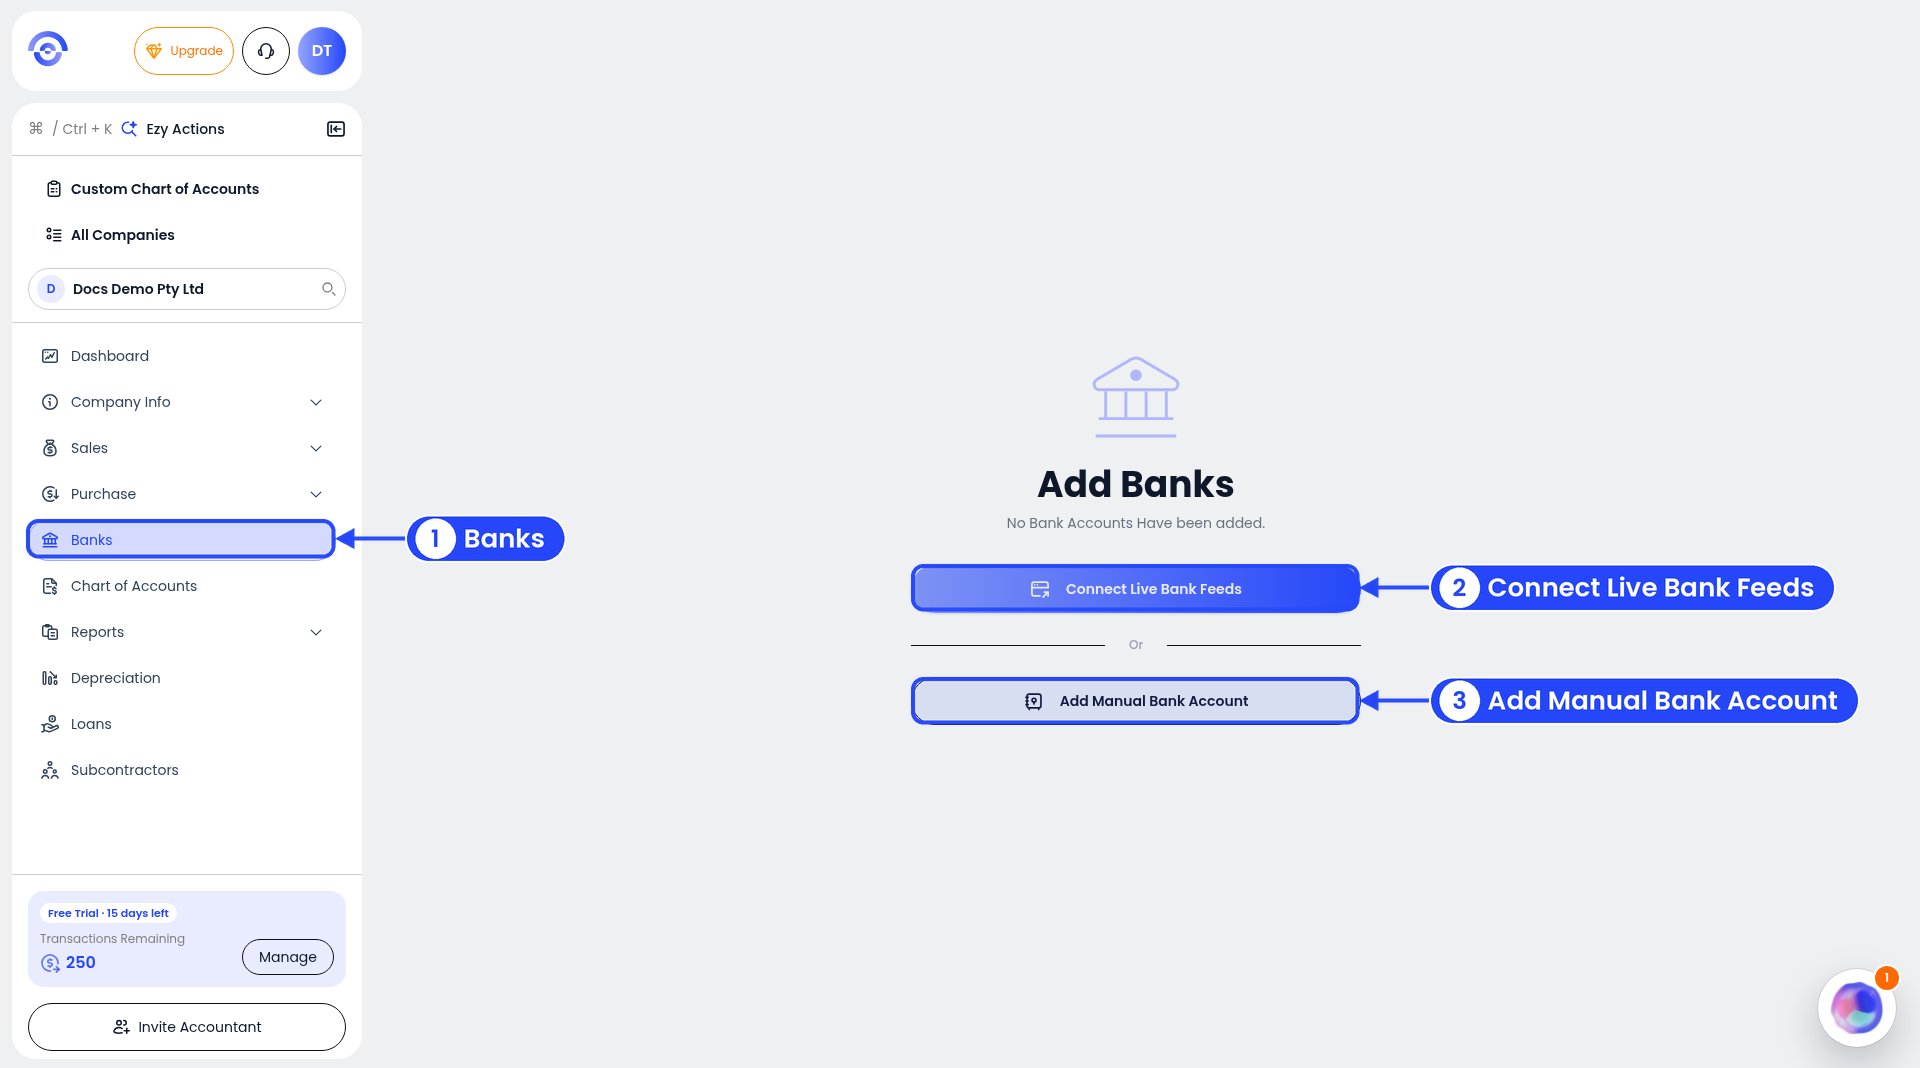
Steps 1 and 2: the Banks page
2
Click Connect Live Bank Feeds
The Connect Bank Feed window opens. Already have a bank account in Ezyiah? The button in the top right is called Link Live Bank Feed instead. It opens the same window.
3
Check your email and send
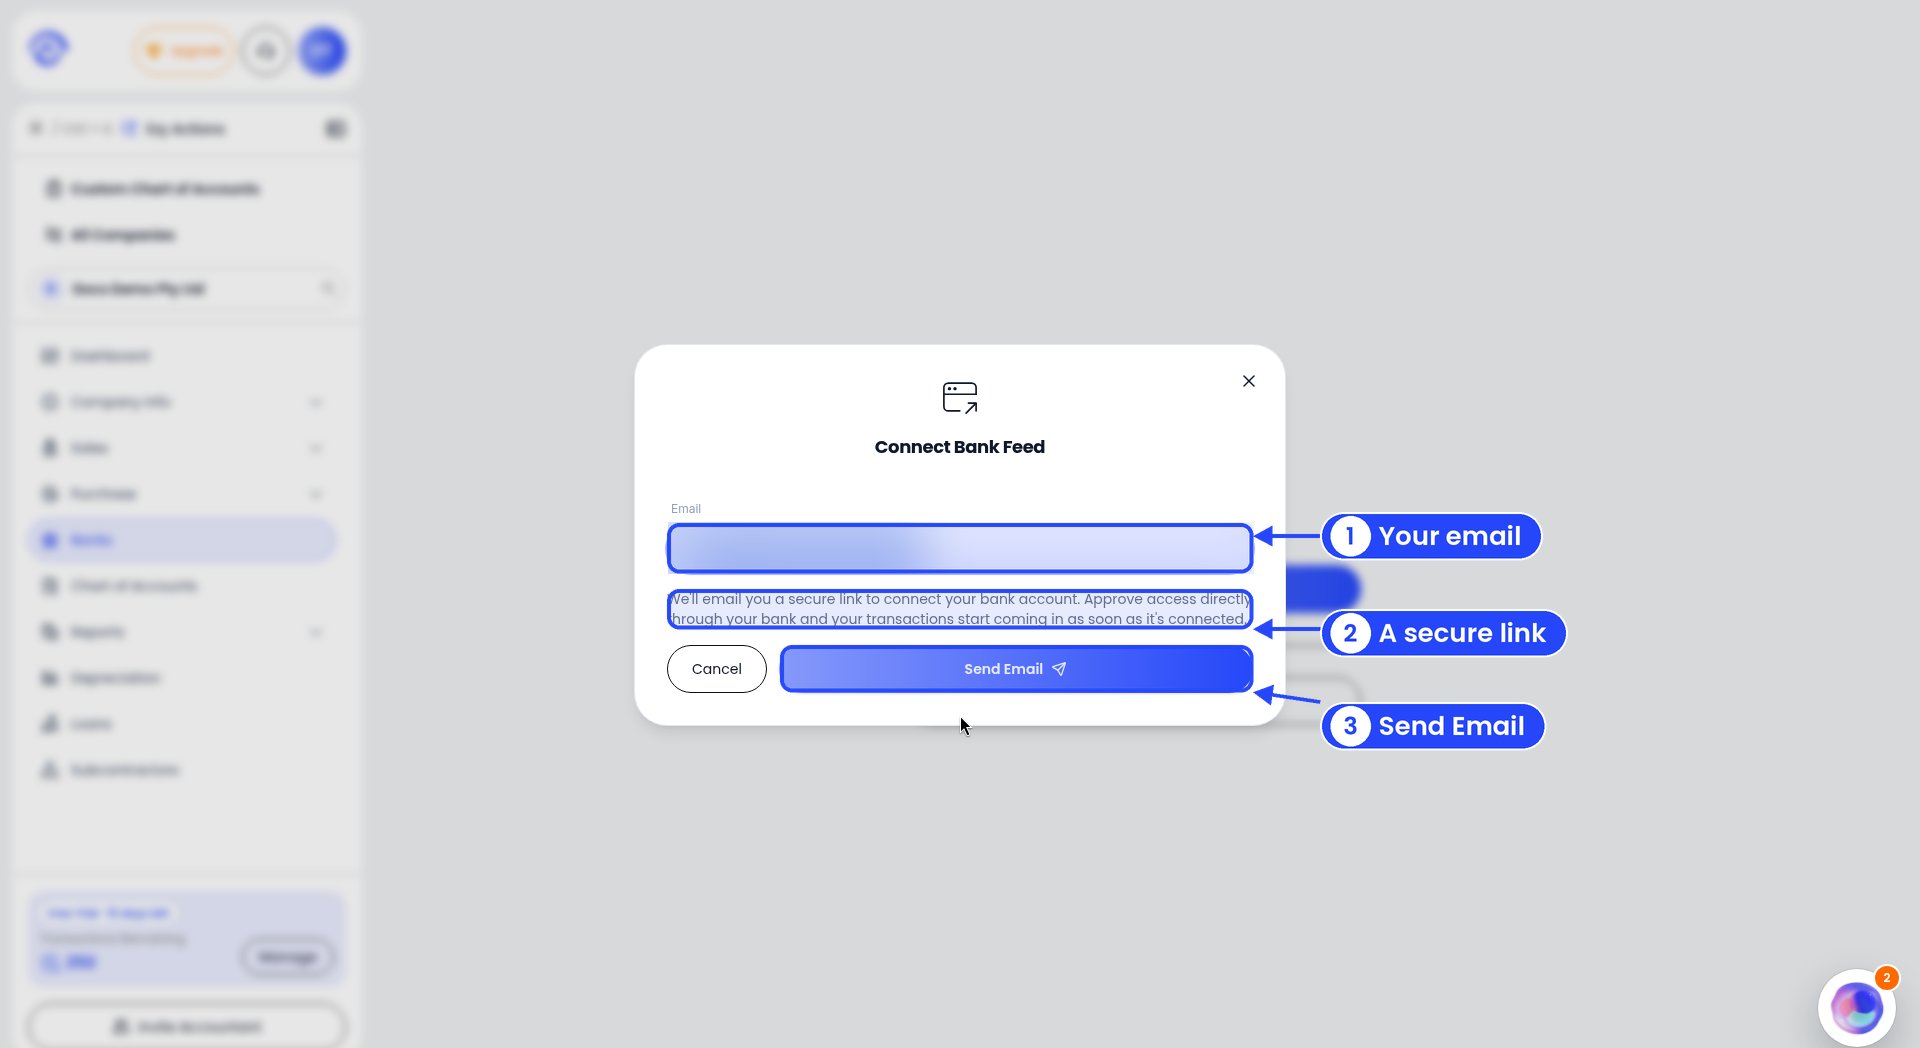
Step 3: Ezyiah emails you a secure link
4
Approve access at your bank
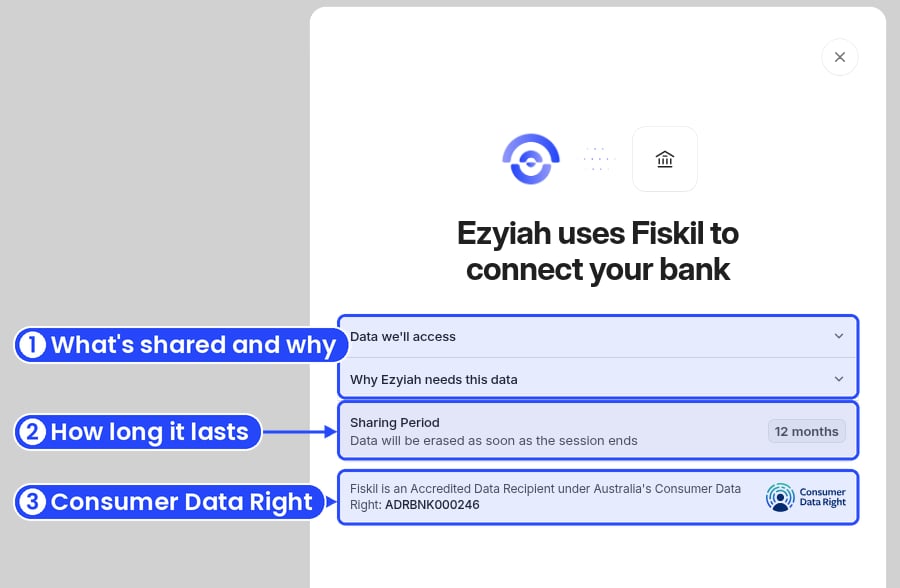
Step 4: Ezyiah connects through Fiskil
5
Check your accounts
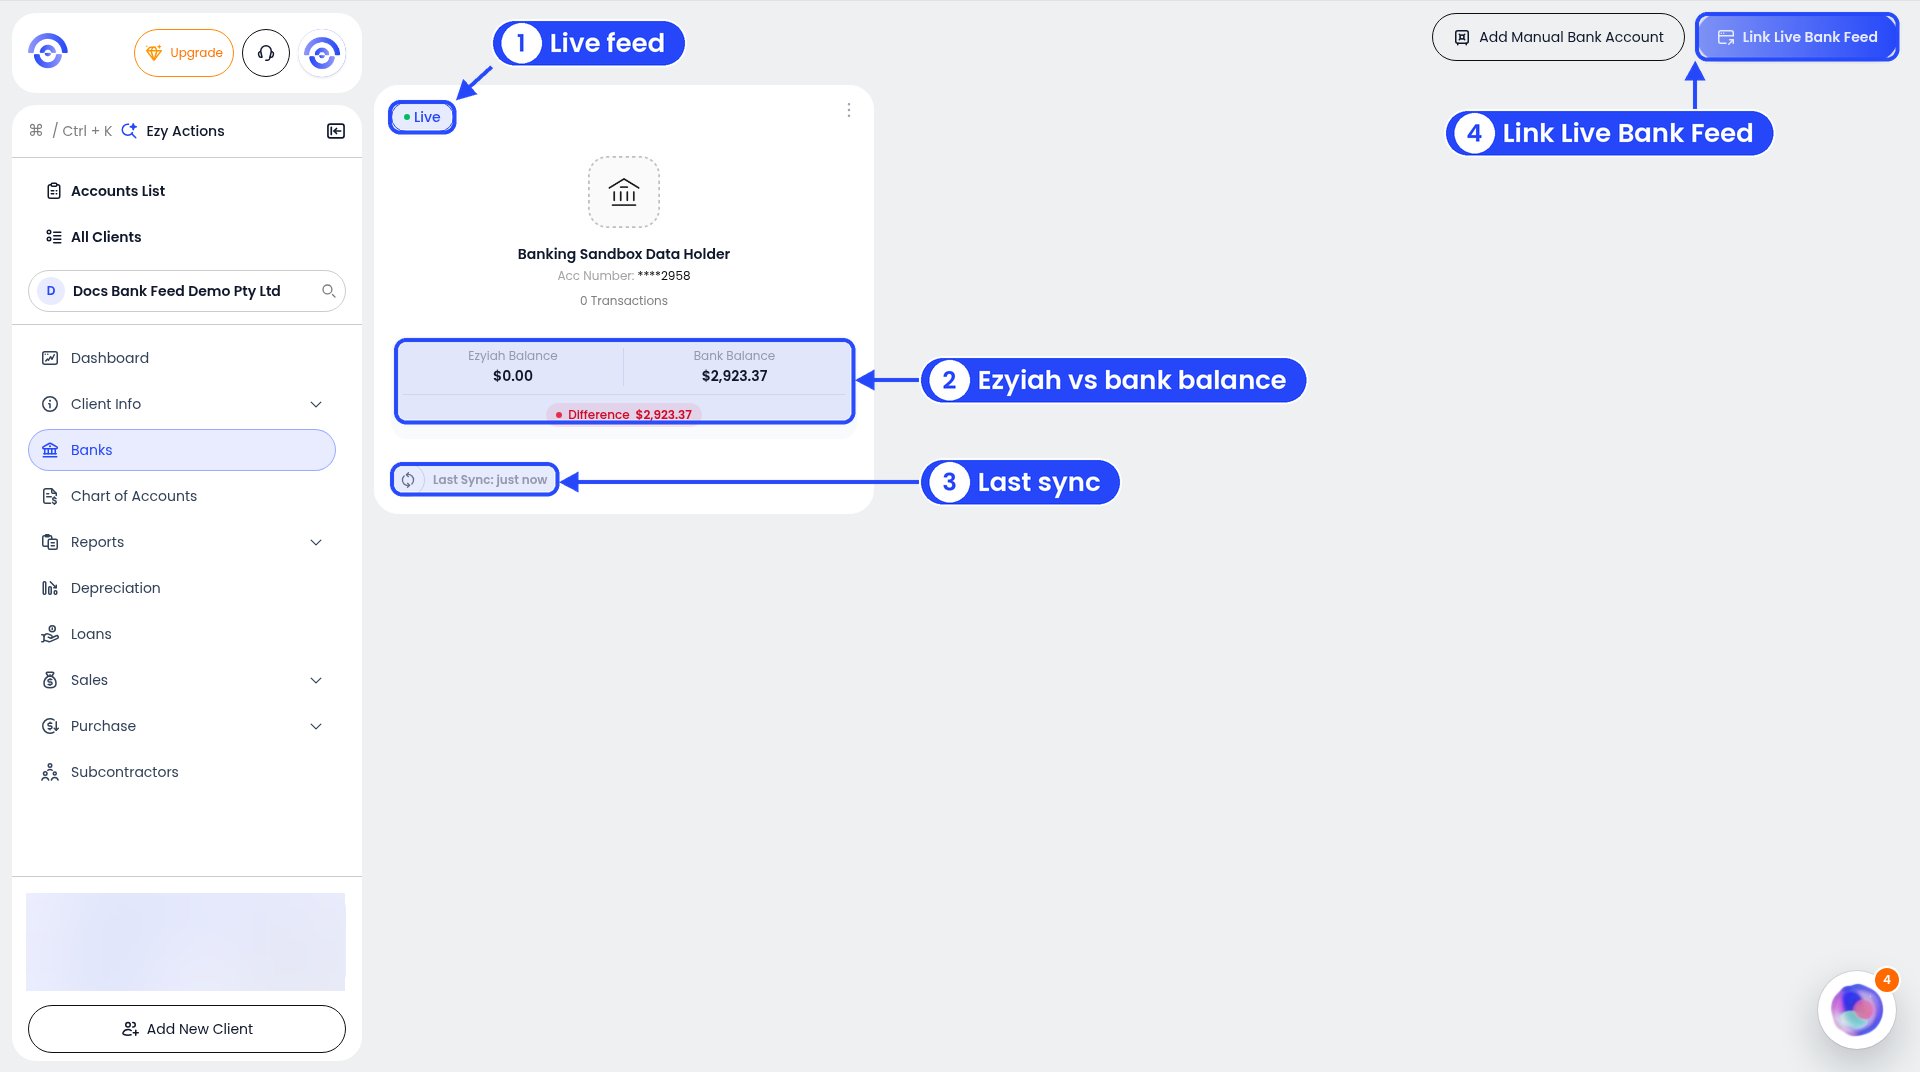
Step 5: a connected account shows a Live badge
Is the account in the name of a company, trust or partnership? Your bank may need you to name a person who can share the account’s data first. See Live bank feeds by bank.
Bring in older transactions
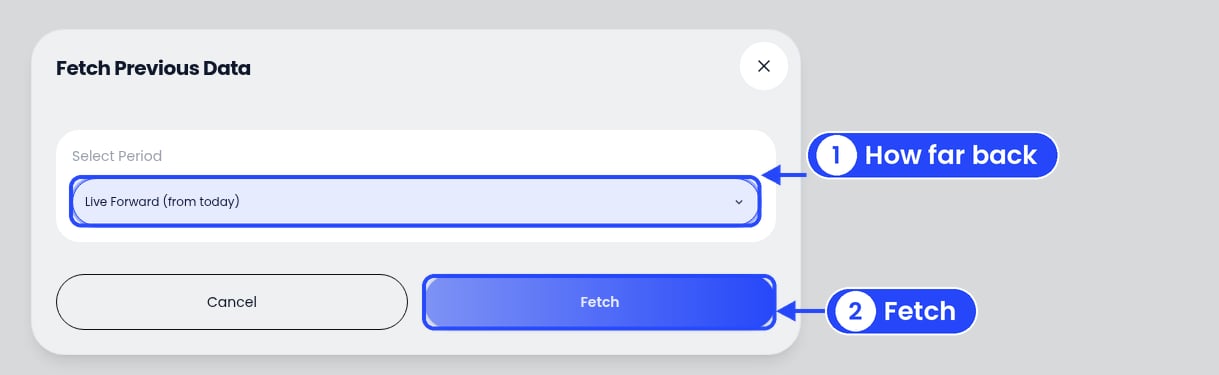
Fetch Previous Data: pick how far back, then Fetch
No live feed for your bank?
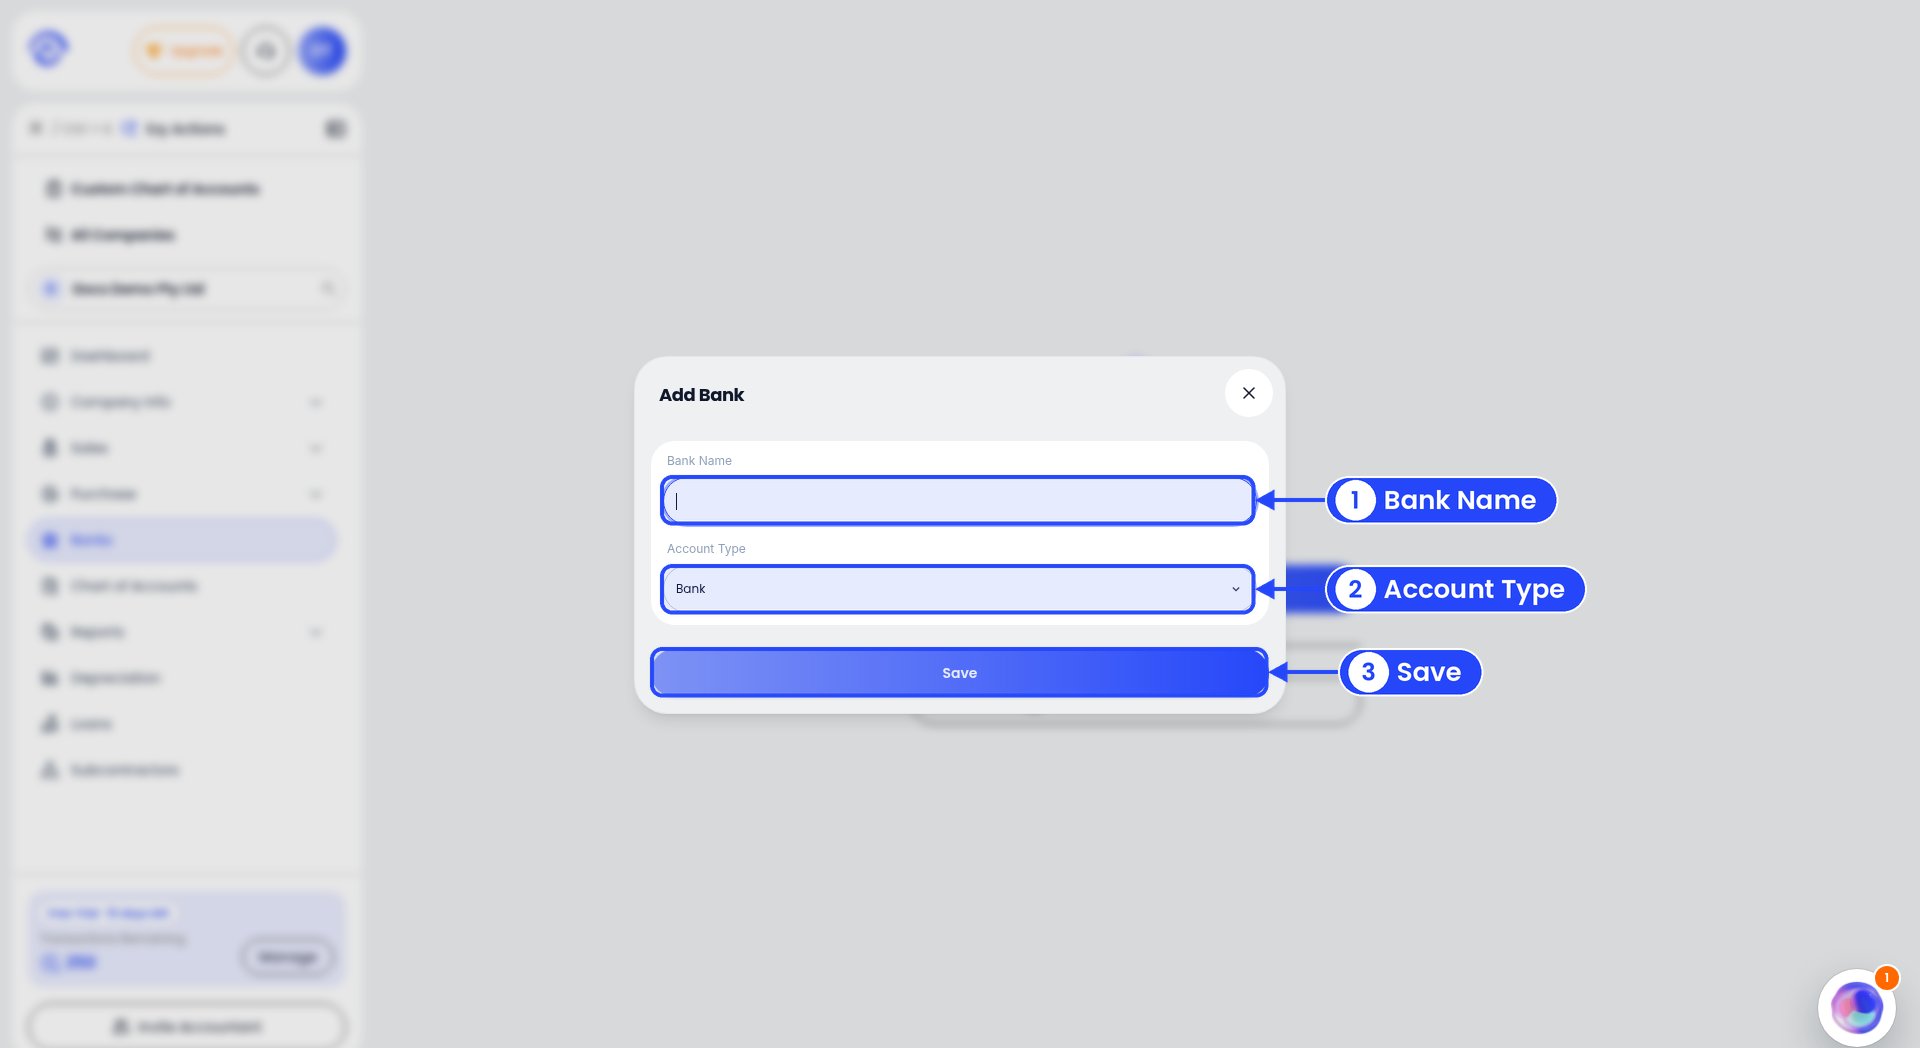
The Add Bank window
Upload a statement
After you save, the account’s own page opens, with the tabs Raw Bank Feed and Files.1
Click Upload File
It’s at the top right of the account’s page.
2
Add your statement
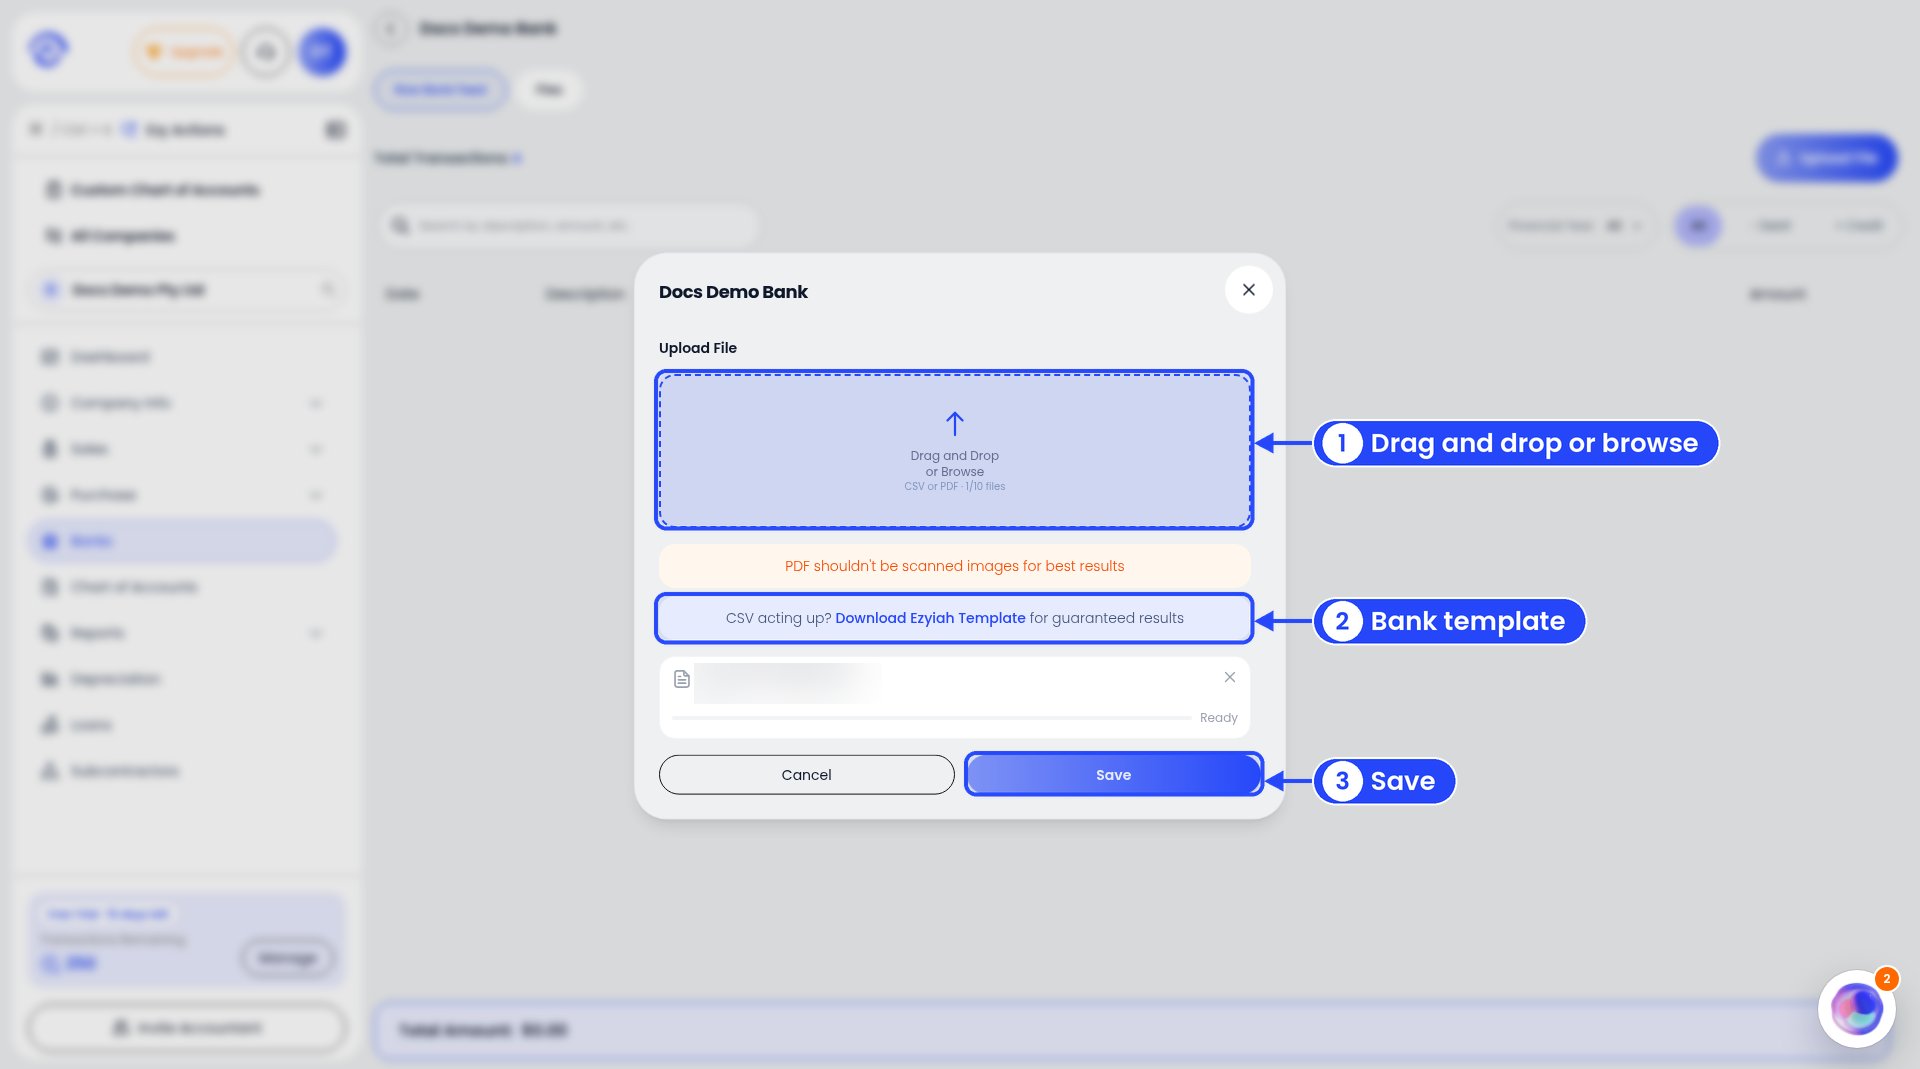
Upload a statement to a manual account
3
Click Save
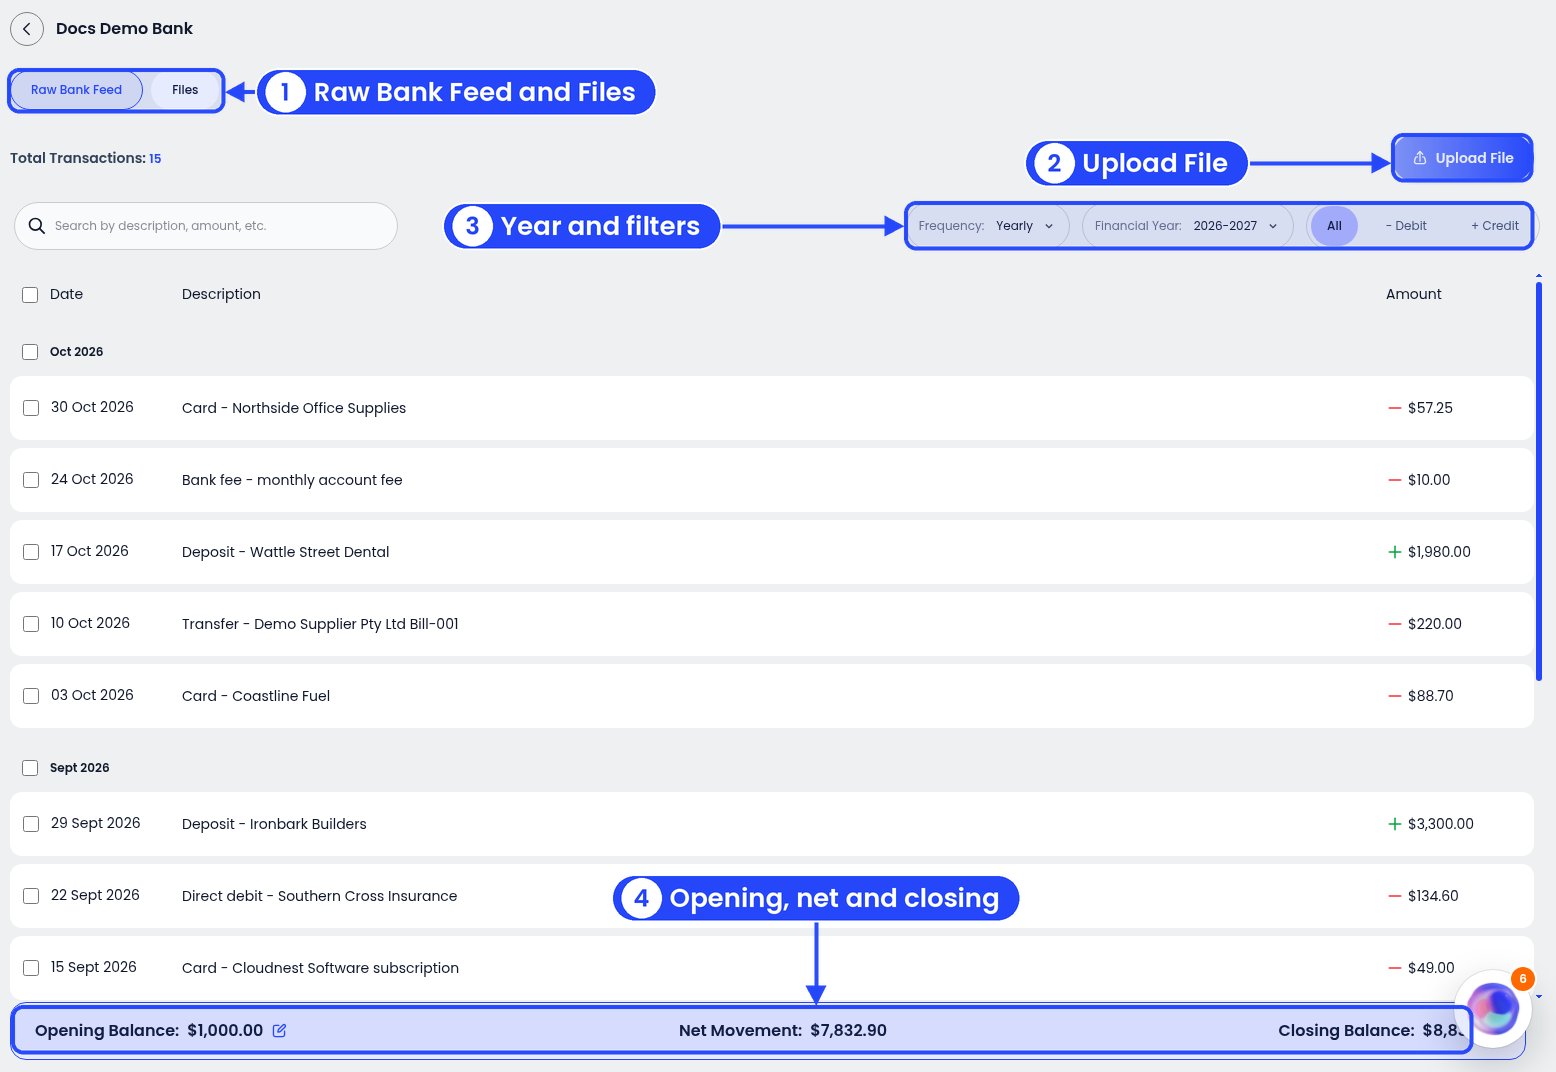
A bank account's Raw Bank Feed
Your bank cards
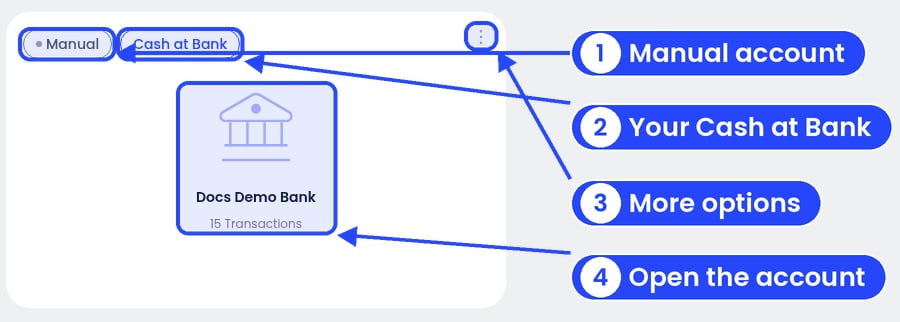
A bank card on the Banks page
- Manual: you add its transactions by uploading statements.
- Live: it gets transactions from a live bank feed.
- Cash at Bank: this is the account that shows as Cash at Bank on your balance sheet.
Change or remove a bank account
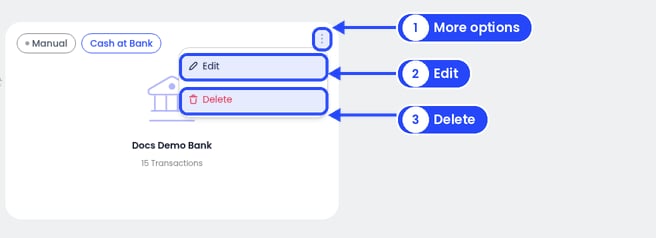
The menu on a bank account that's already your Cash at Bank
- Select as Cash at Bank: makes this account your Cash at Bank on the balance sheet. It applies straight away, with no confirm step. You’ll see “Bank set as cash at bank”. After that, the card shows a Cash at Bank tag and the menu has just Edit and Delete.
- Edit: the Edit Bank window opens. Change the Bank Name or Account Type, then click Save Changes. To leave without saving, click the X.
- Delete: Ezyiah asks “Delete bank?” first. Click Delete to confirm, or Cancel.
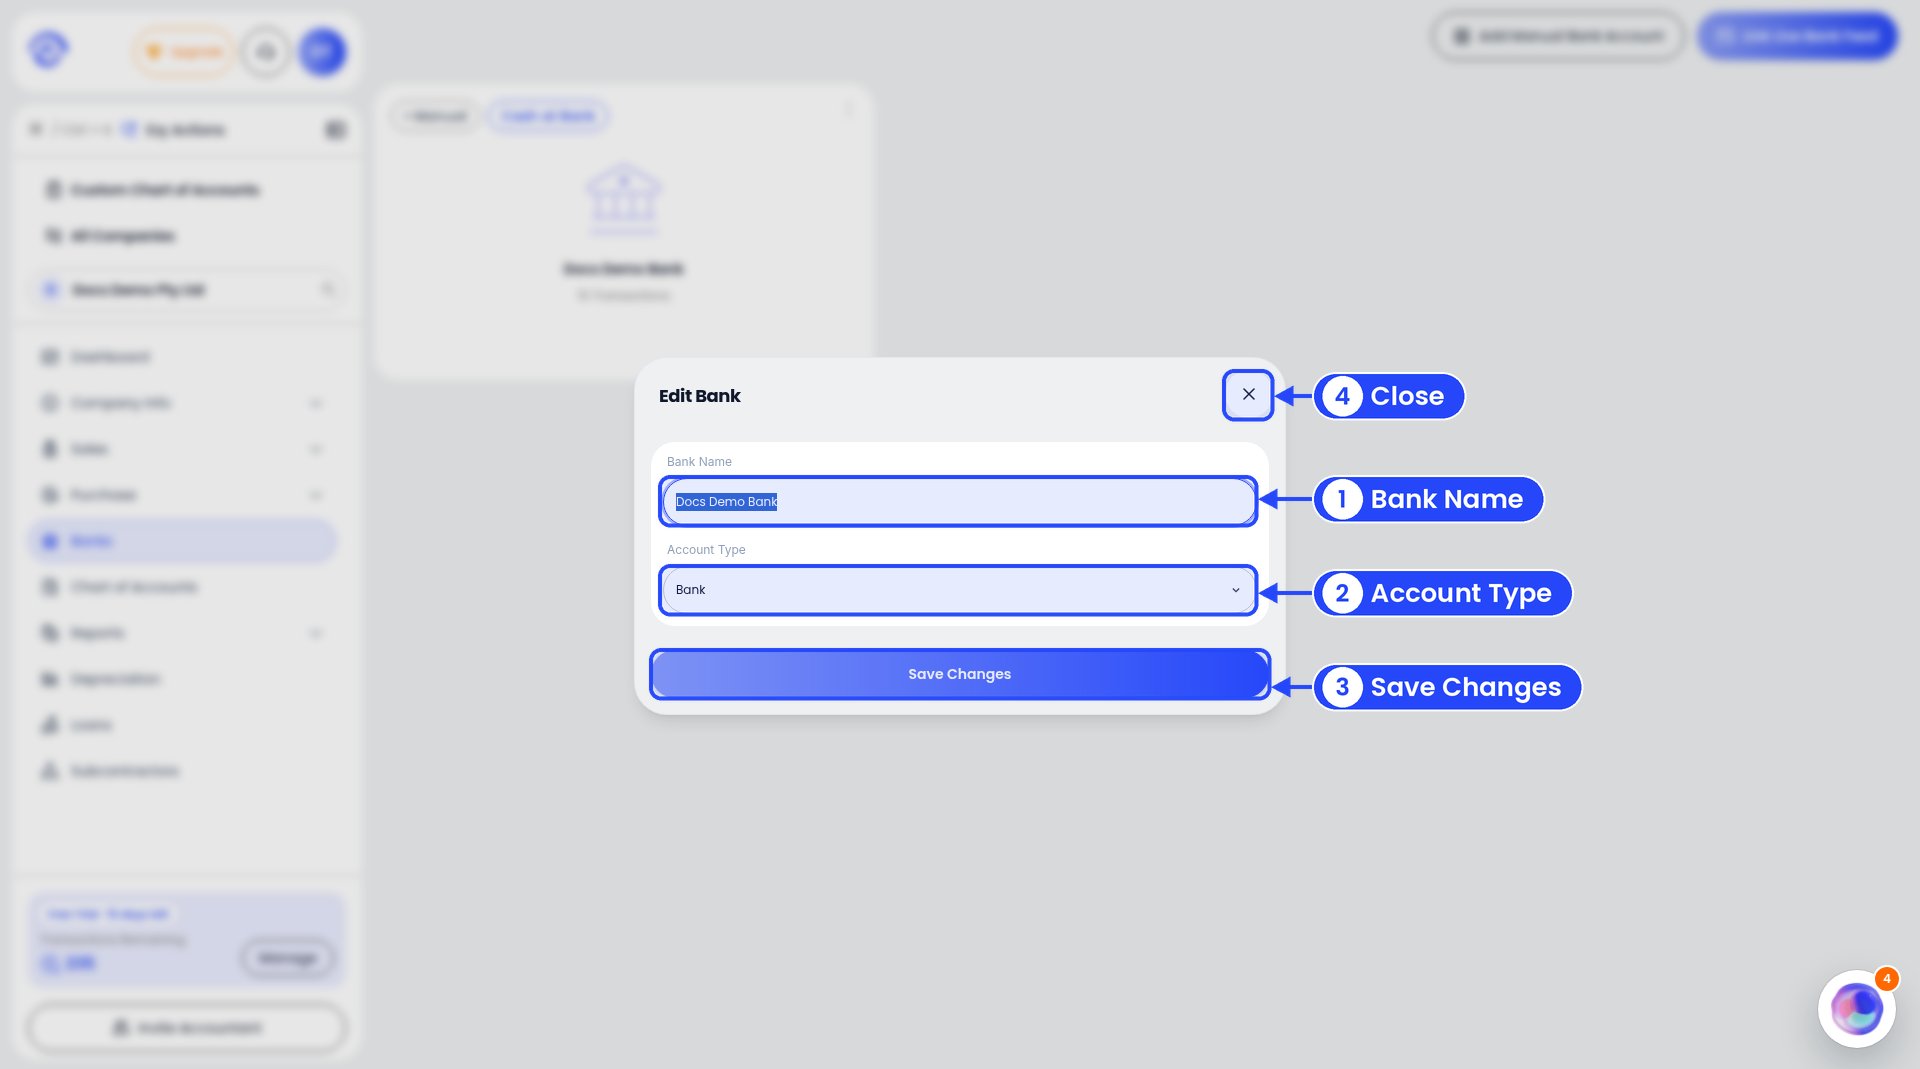
The Edit Bank window
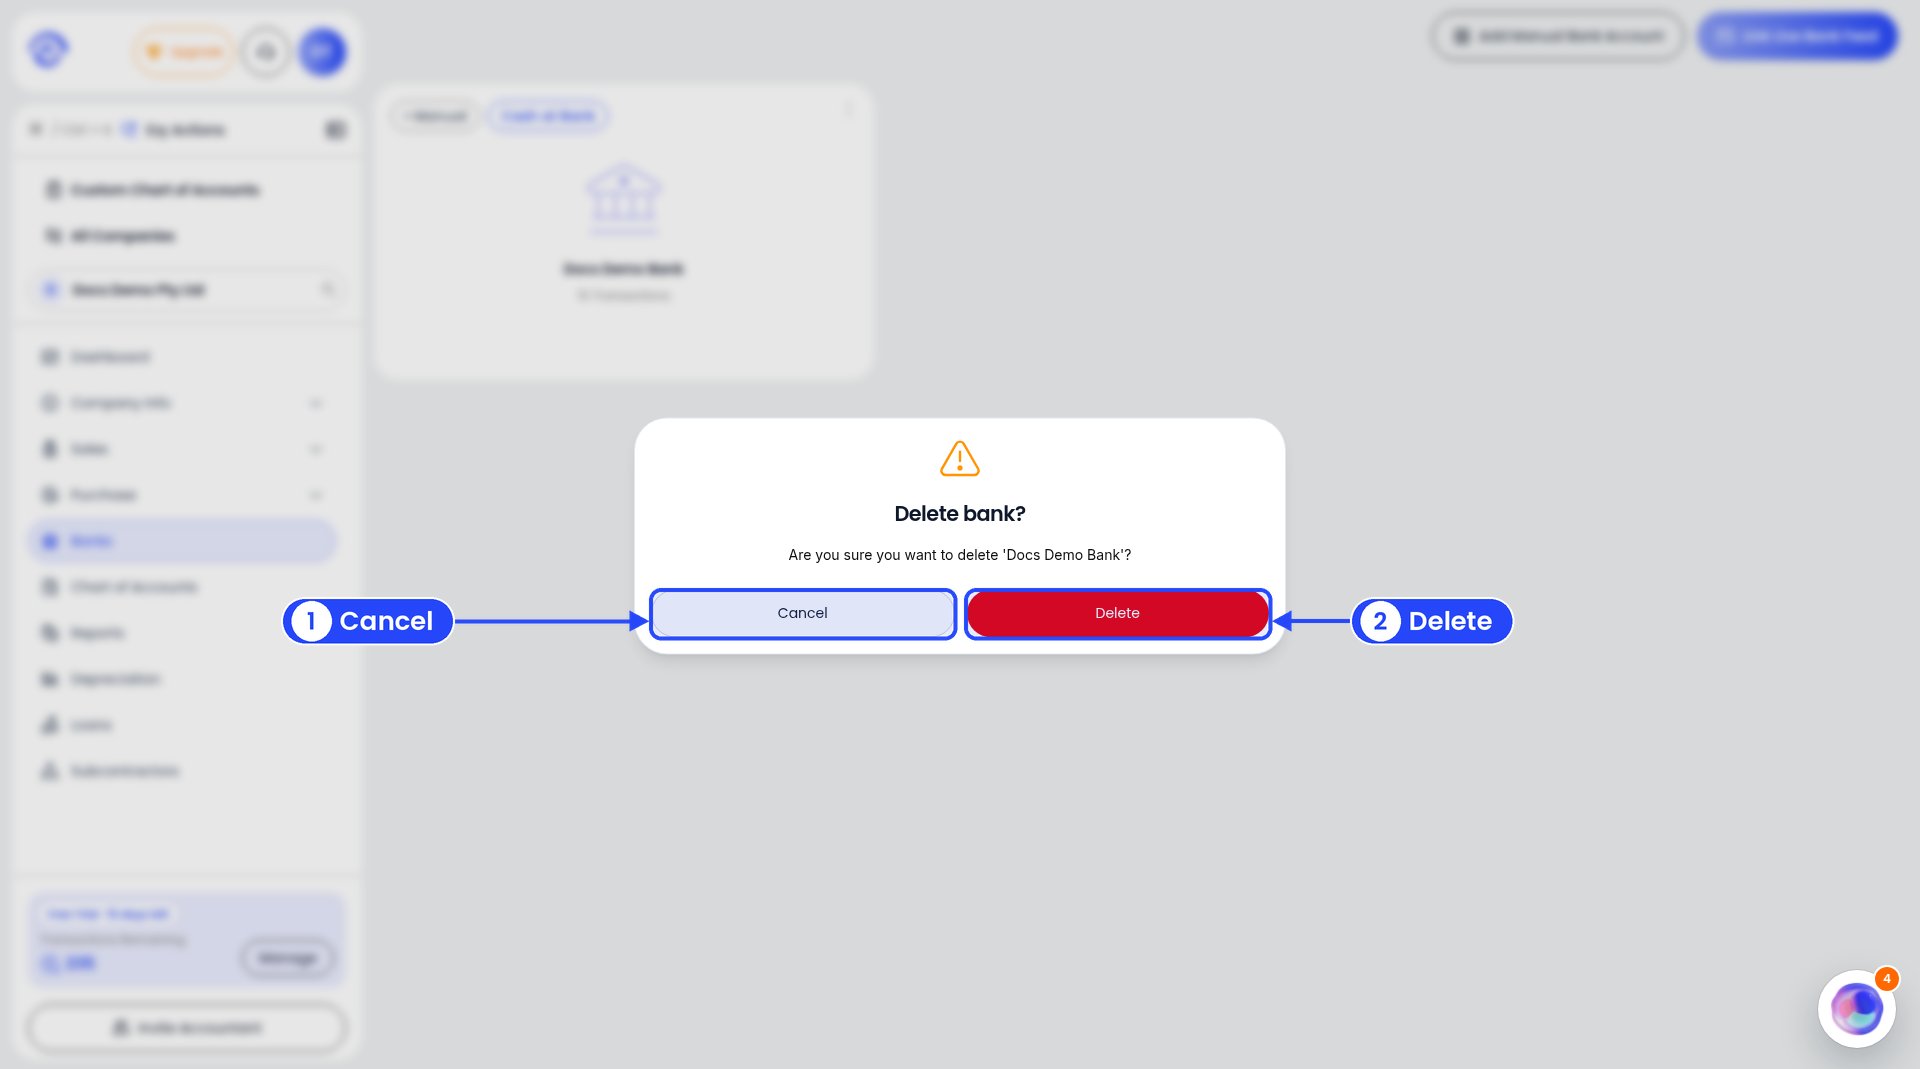
Ezyiah checks before deleting a bank account
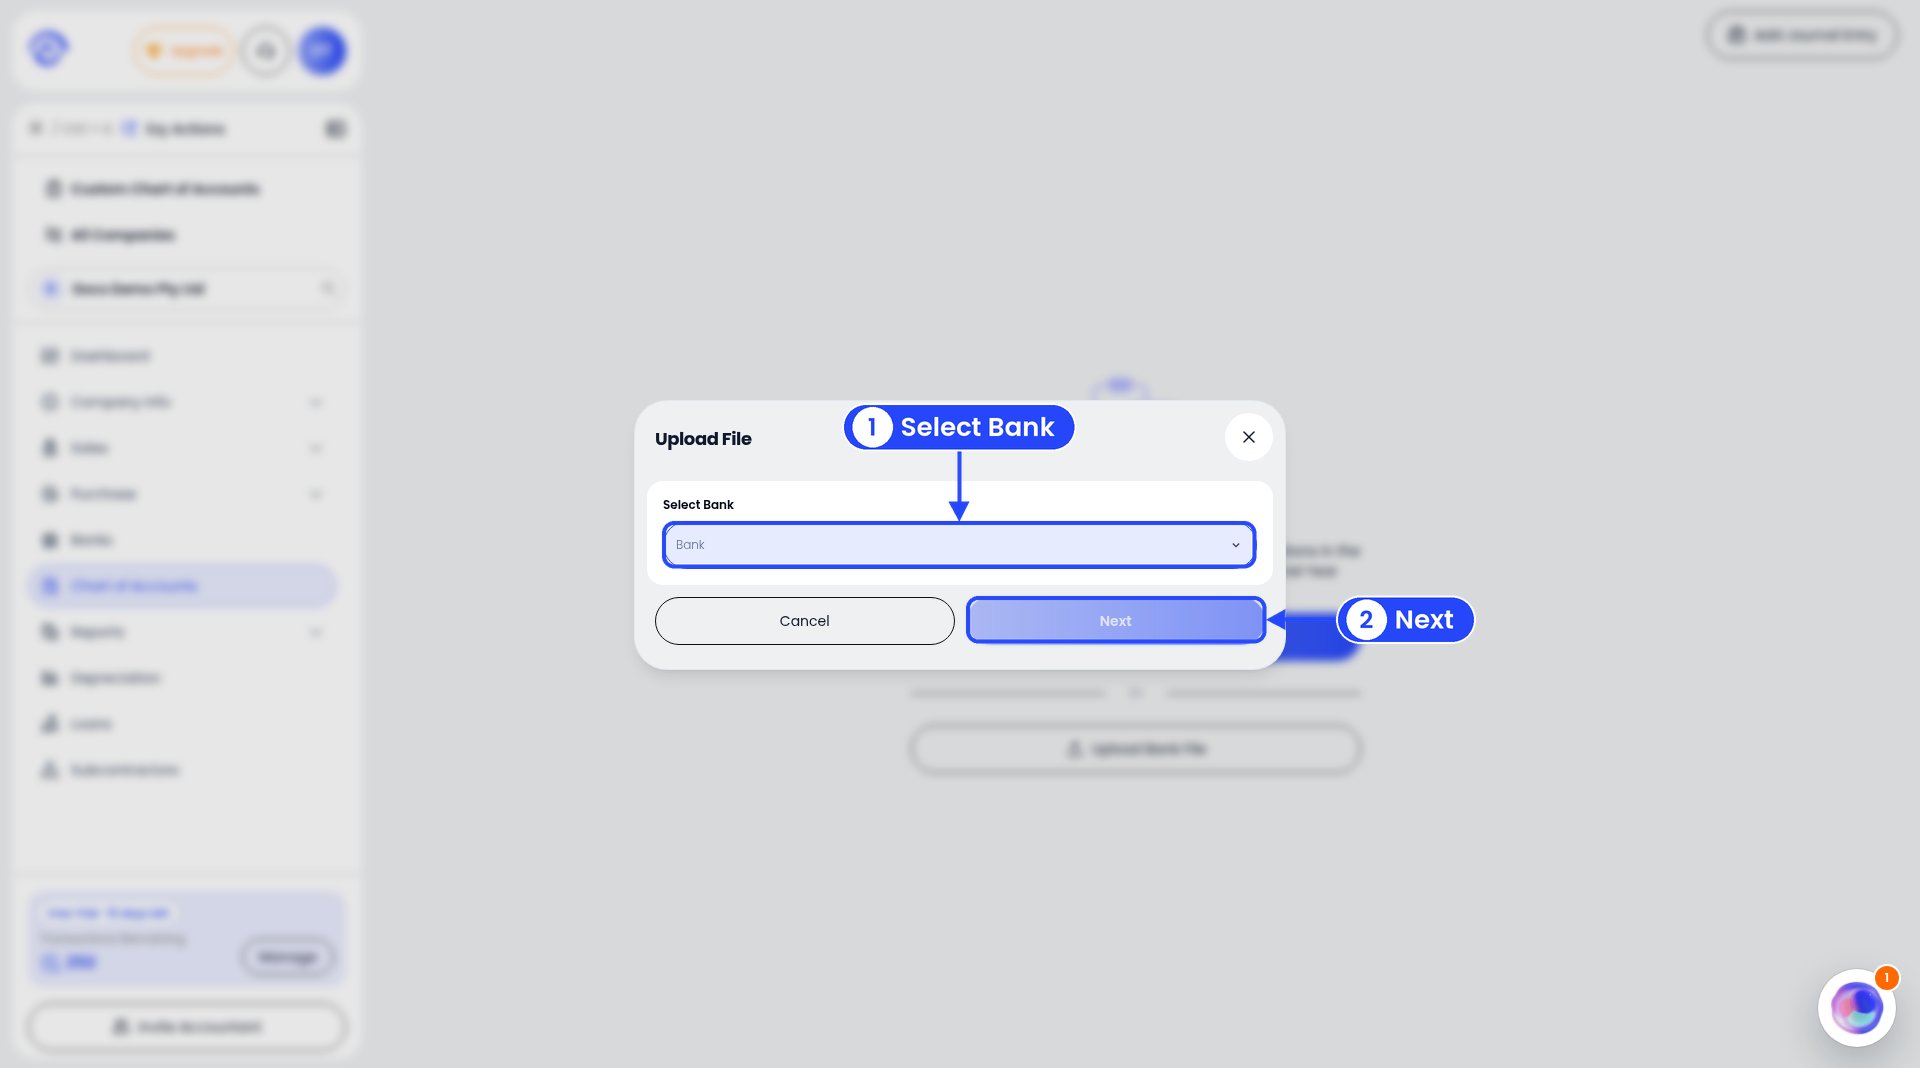
Upload a bank file