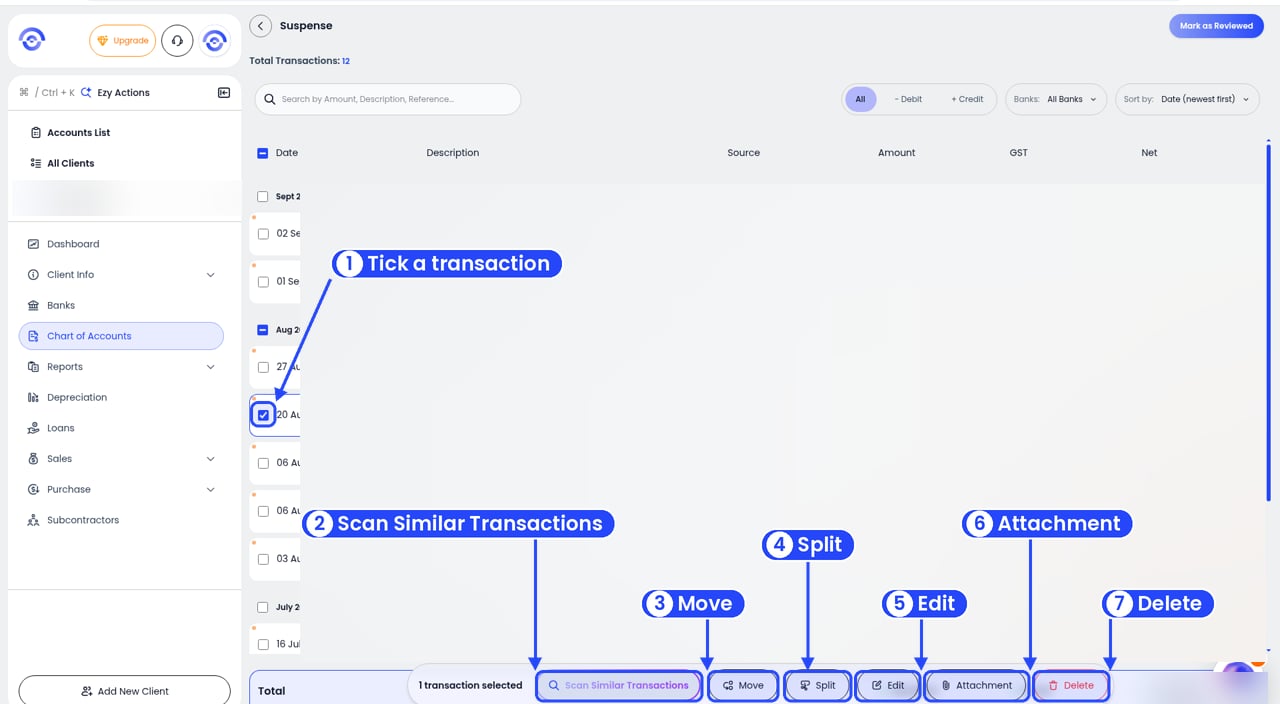
You change transactions in Chart of Accounts, not on the bank feed (that’s view-only). Click Chart of Accounts in the sidebar, open the Financial Year card, then the account card (Chart of Accounts, Income or Expense), and tick the box next to the transaction. A bar appears at the bottom of the screen. It shows how many you’ve selected (for example 1 transaction selected) and these options: Scan Similar Transactions, Move, Split, Edit, Attachment and Delete.
The Suspense transactions list with one row ticked and numbered callouts on the tick box and the bar buttons: Scan Similar Transactions, Move, Split, Edit, Attachment and Delete. Transactions are blurred

Tick a transaction to see what you can do

Fix lots of similar transactions at once

Tick them yourself
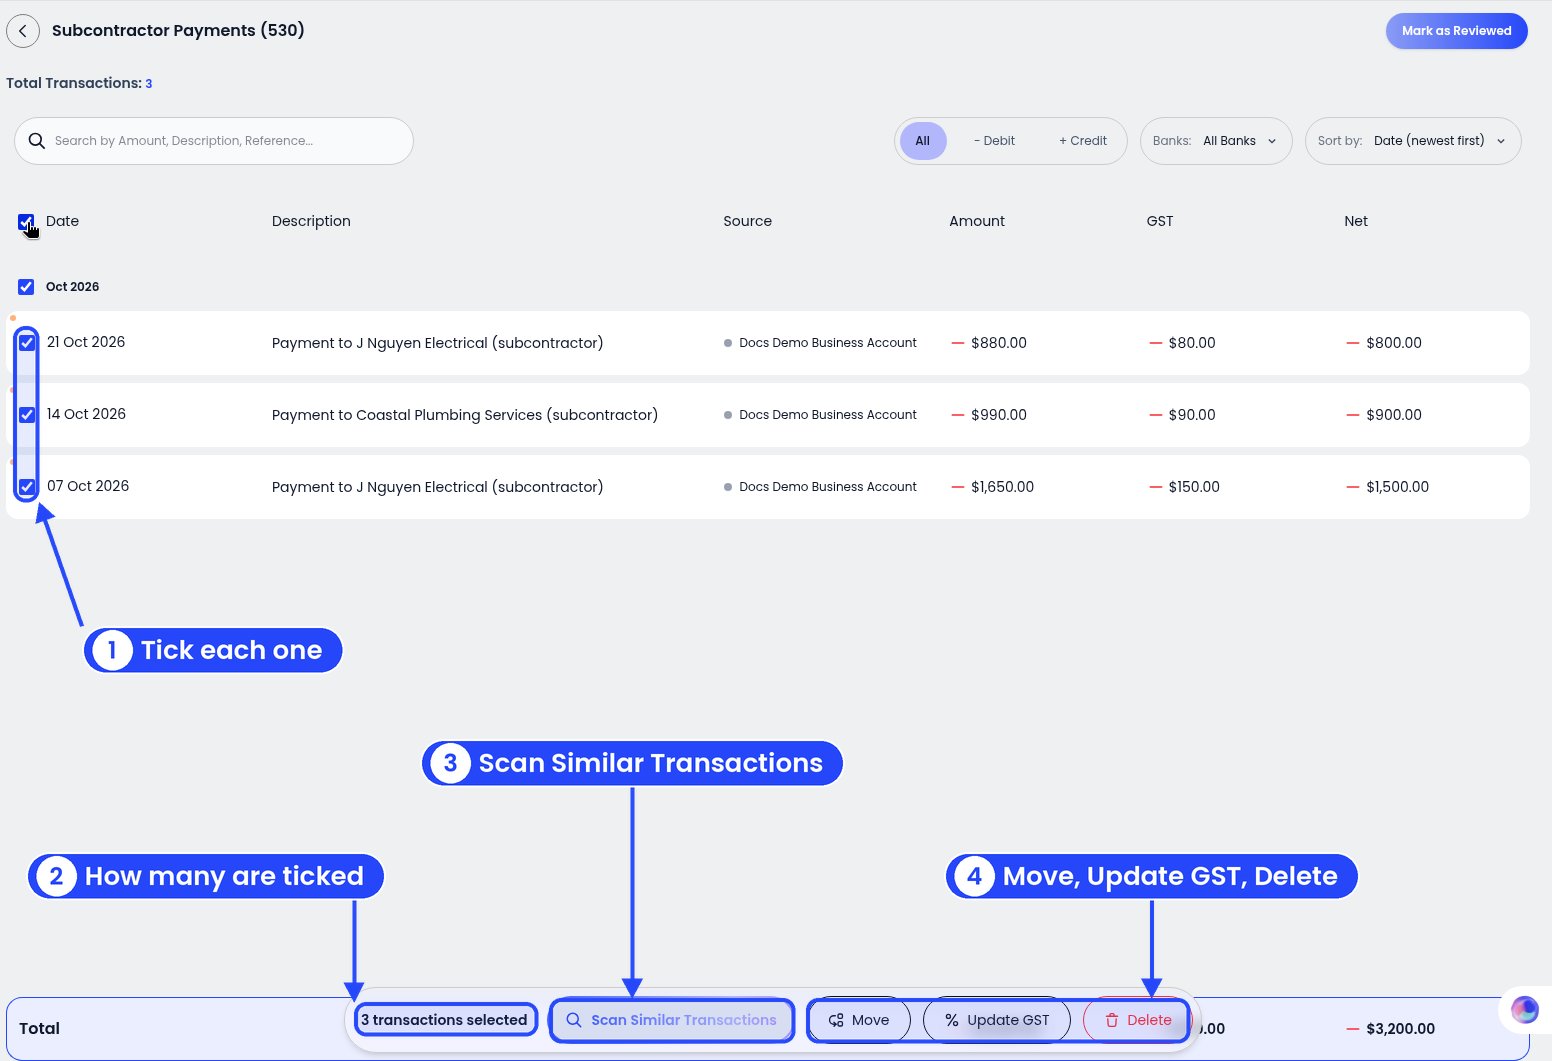
Three transactions ticked, with callouts on the tick boxes and the bottom bar showing 3 transactions selected, Scan Similar Transactions, Move, Update GST and Delete

Tick more than one transaction to change them together

Tick each transaction you want to change. The bar at the bottom shows how many you’ve ticked, for example 3 transactions selected. With more than one ticked, the bar has Scan Similar Transactions, Move, Update GST and Delete. Whatever you pick applies to every ticked transaction. Split, Edit and Attachment only show when one transaction is ticked.

Let Ezyiah find them

Scan Similar Transactions finds transactions like the one you ticked. Then you can fix them all in one go.
1

Tick one and scan

Tick a transaction, then click Scan Similar Transactions. Ezyiah finds others with a matching description.
2

Pick the ones to change

Each match shows the date, description, category, source, amount, GST and net. Click Select all, or tick the ones you want.
3

Choose what to do

Click Delete, Move or Update GST. It applies to every one you picked.

Move a transaction

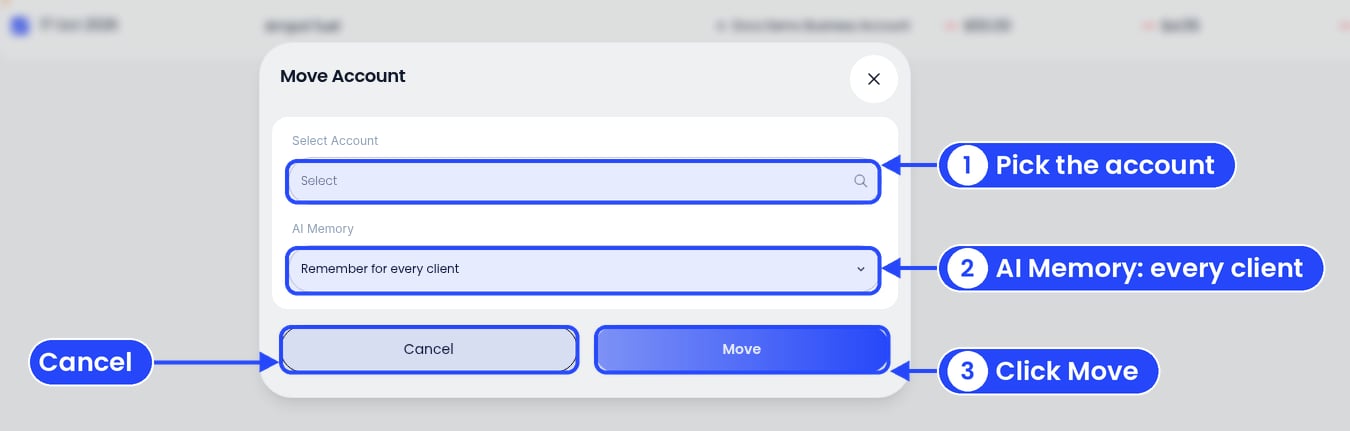
Move a transaction to a different account. You can also tell Ezyiah to remember it.
1

Tick it and click Move

The Move Account window with callouts on Select Account, AI Memory set to Remember for every client, Cancel and Move

The Move Account window

The Move Account window opens. It has Select Account, AI Memory, Cancel and Move.
2

Pick the account

Click Select Account and pick the right one. You can search by name or code.
3

Choose what Ezyiah remembers
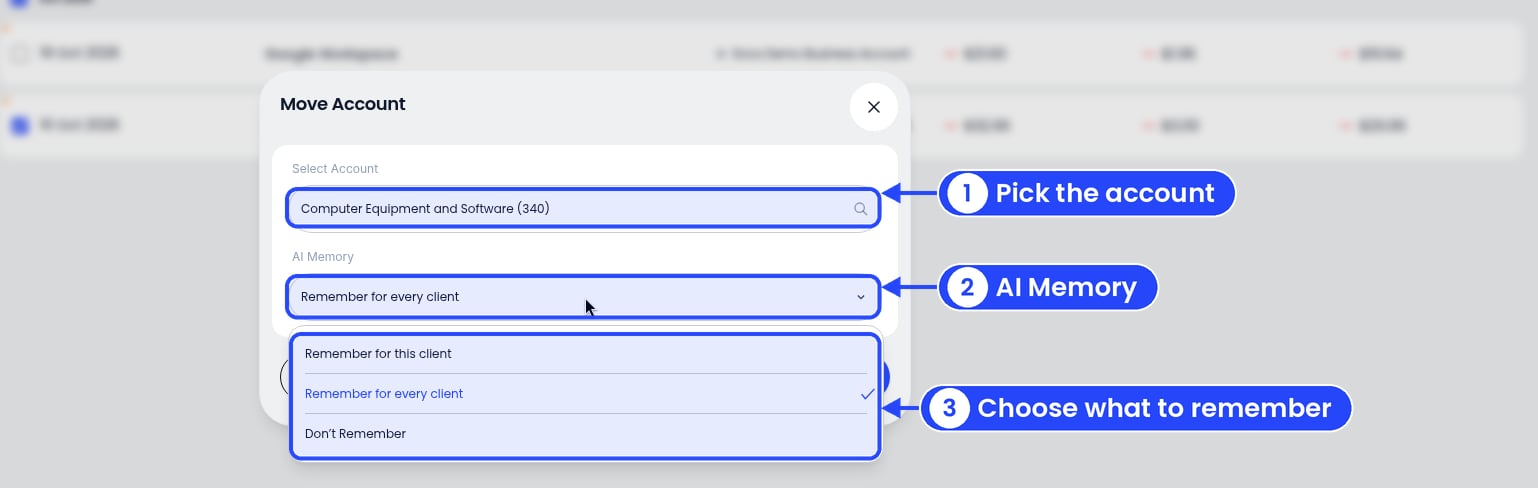
The Move Account window with the AI Memory list open, showing Remember for this client, Remember for every client and Don't Remember

The three AI Memory options

In AI Memory, pick Remember for this client, Remember for every client or Don’t Remember. It starts on Remember for every client, so change it if the rule is only for this client. See AI Memory.
4

Click Move

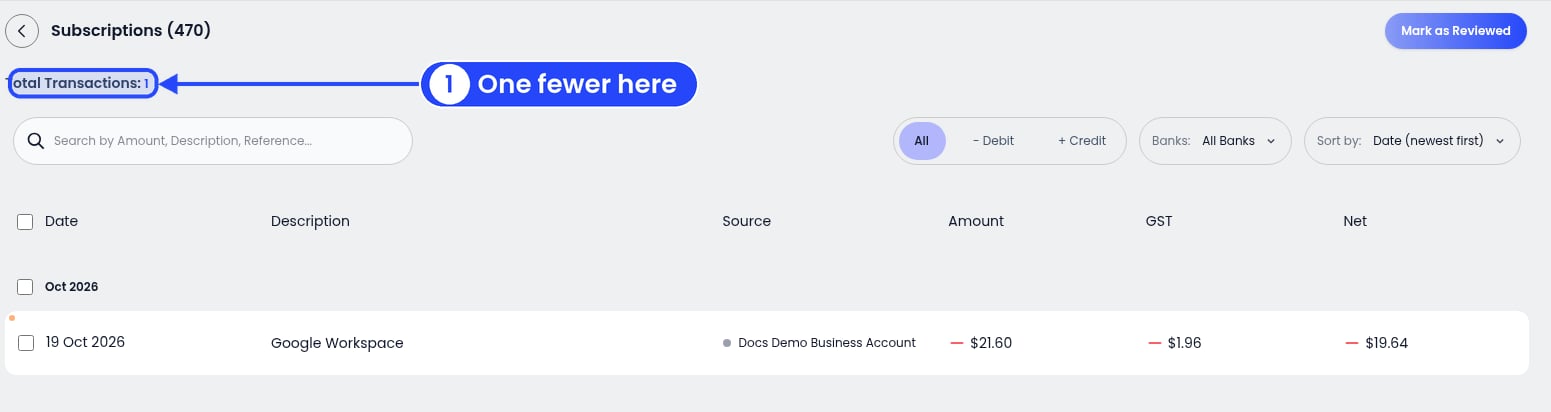
The Subscriptions account after a move, with a callout on Total Transactions: 1. Only one transaction is left in the list

The moved transaction has left this account

The transaction moves straight away. It leaves this account’s list and shows in the account you picked. To leave without moving it, click Cancel.

Split a transaction

Split one transaction across more than one account. For example, a $220 Bunnings payment that was $165 of materials and $55 of cleaning supplies.
1

Tick it and click Split

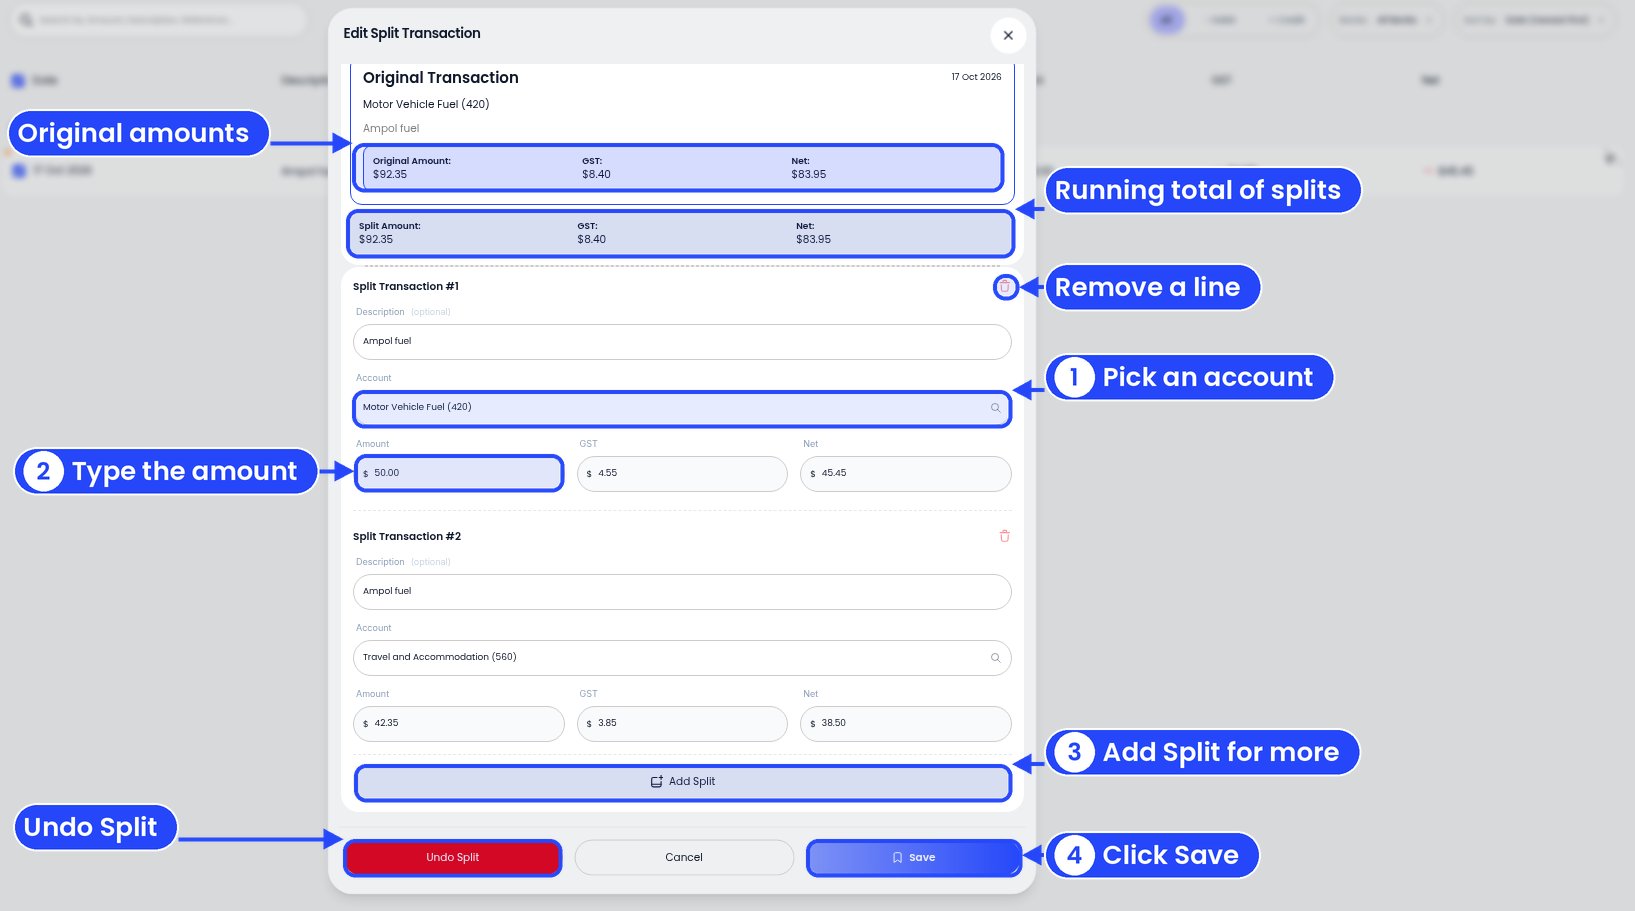
The Edit Split Transaction window with callouts on the Original Transaction amounts, the Split Amount total, the account and amount of the first line, the red bin, Add Split, Undo Split and Save

The split window. This one is already split, so it also has Undo Split.

The Split Transactions window opens. At the top are two boxes:
  • Original Transaction: the Original Amount, GST and Net of the transaction you’re splitting.
  • Split Amount: the Split Amount, GST and Net of your split lines added up. It changes as you type.
2

Fill in each part

Each part is a Split Transaction line. Pick the Account and type the Amount. GST and Net are worked out for you. Description is optional. Click Add Split for another line, or the red bin to remove one.
3

Save

When the Split Amount matches the Original Amount, click Save. To leave without saving, click Cancel.
4

Check the split
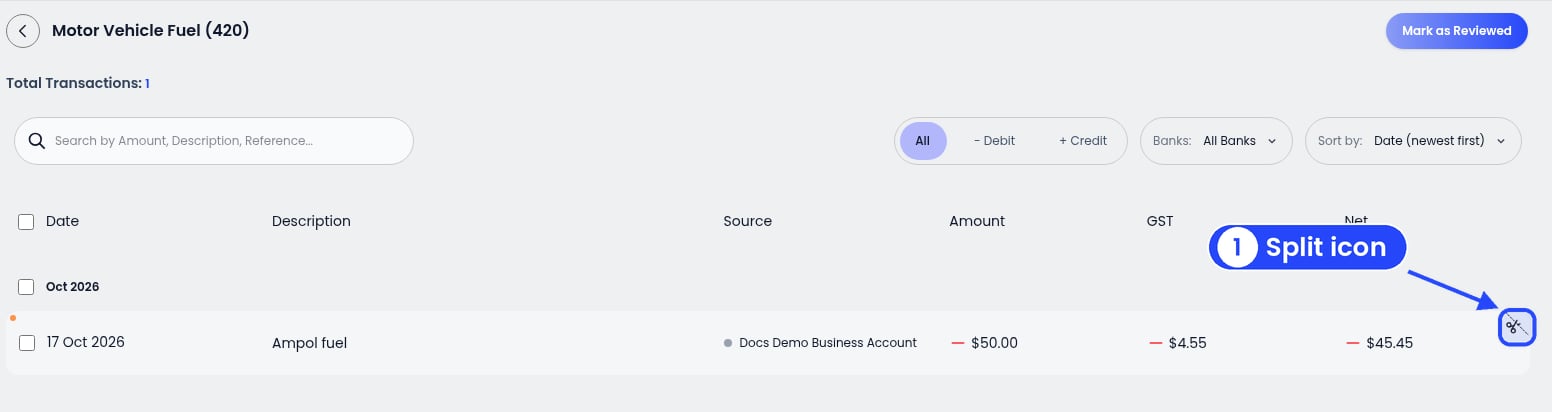
The Motor Vehicle Fuel account with one $50.00 transaction and a callout on the scissors icon at the end of its row

A split part shows a scissors icon

Each part now sits in the account you picked for it, with a scissors icon at the end of its row.
The parts must add up to the original total before you can save.

Change or undo a split

Tick one of the split parts and click Split. The Edit Split Transaction window opens (see the picture above).
  • To change the split, edit the lines and click Save.
  • To put it back as one transaction, click Undo Split.

Edit a transaction

Change the date, description, amount, GST or net. Tick it, click Edit, make your changes and click Save.

Add an attachment

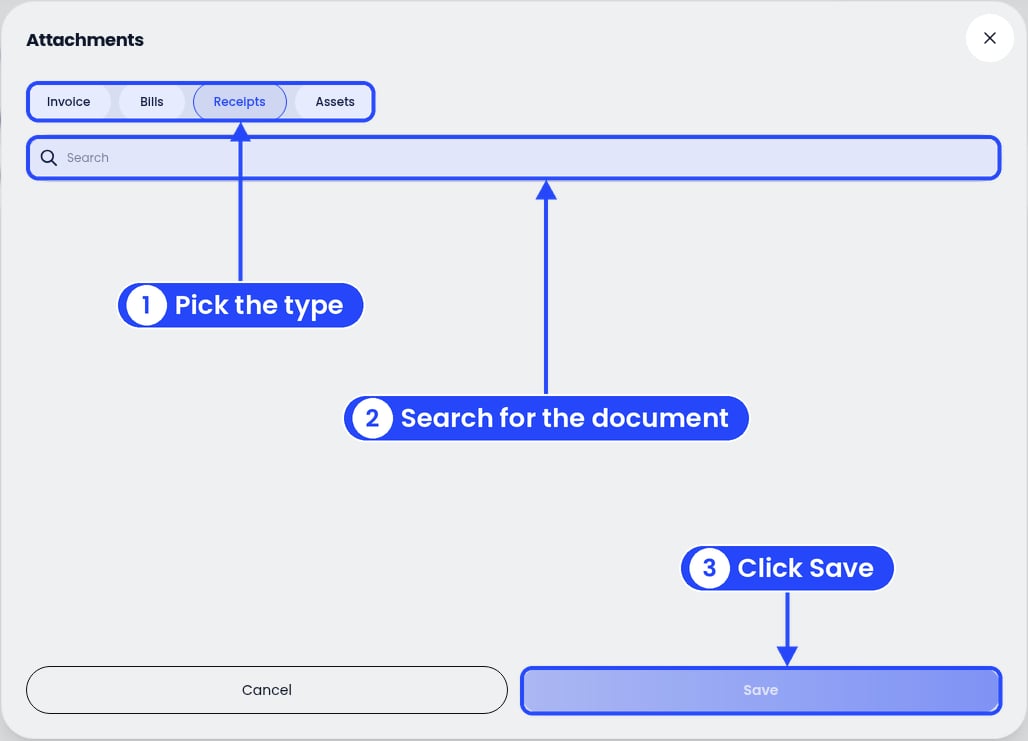
The Attachments window with callouts on the Invoice, Bills, Receipts and Assets tabs, the Search box and Save

The Attachments window

Link an invoice, bill, receipt or asset to the transaction. Tick it and click Attachment. In the Attachments window, pick the Invoice, Bills, Receipts or Assets tab, use Search to find the document, tick it, then click Save. You’ll see “Transaction linked.” The transaction then shows a document icon. To remove a link, tick the transaction, click Attachment, open the Transactions tab, click the x next to the transaction, then click Save. See Undo a wrong match.

Delete a transaction

This removes the transaction for good. You can’t undo it. Tick it, click Delete, then click Delete again to confirm. Changed your mind? Click Cancel.