BAS Preparation
Step 1: Initiate the BAS Wizard
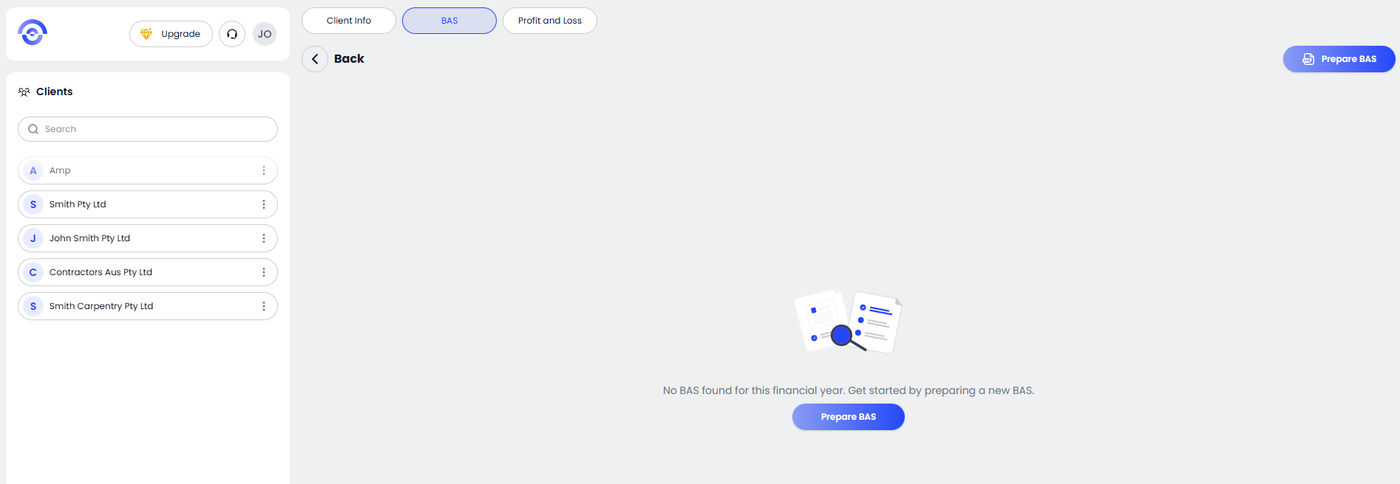
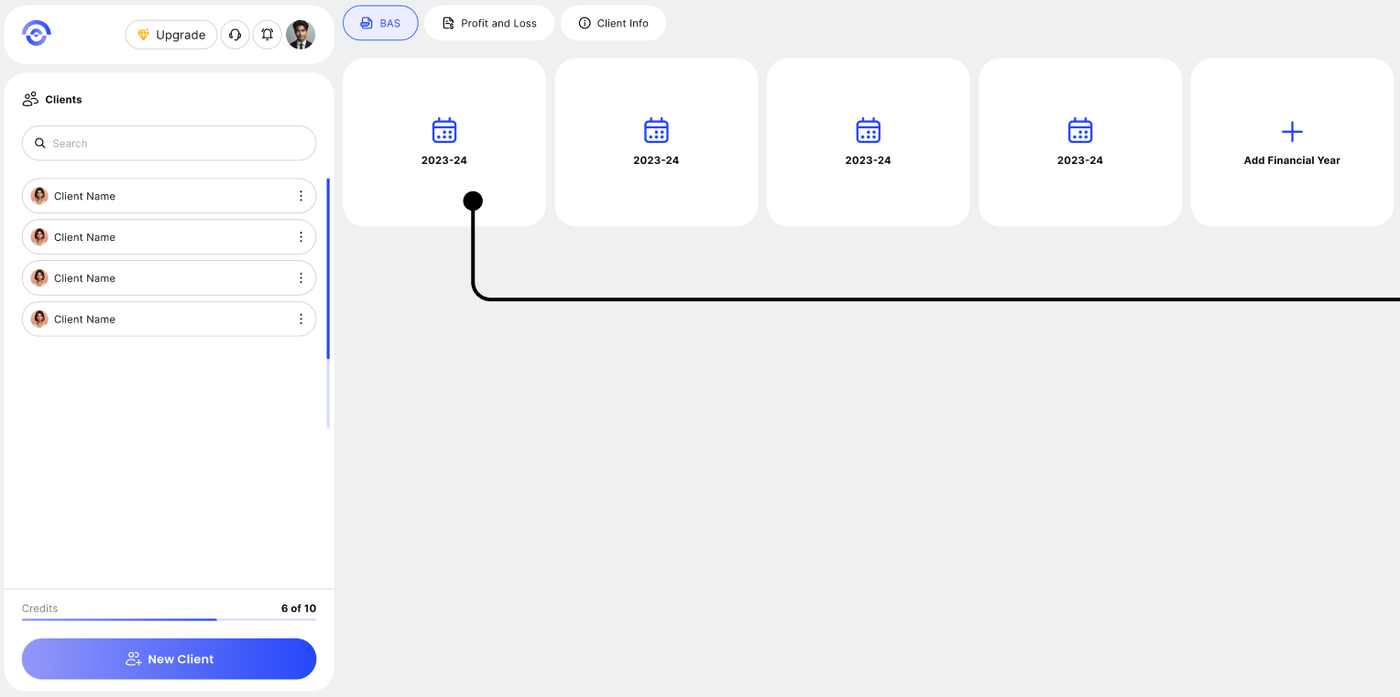
To begin, select your client from the sidebar and navigate to the BAS tab located in the top navigation bar. If no records exist, click the Prepare BAS button in the center of the screen or the top-right corner to launch the guided setup.
Step 2: Establish the Financial Year
If this is a new reporting cycle, you will be prompted to add a financial year container. Click the + Add Financial Year tile. In the "Add Year" modal, enter the relevant year (e.g., 2025-2026) and click Add. This ensures your data is correctly archived and aligned with Australian taxation standards.
Step 3: Configure Reporting Frequency
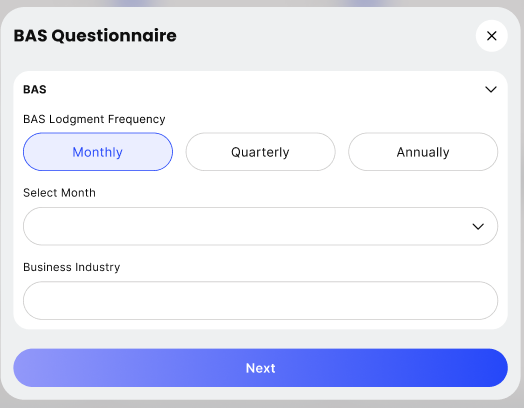
Complete the BAS Questionnaire to define how Ezyiah should process your data.
Lodgment Frequency: Select Monthly, Quarterly, or Annually based on the client's ATO requirements.
Select Period: Use the dropdown menu to choose the specific month or quarter you are currently reconciling.
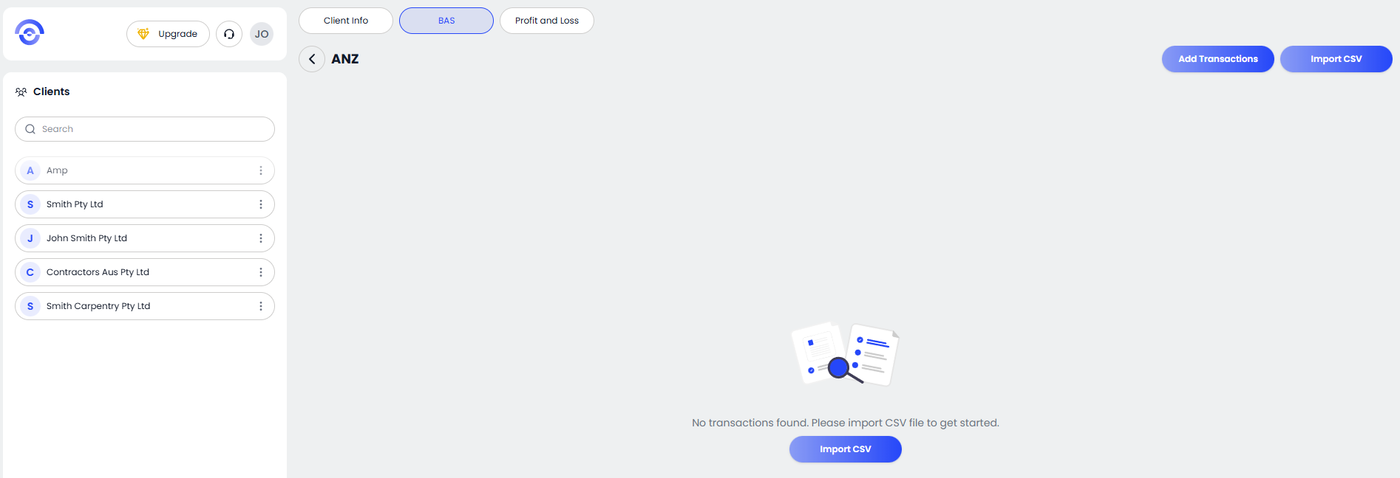
Step 4: Import Transaction Data
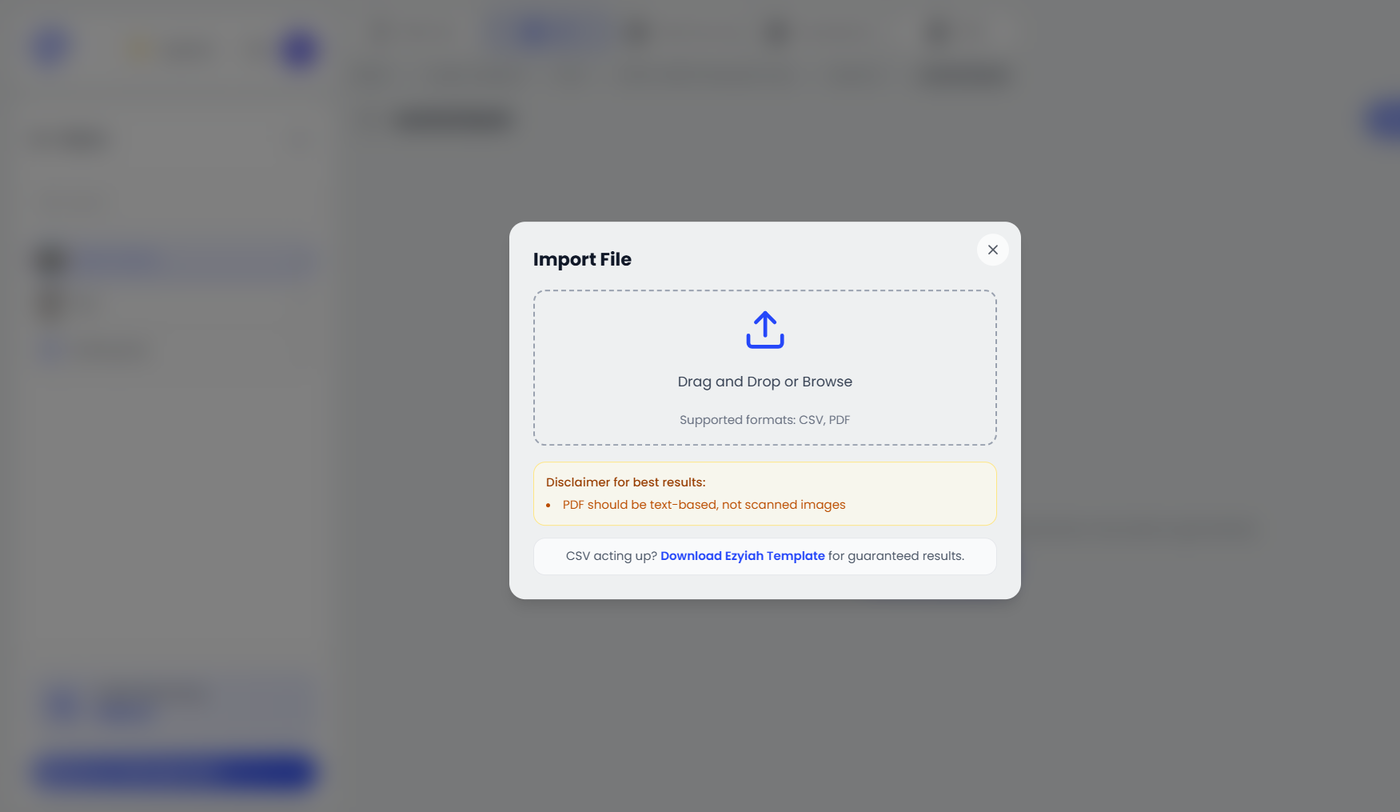
Once your reporting period is set, you can provide your transaction data. You now have two supported formats in the Document Upload portal.
Direct Upload
• Drag and drop your bank CSV file
• Or upload a PDF bank statement
• The system will automatically extract and process transactions
Use a Template
• Download our standardized CSV template
• Add your transactions manually
• Upload the completed file
Notes
• PDF uploads work best with clear bank-generated statements
• Review extracted data before finalizing
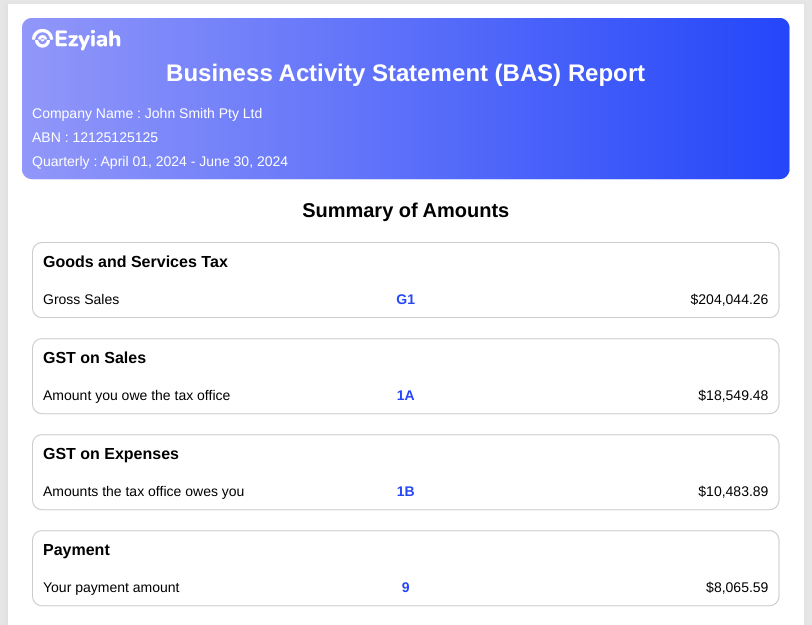
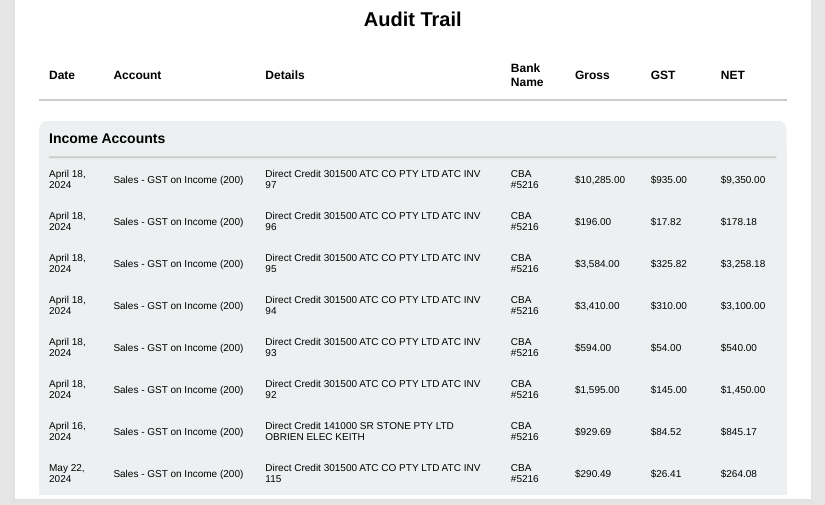
Step 5: Review Summary & Audit Trail
After the AI processes your data, you will be presented with a Summary of Amounts. This provides a clear breakdown of:
G1: Total Gross Sales.
1A & 1B: GST on Sales vs. GST on Expenses.
9: Your final payment or refund amount.
Review the Audit Trail below the summary to verify individual line items before clicking Download to export your final, branded report.