Live Logs & File Uploads
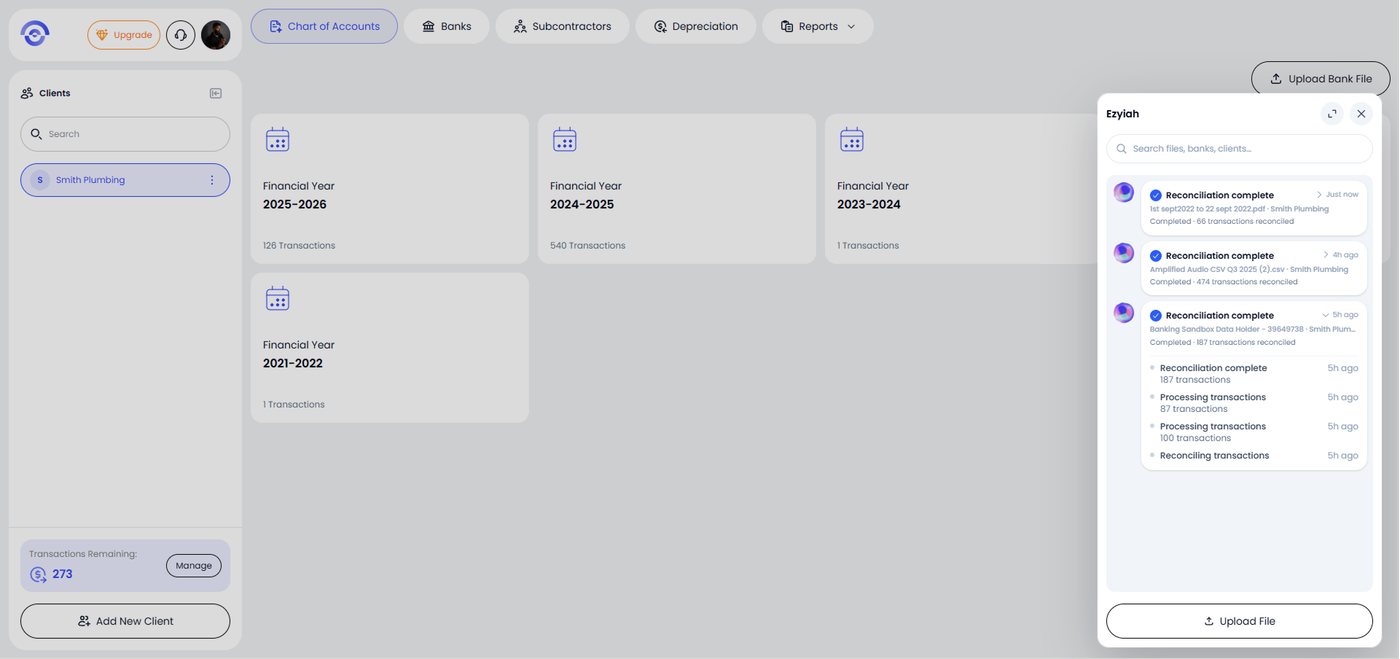
The Ezyiah Assistant is the panel in the bottom right corner of the screen. Use it to upload bank statements and track reconciliation progress. You can continue working in Ezyiah while files are uploading and reconciling in the background.
Step 1 — Open the Ezyiah Assistant
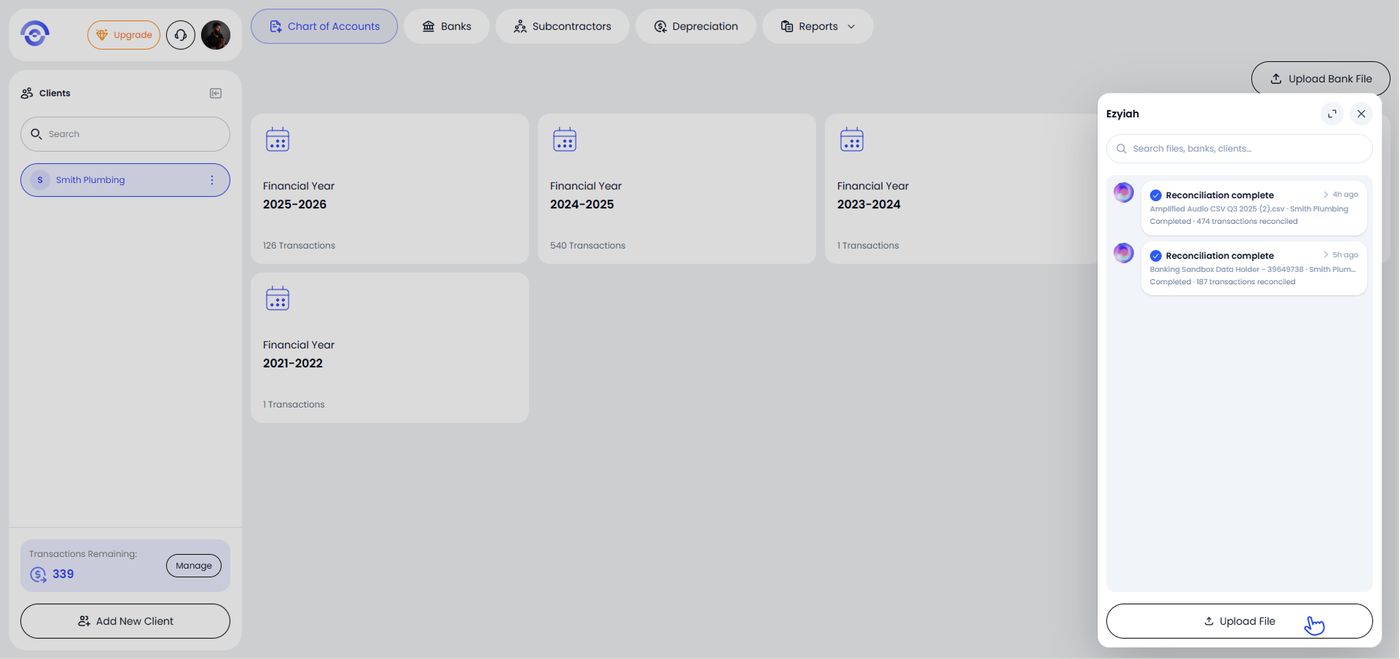
Click the Ezyiah Assistant icon in the bottom right corner of the screen. The panel slides open showing your recent reconciliation activity and an Upload File button at the bottom.
The Assistant panel is draggable. Click and drag it to reposition it — it will snap to either the left or right side of the screen.
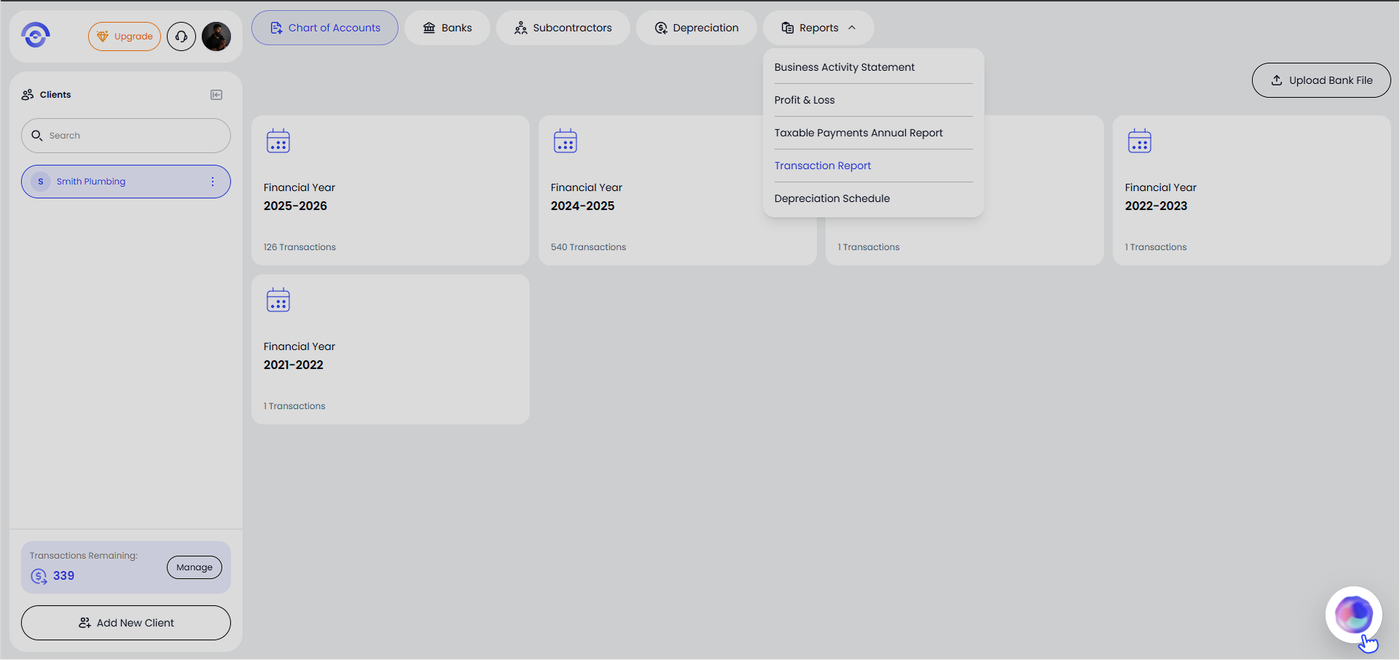
Step 2 — Click Upload File
Click Upload File at the bottom of the Assistant panel.
Step 3 — Select a Bank
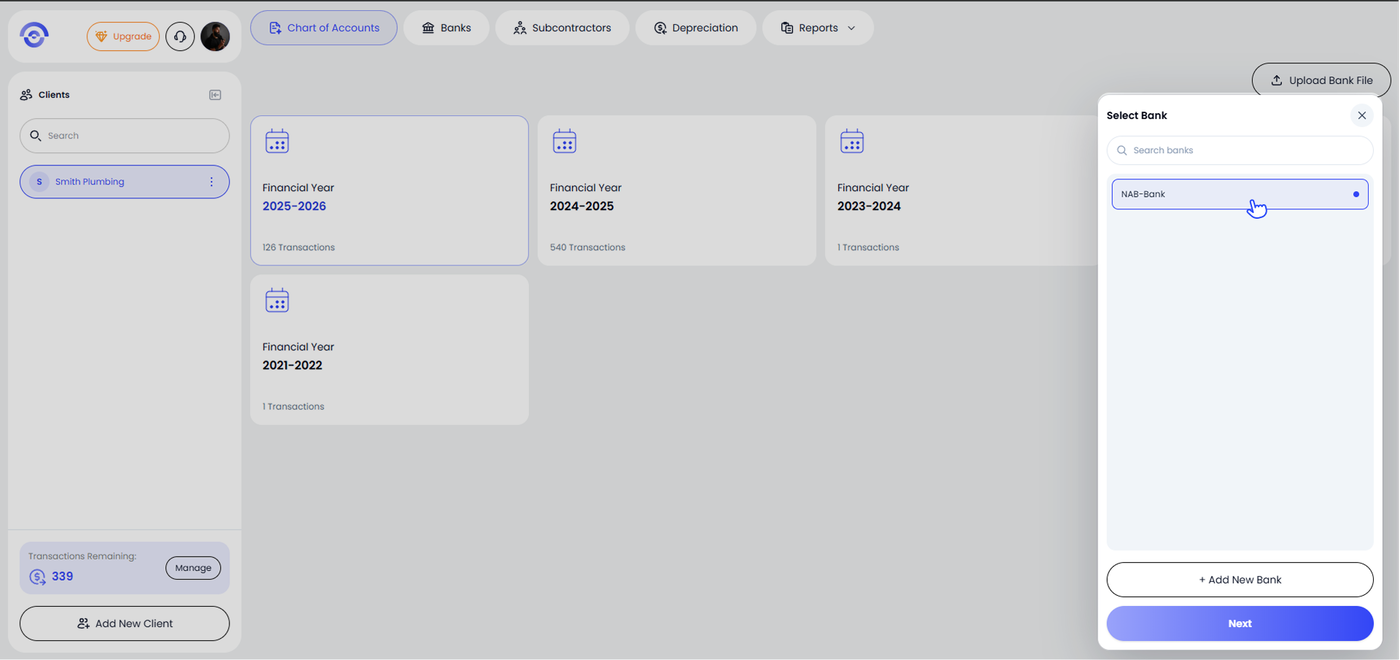
The Select Bank panel opens. Choose the bank account this statement belongs to from the list. You can search by bank name if needed.
If the bank is not listed, click + Add New Bank to add it before continuing.
Once you have selected the bank, click Next.
Step 4 — Upload Your Files
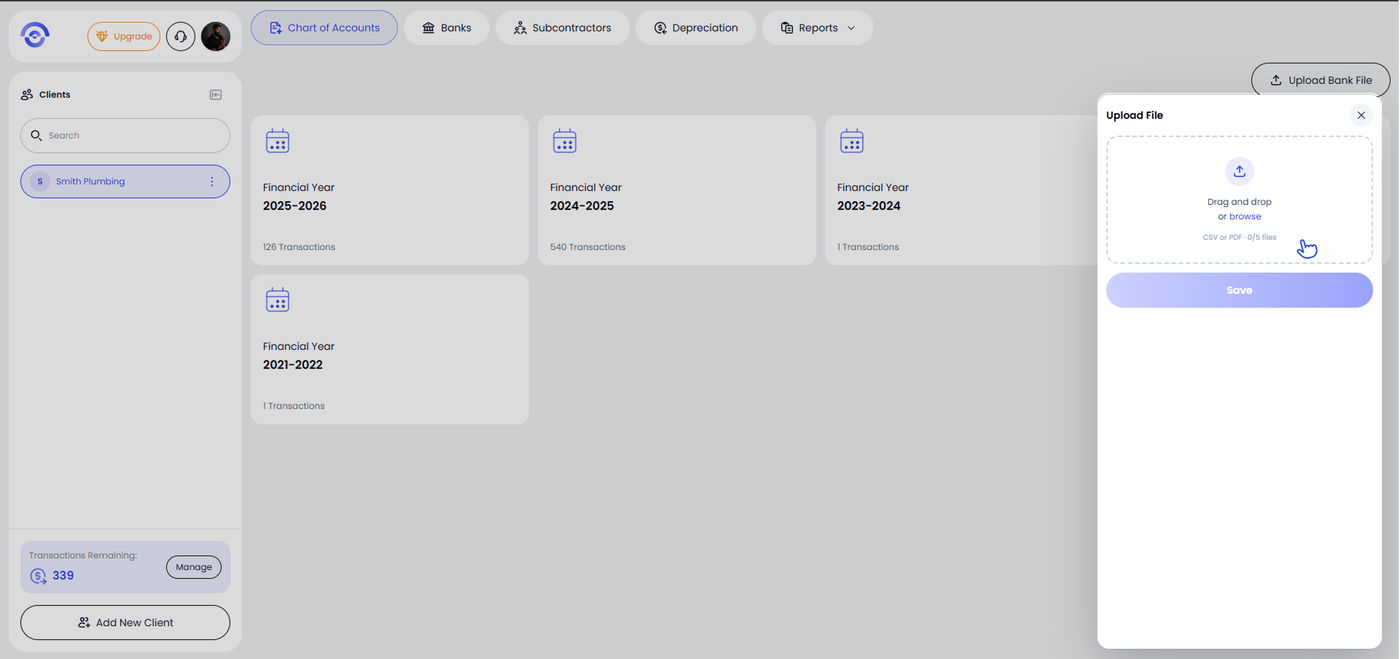
The Upload File panel opens with a drag and drop area. You can upload up to 5 files at a time. Accepted formats are CSV and PDF.
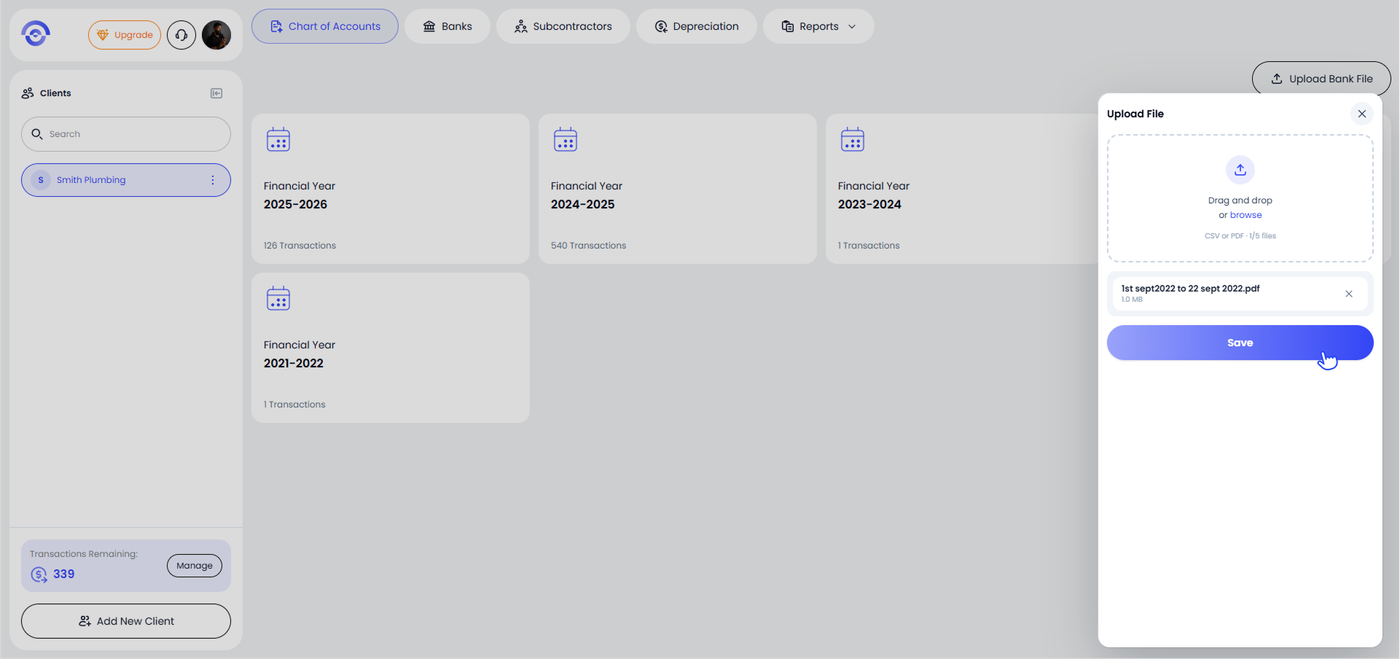
Drag your bank statement files into the upload area, or click browse to select them from your computer. Each uploaded file appears listed below the drop zone with its file name and size.
When all files are added, click Save.
Step 5 — Ezyiah Uploads and Reconciles
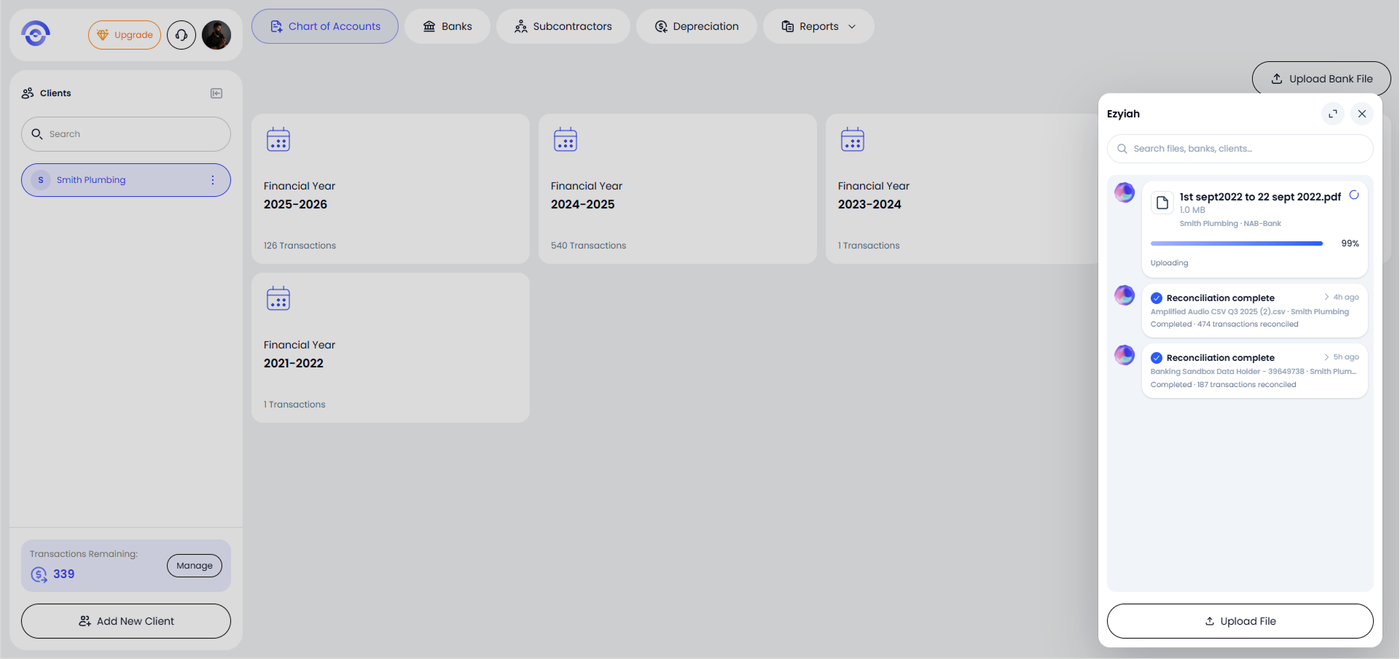
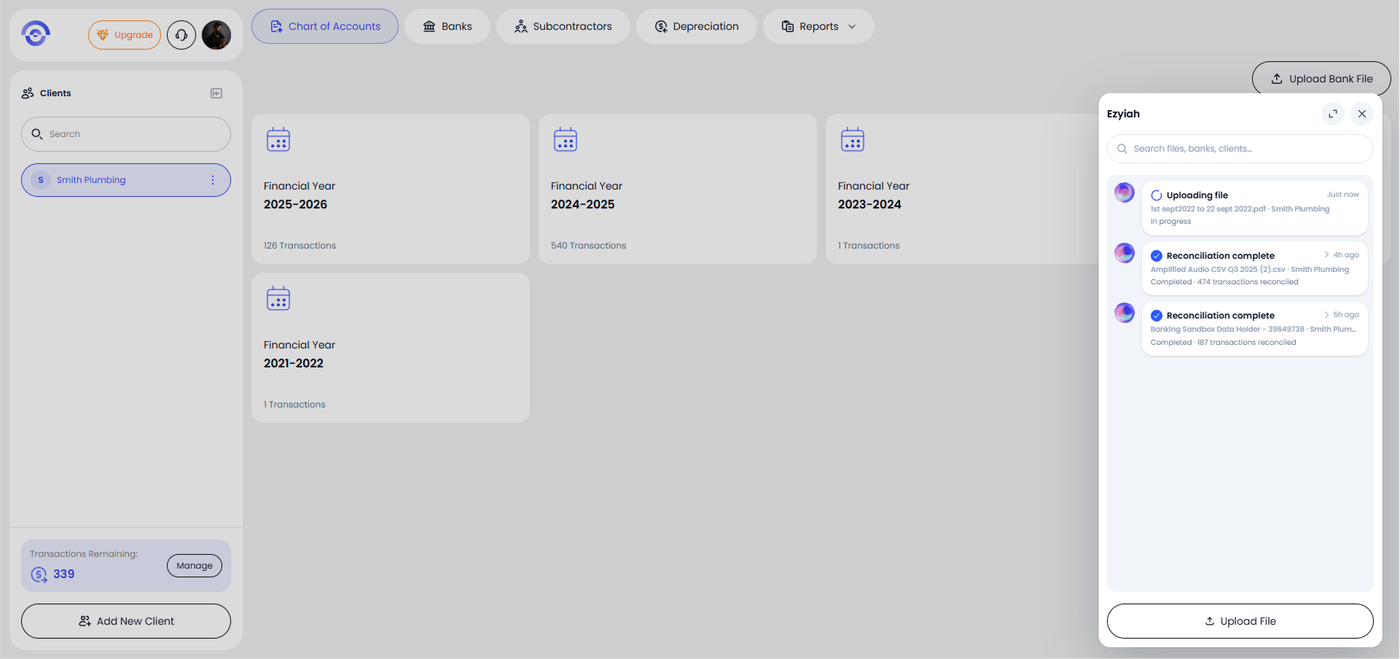
After clicking Save, the Assistant panel shows the upload progress in real time. You will see the file move through the following stages:
Uploading — the file is being transferred, with a progress bar showing the percentage complete
Uploading file — upload confirmed, reconciliation is about to begin
Reconciling transactions — Ezyiah is processing and categorising the transactions
You can navigate anywhere in Ezyiah while this is happening. The reconciliation runs in the background.
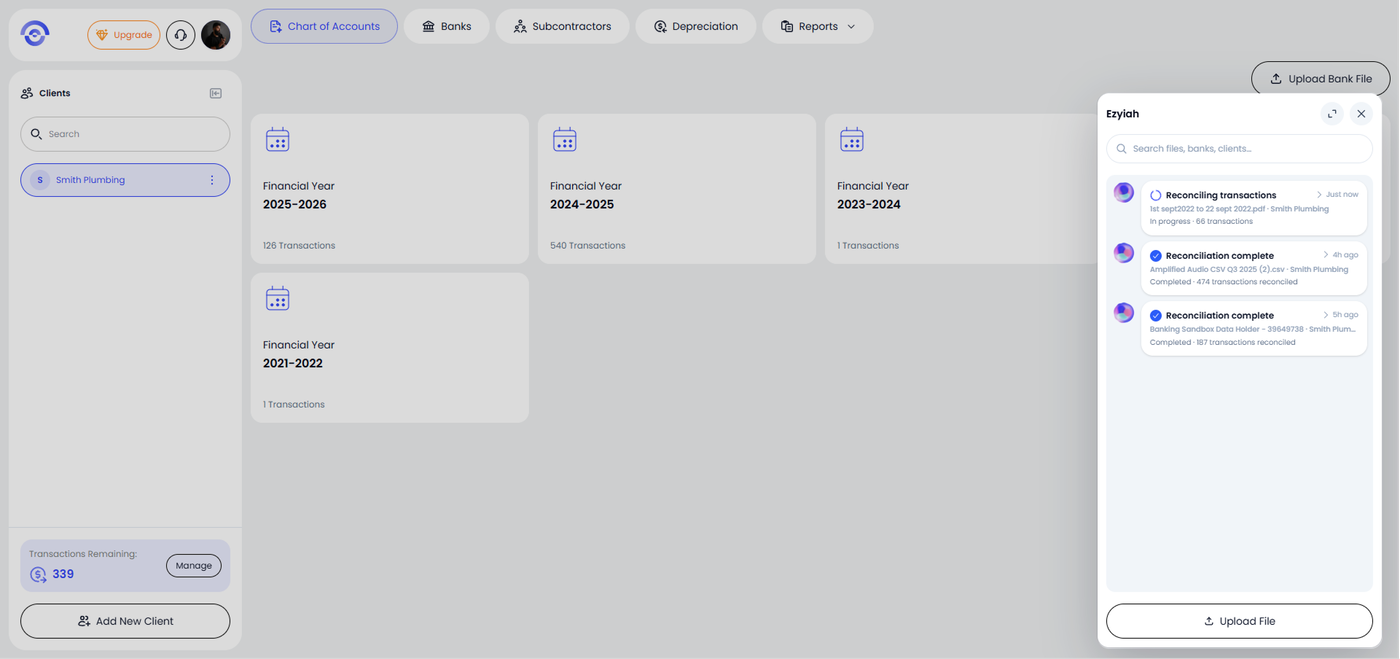
Step 6 — Reconciliation Complete
When reconciliation finishes, the top entry updates to Reconciliation complete with the file name, client name and total number of transactions reconciled. The new transactions are now available in your Chart of Accounts ready for review.
Click the completed entry to expand it and see a full activity log showing each processing stage and how many transactions were handled at each step.