Editing, Moving, Splitting and Deleting Transactions
To edit, move, split or delete a transaction, open the account it belongs to from the Chart of Accounts, tick the checkbox next to the transaction, then select the action from the toolbar that appears at the top of the screen.
Edit a Transaction
Use Edit to update the date, description, amount, GST or net on an existing transaction.
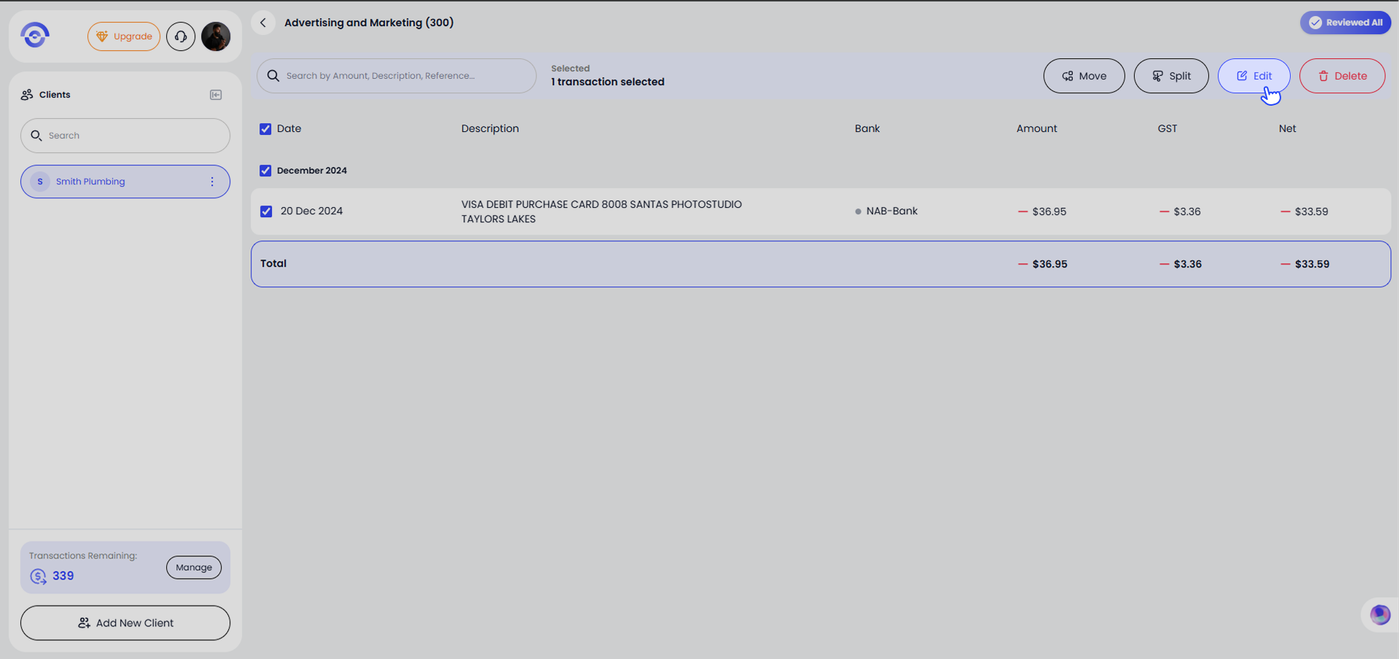
Step 1 — Select the transaction and click Edit
Tick the checkbox next to the transaction you want to edit. The action toolbar appears at the top of the screen showing Move, Split, Edit and Delete. Click Edit.
Step 2 — Update the details and save
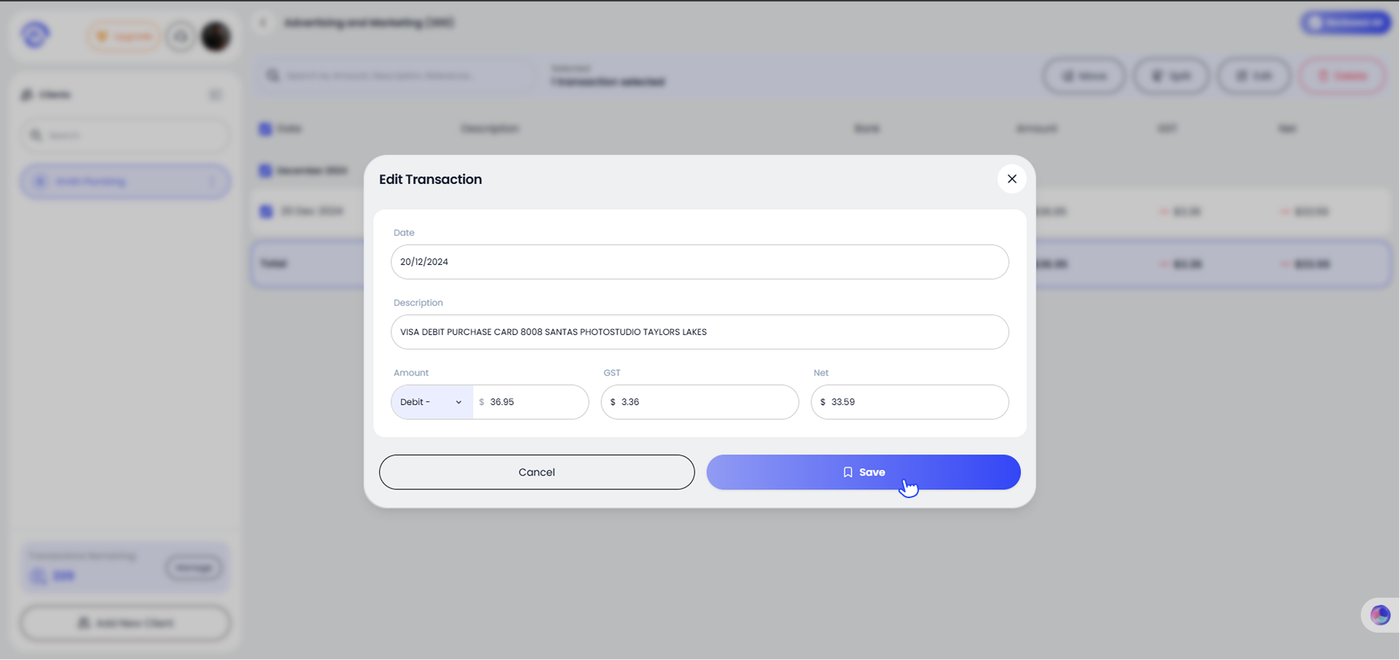
The Edit Transaction modal opens showing the current date, description, amount, GST and net. Update any fields you need to change, then click Save.
Move a Transaction
Use Move to reassign a transaction to a different account. You can also set an AI Memory preference so Ezyiah remembers this coding choice for next time.
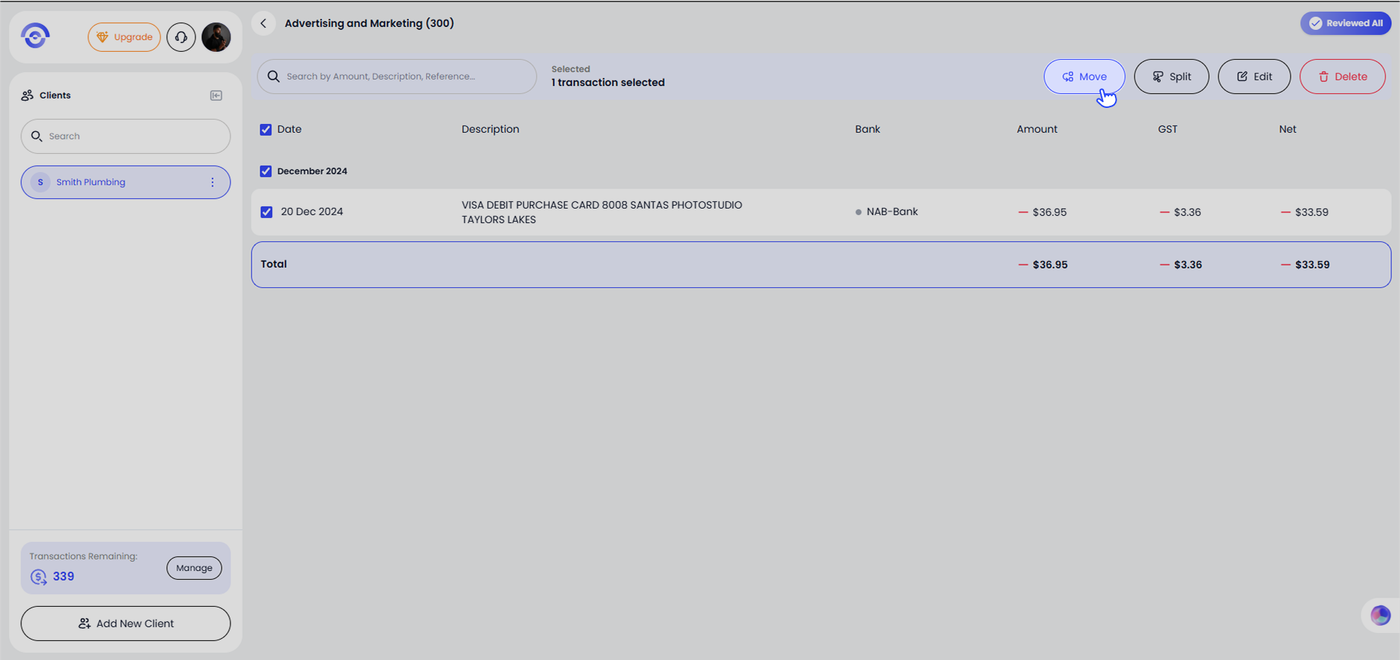
Step 1 — Select the transaction and click Move
Tick the checkbox next to the transaction you want to move. Click Move in the action toolbar.
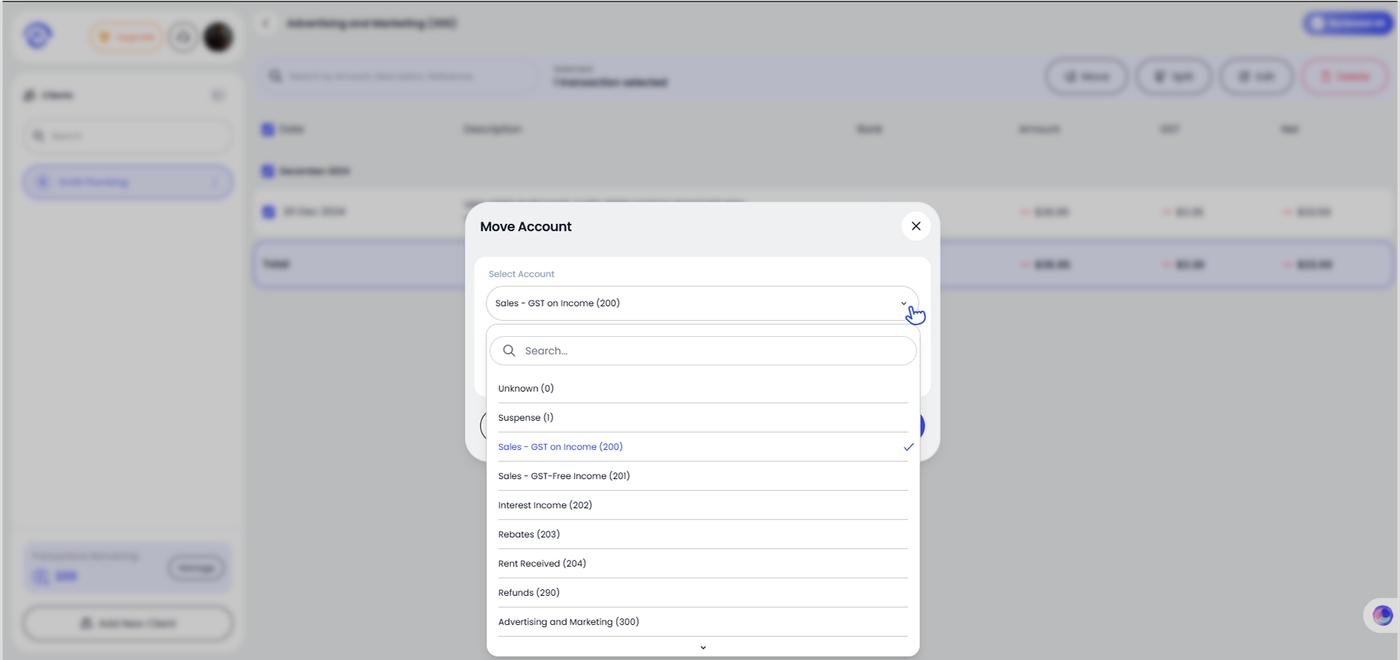
Step 2 — Select the account
The Move Account modal opens. Click the Select Account dropdown and choose the account you want to move the transaction into. You can search by account name or code.
Step 3 — Set AI Memory
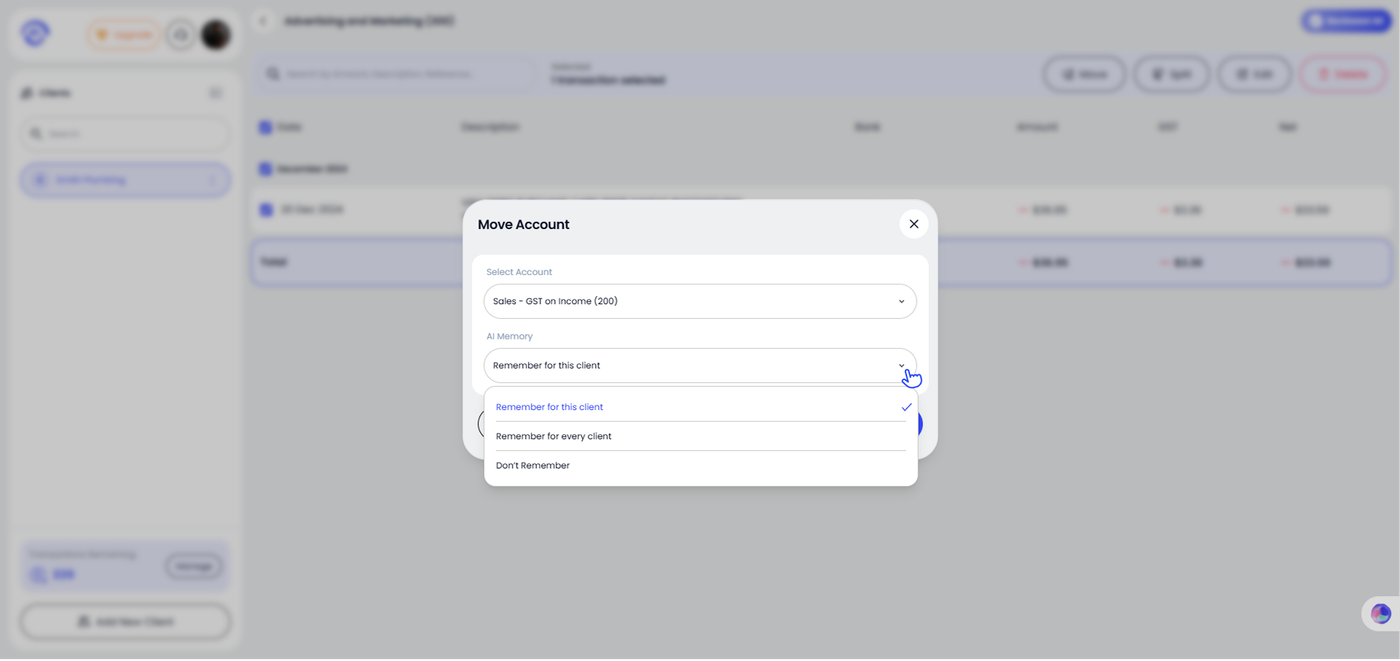
Click the AI Memory dropdown and choose how Ezyiah should handle this coding preference in the future:
Remember for this client — Ezyiah will apply this coding to matching transactions for this client only
Remember for every client — Ezyiah will apply this coding to matching transactions across all clients
Don't Remember — this move will not be saved to AI Memory
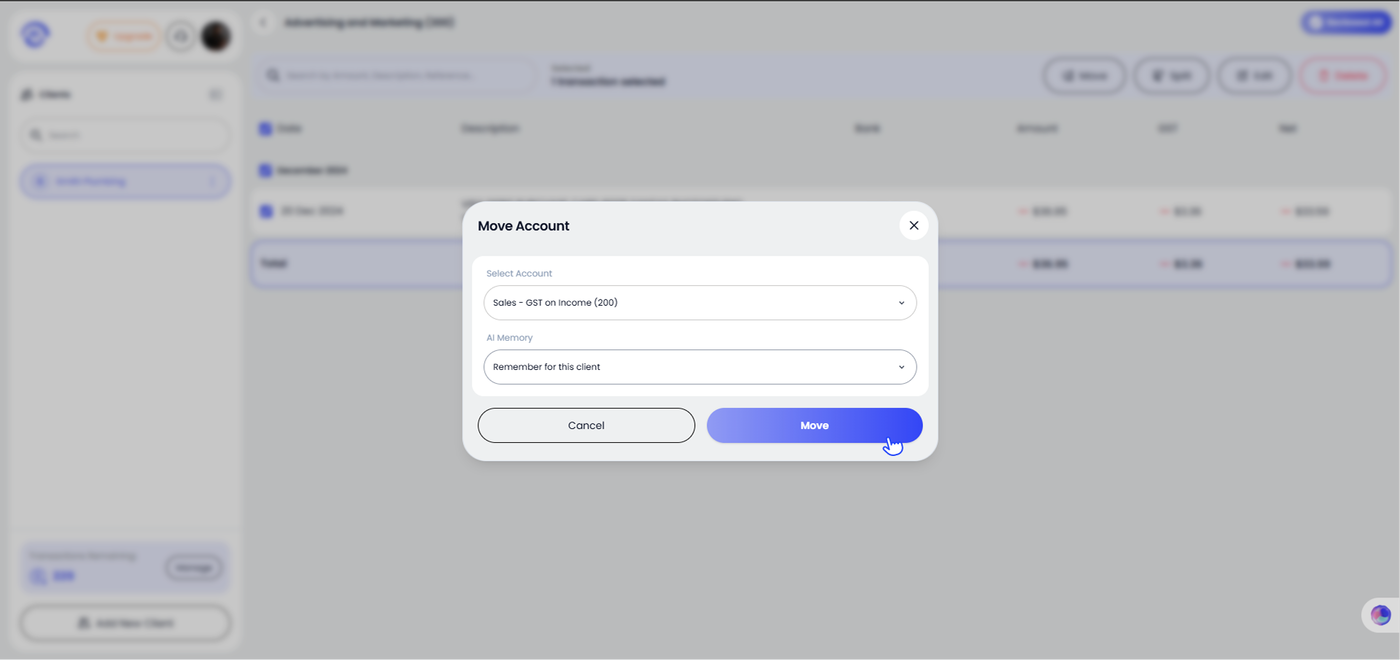
Step 4 — Click Move
Once the account and AI Memory preference are set, click Move. The transaction is moved immediately.
Split a Transaction
Use Split to divide one transaction across multiple accounts. This is useful when a single bank entry covers more than one expense category.
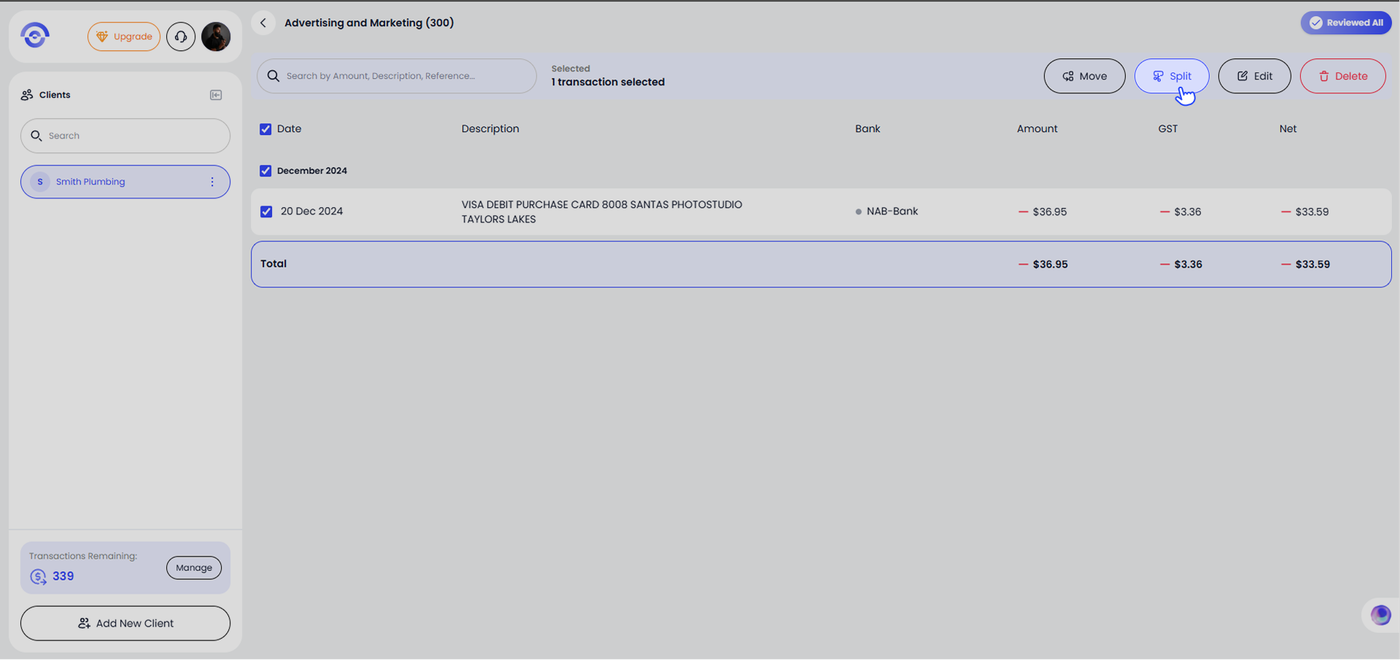
Step 1 — Select the transaction and click Split
Tick the checkbox next to the transaction you want to split. Click Split in the action toolbar.
Step 2 — Enter the split details and save
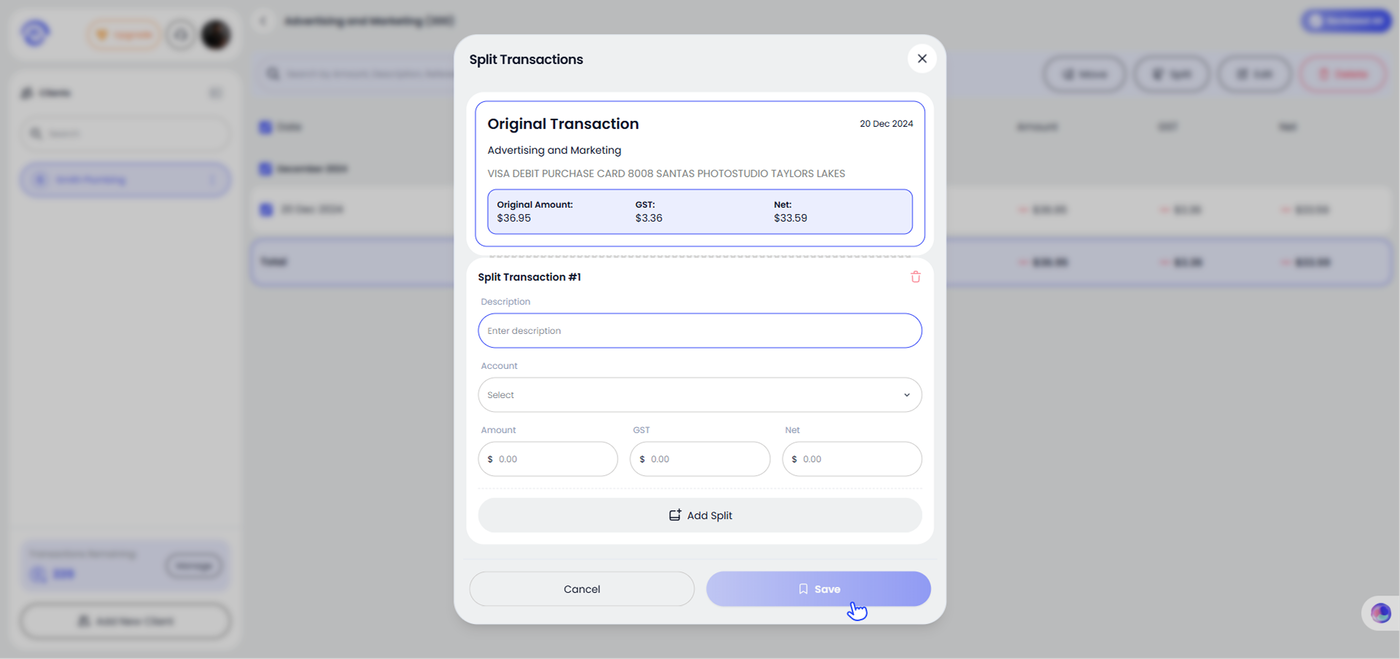
The Split Transactions modal opens showing the original transaction at the top with its amount, GST and net. Below it, a Split Transaction #1 form appears with fields for Description, Account, Amount, GST and Net.
Fill in the details for each split. Click Add Split to add another line if you need to split across more than two accounts. The amounts across all splits must add up to the original transaction total.
When all splits are complete, click Save.
Delete a Transaction
Use Delete to permanently remove a transaction from the Chart of Accounts. This action cannot be undone.
Step 1 — Select the transaction and click Delete
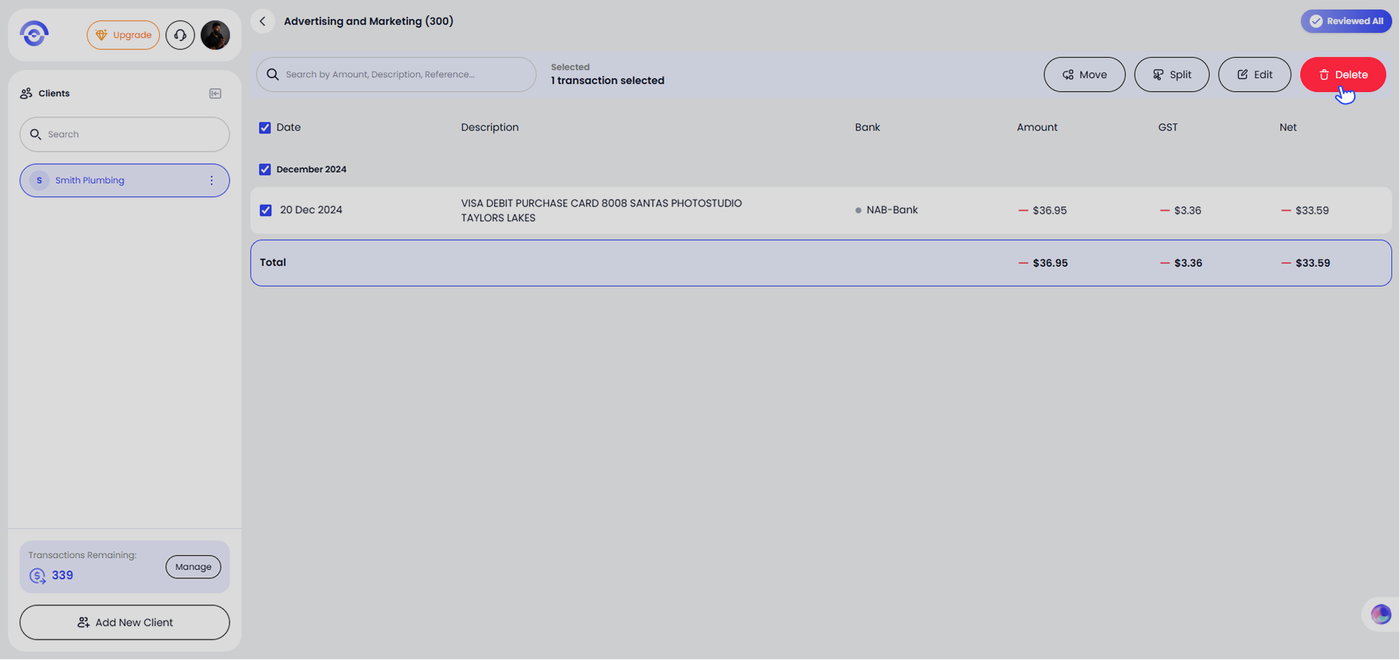
Tick the checkbox next to the transaction you want to delete. Click Delete in the action toolbar. The Delete button is red.
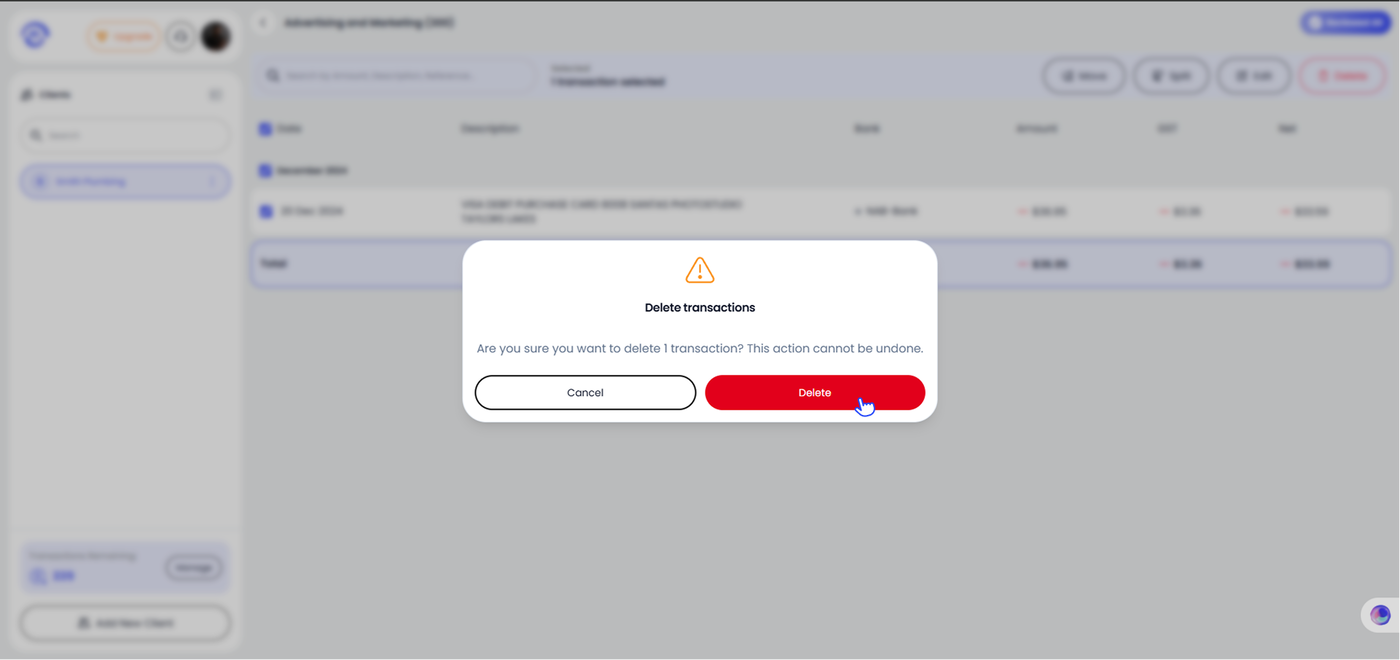
Step 2 — Confirm the deletion
A confirmation modal appears: Are you sure you want to delete 1 transaction? This action cannot be undone. Click Delete to confirm, or Cancel to go back.