After Ezyiah reconciles the transactions, check them in the Chart of Accounts. This is where you make sure every transaction is in the right account before you run reports.

Step by step

1

Pick a financial year
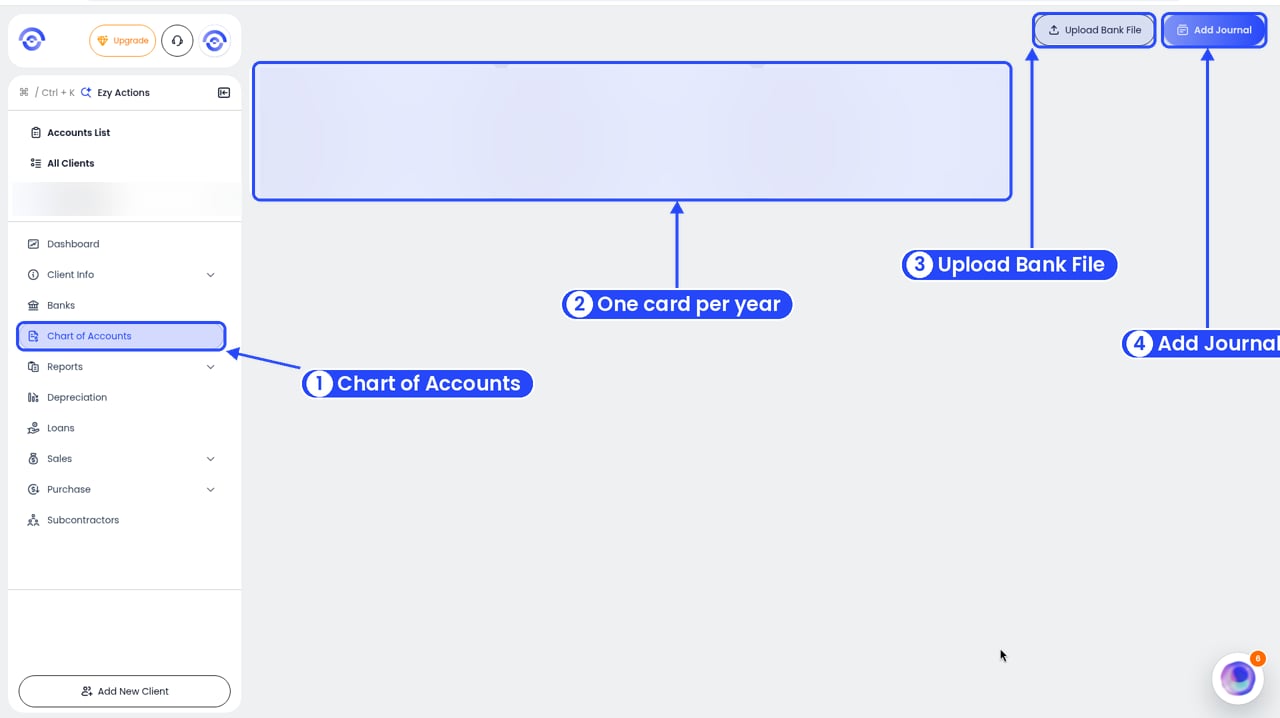
The financial year cards in Chart of Accounts with numbered callouts on Chart of Accounts in the sidebar, the year cards, Upload Bank File and Add Journal. The cards are blurred

Pick a financial year

Click Chart of Accounts in the client’s sidebar. You’ll see a card for each financial year with transactions, and how many transactions it has. Click a year.You can also click Upload Bank File or Add Journal here.
2

Look at the groups

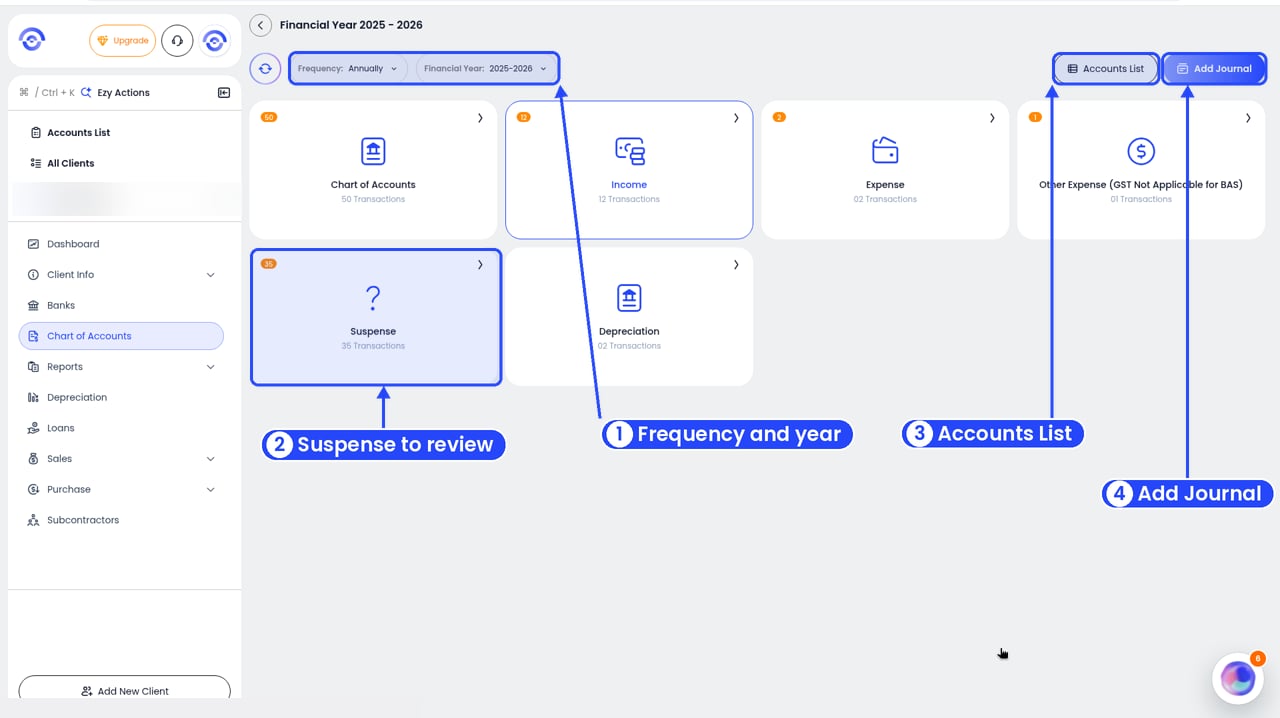
The Chart of Accounts groups for one financial year with numbered callouts on the Frequency and Financial Year filters, the Suspense card, Accounts List and Add Journal

The groups for one year

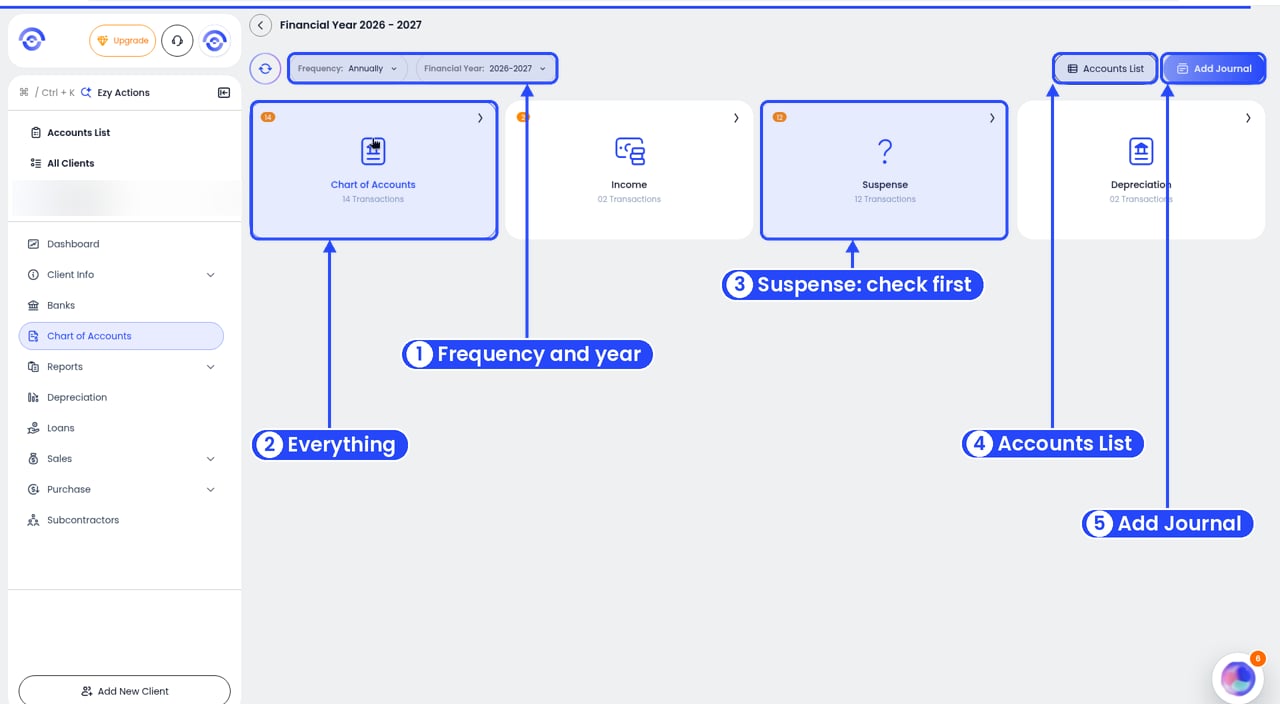
The Chart of Accounts groups for one financial year, with only four cards, and numbered callouts on the Frequency and Financial Year filters, the Chart of Accounts card, the Suspense card, Accounts List and Add Journal

Only the groups with transactions show

Ezyiah sorts transactions into groups. An orange number shows how many still need checking.
  • Chart of Accounts: everything.
  • Income: income with GST.
  • Expense: business expenses.
  • Other Expense (GST Not Applicable for BAS): expenses that don’t go on the BAS.
  • Suspense: things Ezyiah couldn’t sort. Check these first.
  • Depreciation: depreciation on the client’s assets.
  • Transfers and Subcontractor Payments, when the client has them.
A group only shows when it has transactions for that period, so you may see fewer cards.The Chart of Accounts card lists every account in sections: Income, Expense, Assets, Liabilities and Equity. Equity includes accounts such as 902 Share Capital and 910 Retained Earnings - Opening.Use the Financial Year and Frequency filters at the top to change the year, or to see it by year, quarter or month. Accounts List opens the client’s accounts. Add Journal posts a journal.
3

Open an account

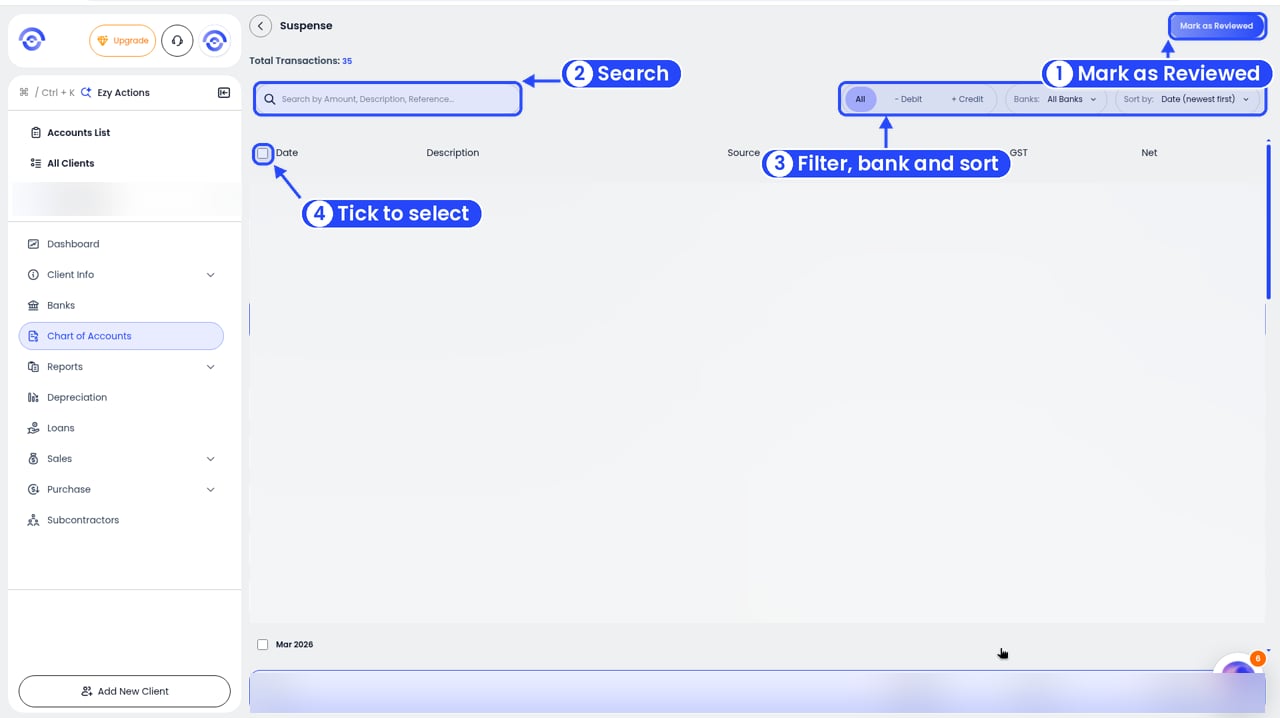
The Suspense transactions list with numbered callouts on Mark as Reviewed, Search, the filters and sort, and the row tick boxes. Transactions are blurred

The transactions in a group

Click a group. You’ll see its transactions, grouped by month, with the Date, Description, Source, Amount, GST and Net. Use Search, All, Debit or Credit, the bank filter and Sort by to find what you need.
4

Fix anything that's wrong

Move, split or edit transactions that are in the wrong place. See Managing transactions.
5

Mark it as reviewed

When the transactions look right, click Mark as Reviewed in the top right. To review only some of them, tick them first. Or click the orange number to mark the whole account as reviewed.
When every orange number has become a blue tick, the books are checked and ready for reports.
Fixing the same thing again and again? Use AI Memory when you move a transaction, so Ezyiah remembers next time.

Before you have any transactions

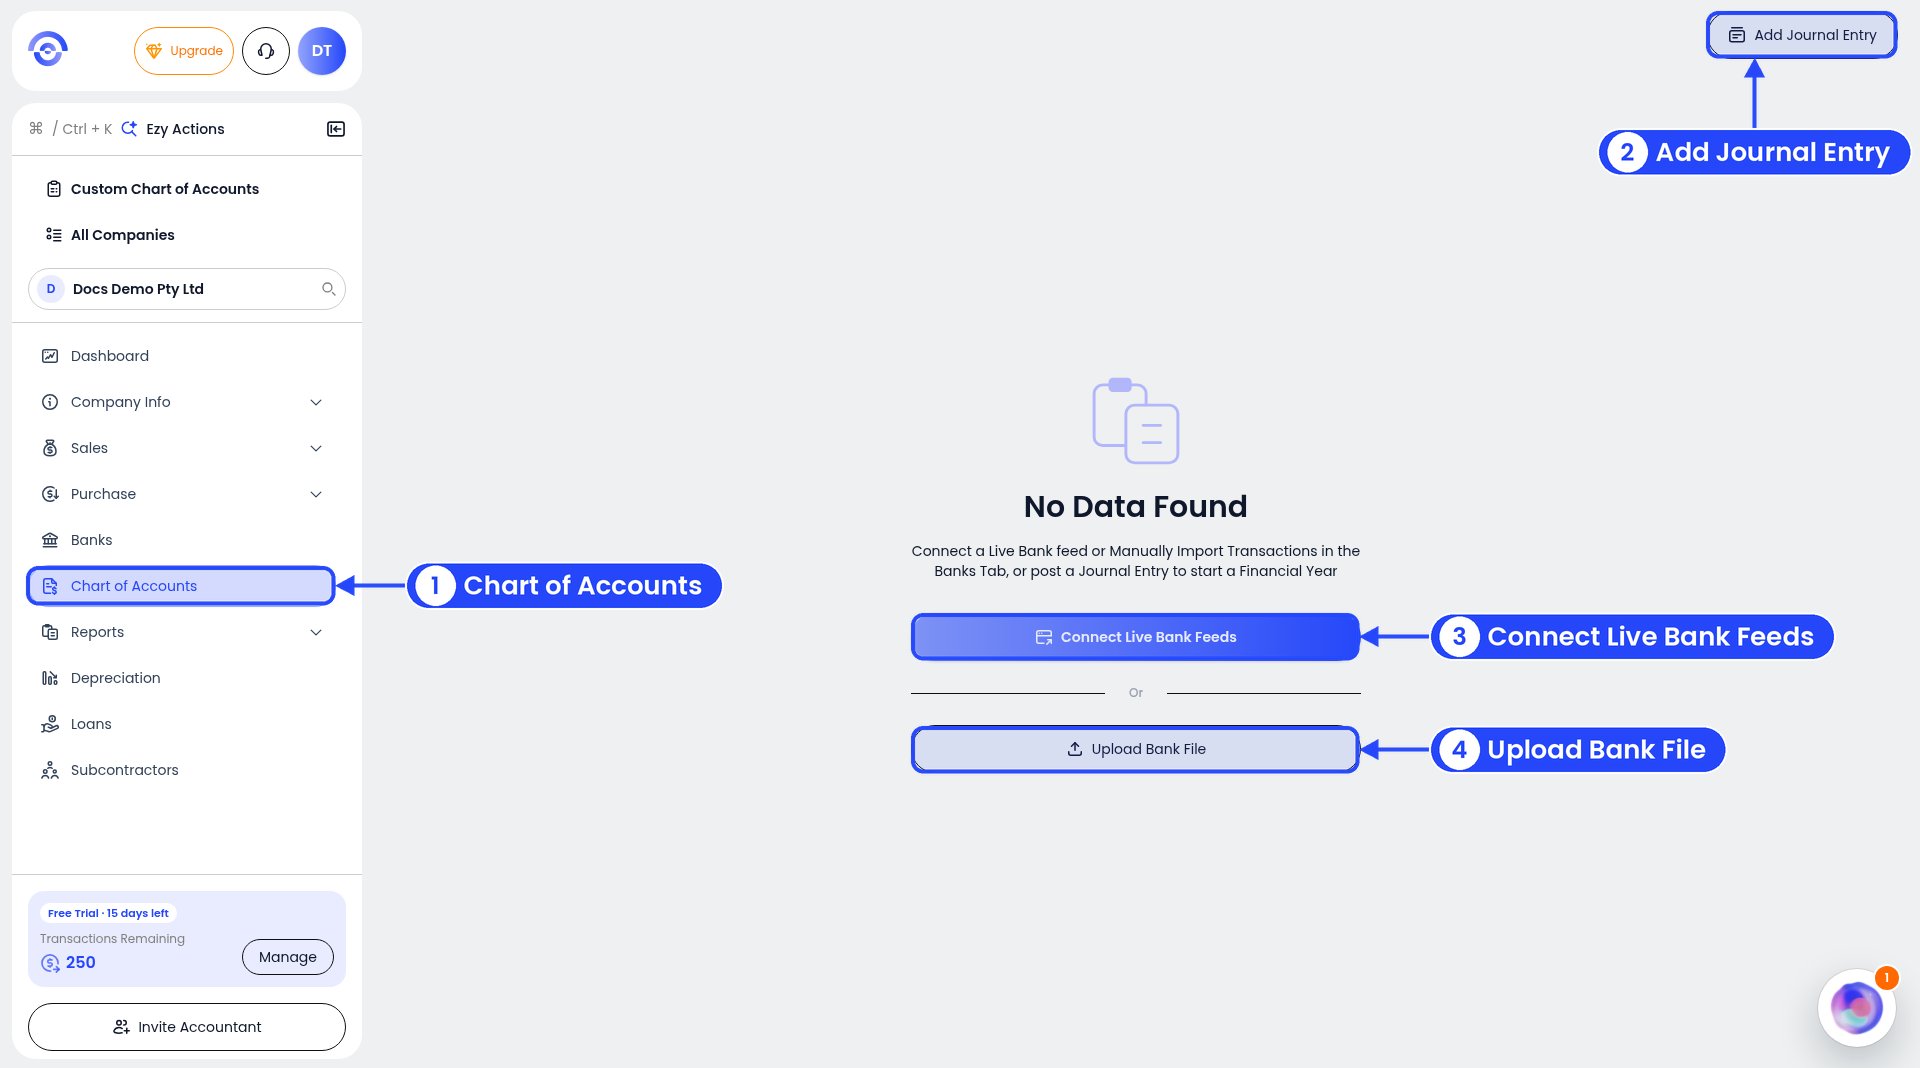
The empty Chart of Accounts page with callouts on Chart of Accounts in the sidebar, Add Journal Entry, Connect Live Bank Feeds and Upload Bank File

Chart of Accounts on a new business

A new business shows “No Data Found” in Chart of Accounts, with the hint “Connect a Live Bank feed or Manually Import Transactions in the Banks Tab, or post a Journal Entry to start a Financial Year.” Use Connect Live Bank Feeds, Upload Bank File or Add Journal Entry to get started.