

- which fields you fill in,
- which accounts Ezyiah sets up in the client’s Chart of Accounts, especially the equity accounts on the balance sheet, and
- how the Balance Sheet is built. Ezyiah builds it for the entity type you pick.
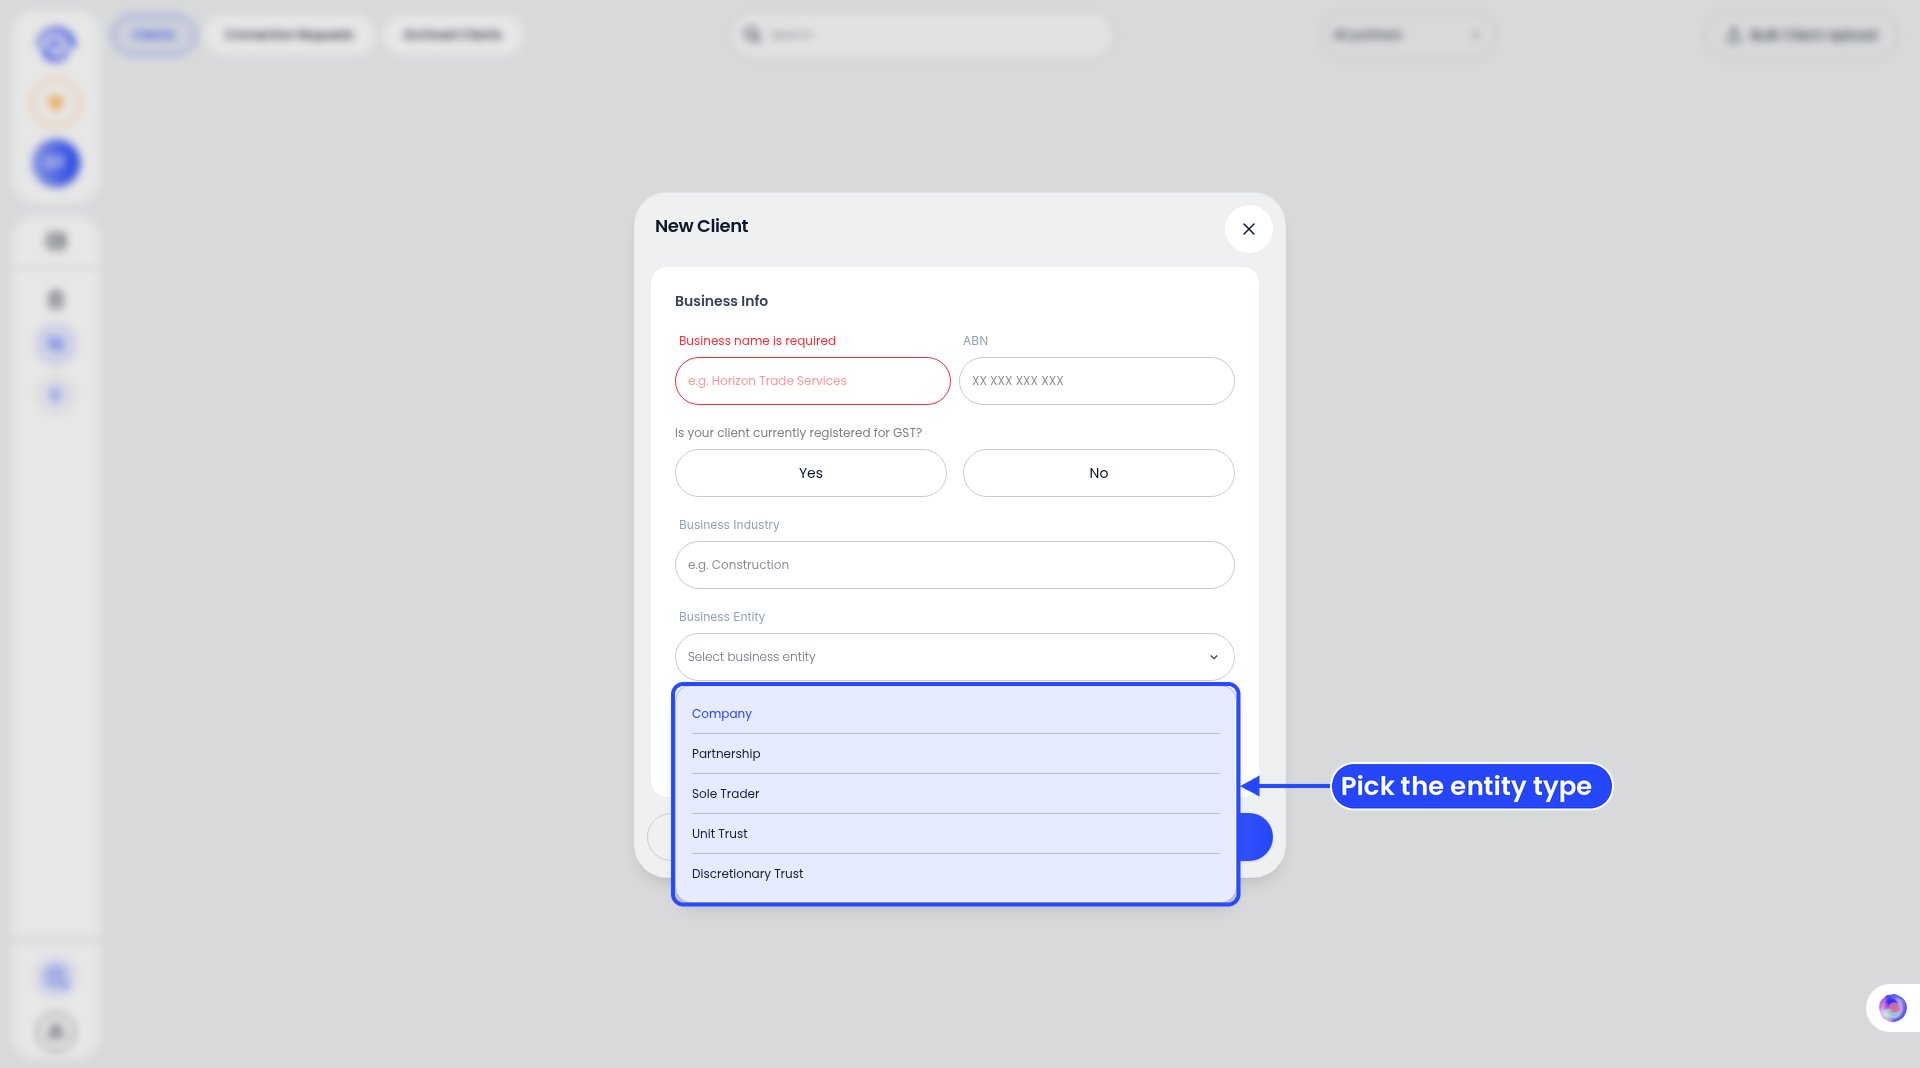
1 Pick the entity type when you add the client.
Where to set it
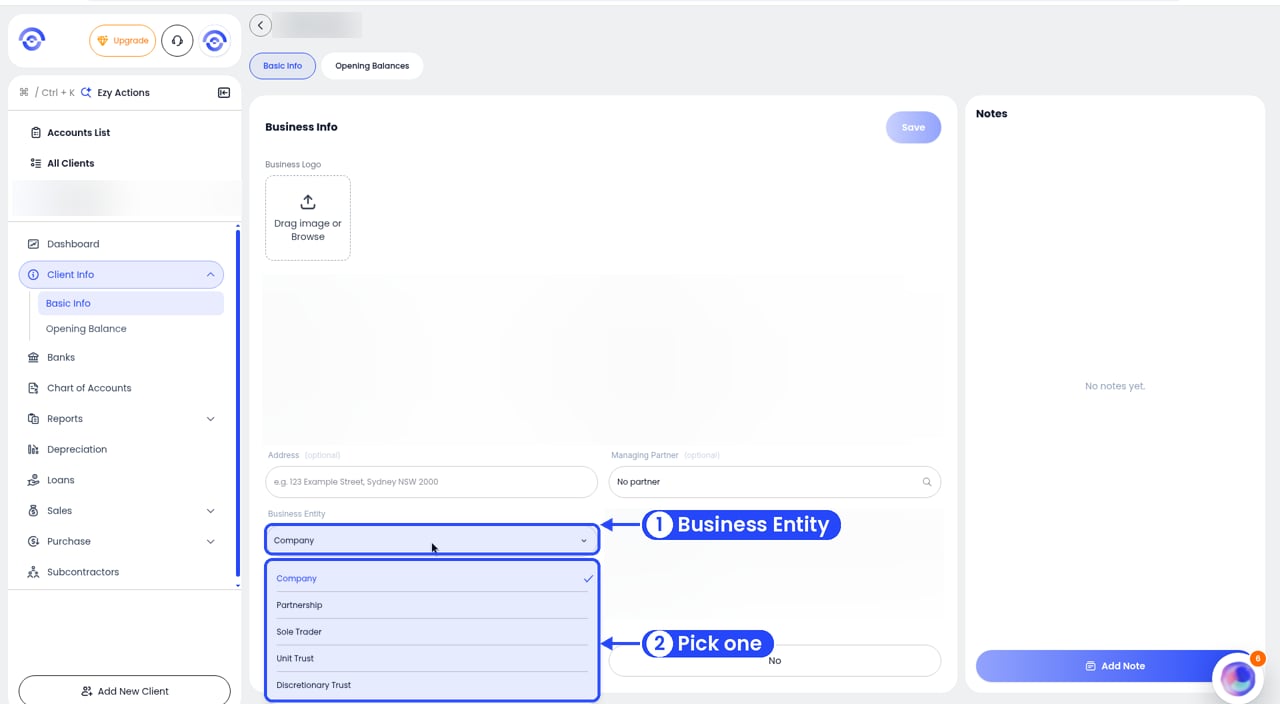
Change the entity on Basic Info
What each one changes
For each entity type, Ezyiah sets up a different equity section in the Chart of Accounts, Balance Sheet and the notes in the EOFY Statement.
For every entity, you also say whether the client is registered for GST. Company and Sole Trader finish with Save. Partnership, Unit Trust and Discretionary Trust show Next → and a second step first.
On the second step, save each person or company with the row’s Save, then click Save at the bottom. The bottom Save stays greyed out until you’ve saved at least one row. See The second step.
Company
1
Pick Company
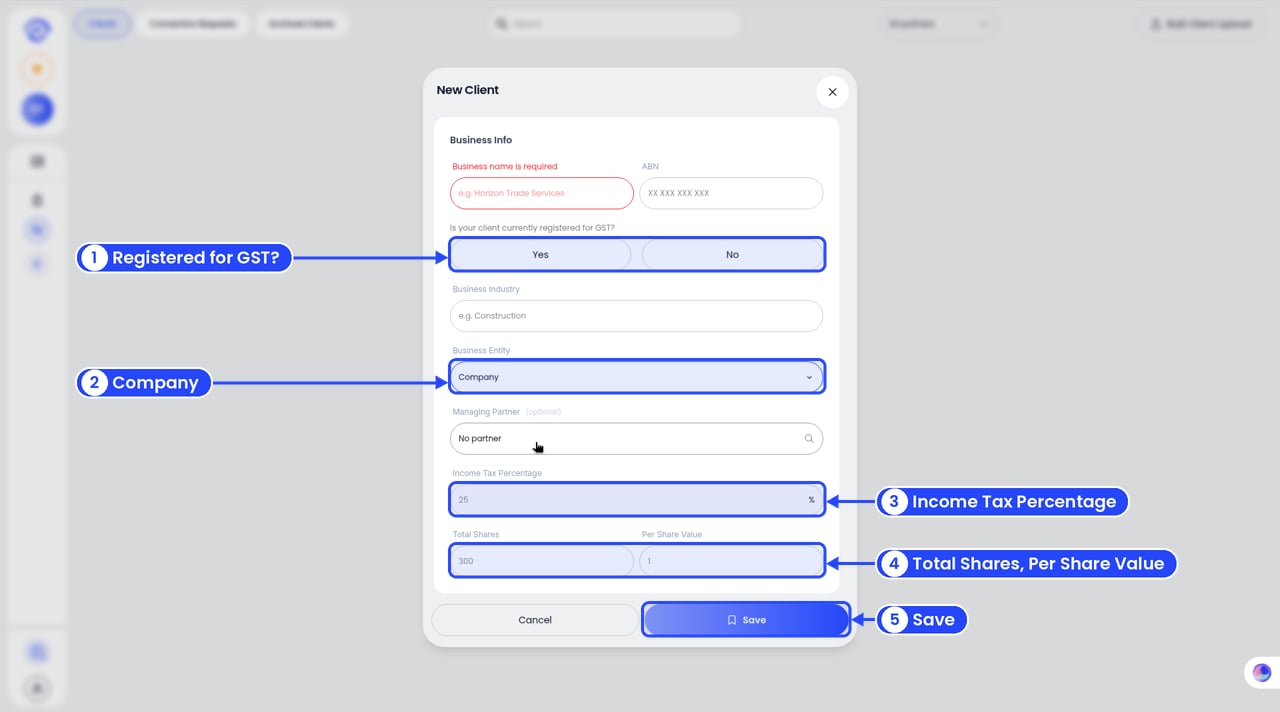
A Company adds its tax rate and share details
2
Check the tax rate
Income Tax Percentage starts at 25%. That’s the rate for a base rate entity: a company with a turnover under $50 million and no more than 80% of its income from passive sources like interest, rent and dividends. Other companies pay 30%, so change it to 30% if the client doesn’t pass that test. It flows through to their reports.
3
Enter the shares
Enter Total Shares and Per Share Value. Ezyiah multiplies them to get the share capital. For example, 100 shares at $1 = $100 share capital.
Unit Trust
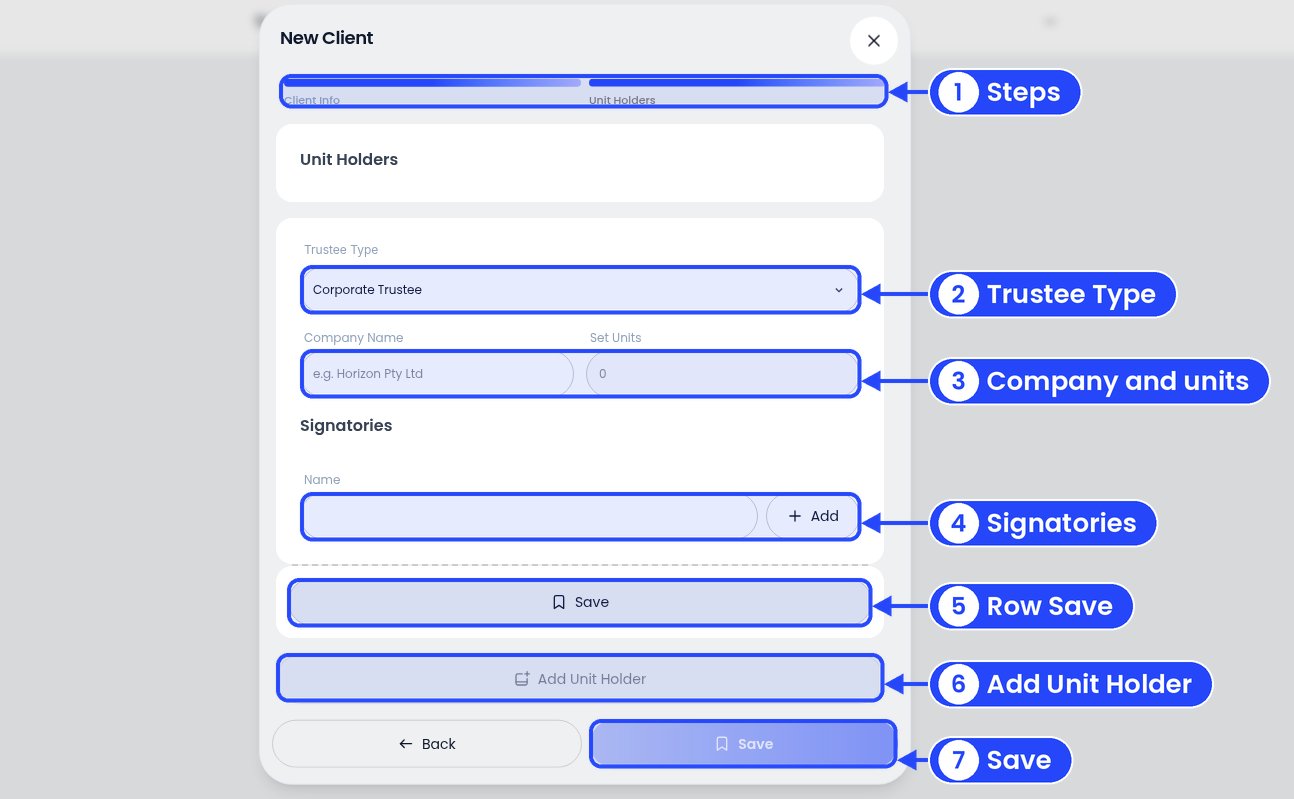
The Unit Holders step
Partnership, Sole Trader and Discretionary Trust
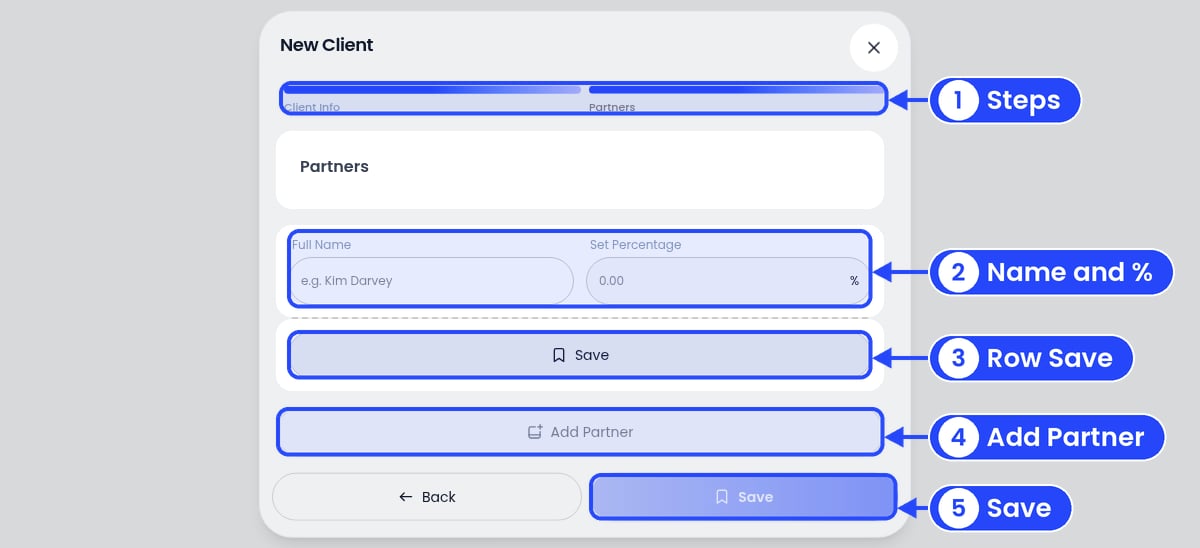
The Partners step
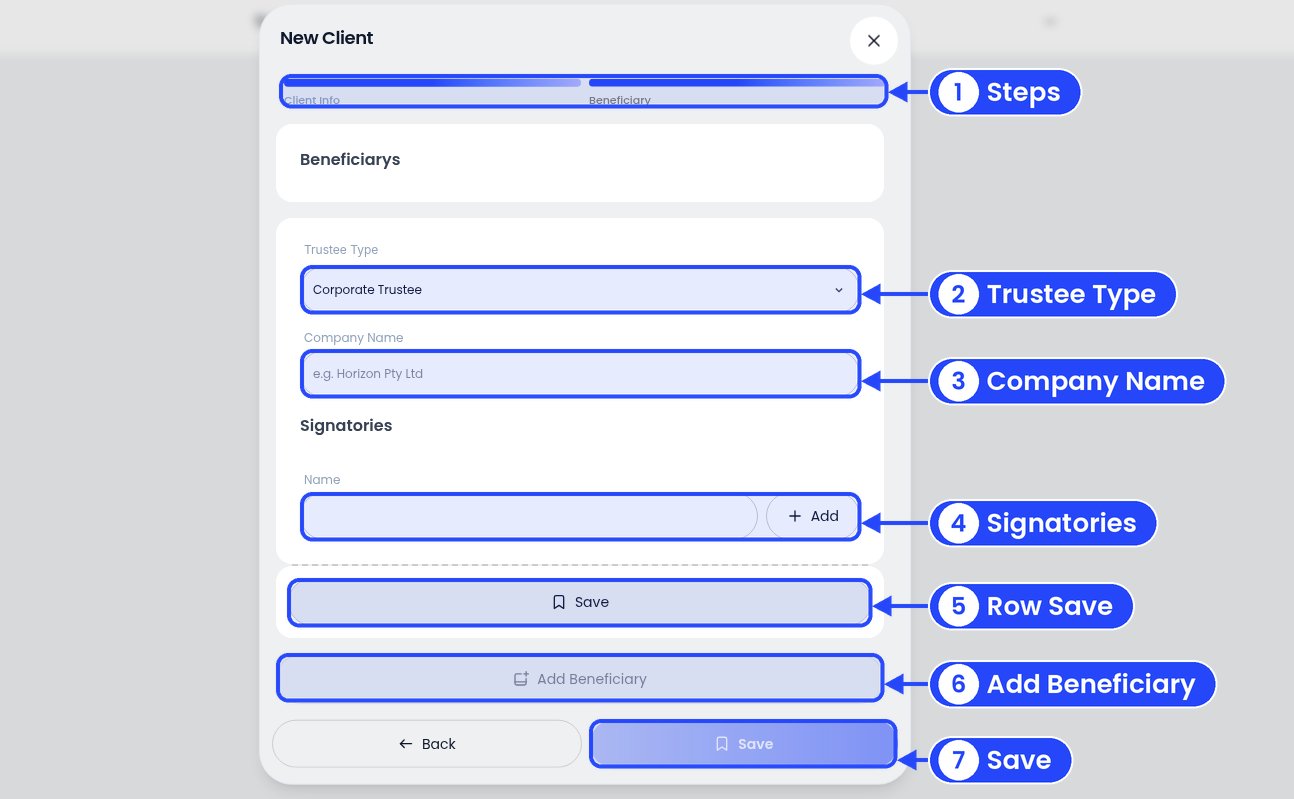
The Beneficiary step
- Sole Trader: click Save.
- Partnership: click Next →, then fill in the Partners step. For each partner, enter their Full Name and Set Percentage (%), click the row’s Save, then Add Partner for the next one. Then click Save at the bottom.
- Discretionary Trust: click Next →, then fill in the Beneficiary step. For each beneficiary, pick the Trustee Type (it starts as Corporate Trustee) and enter the Company Name. Under Signatories, type a Name and click Add. Click the row’s Save, then Add Beneficiary for the next one. Then click Save at the bottom.